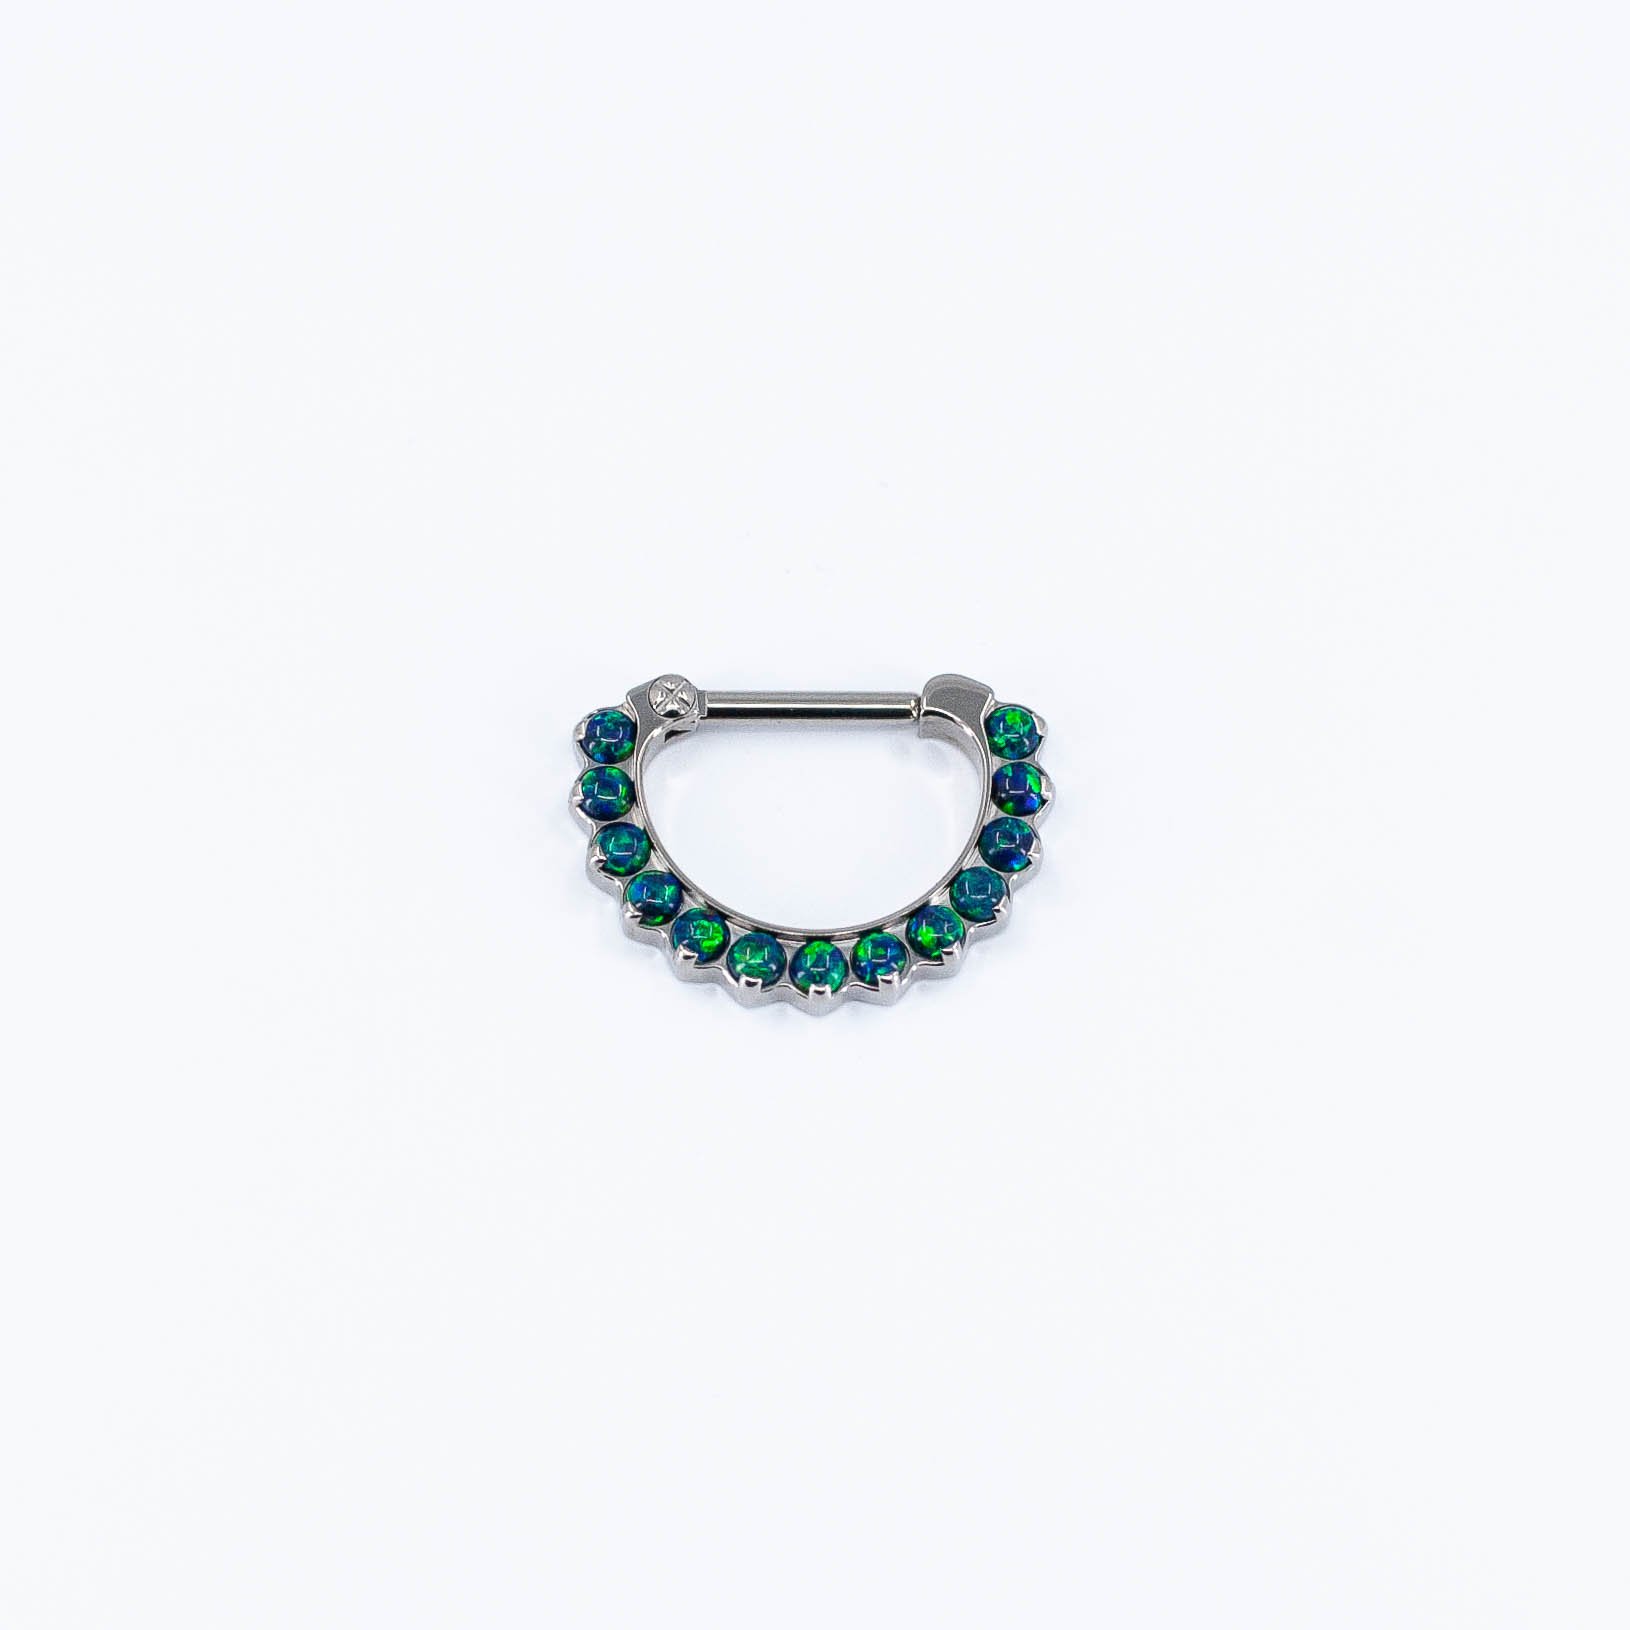
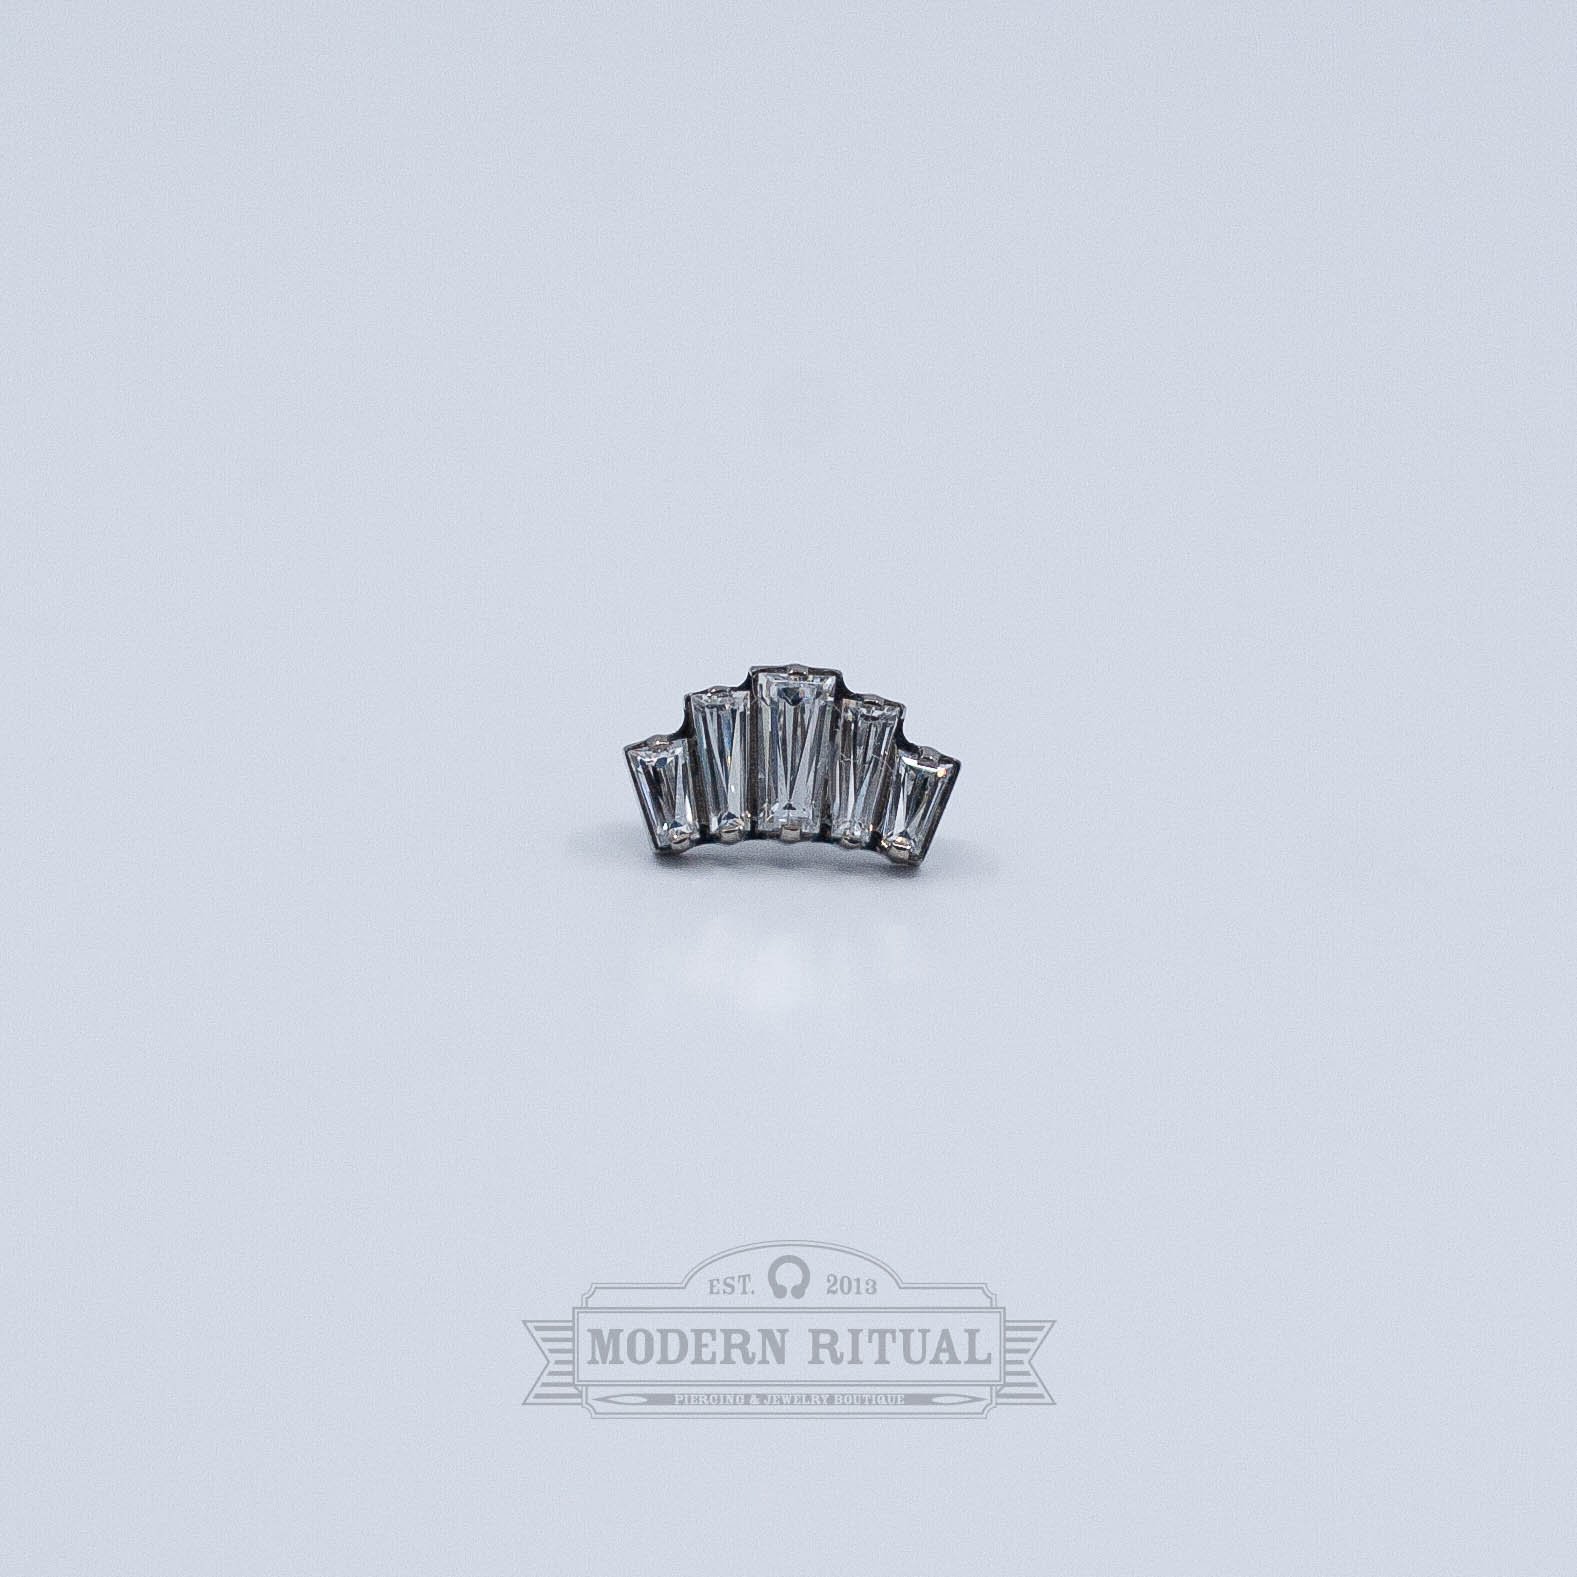
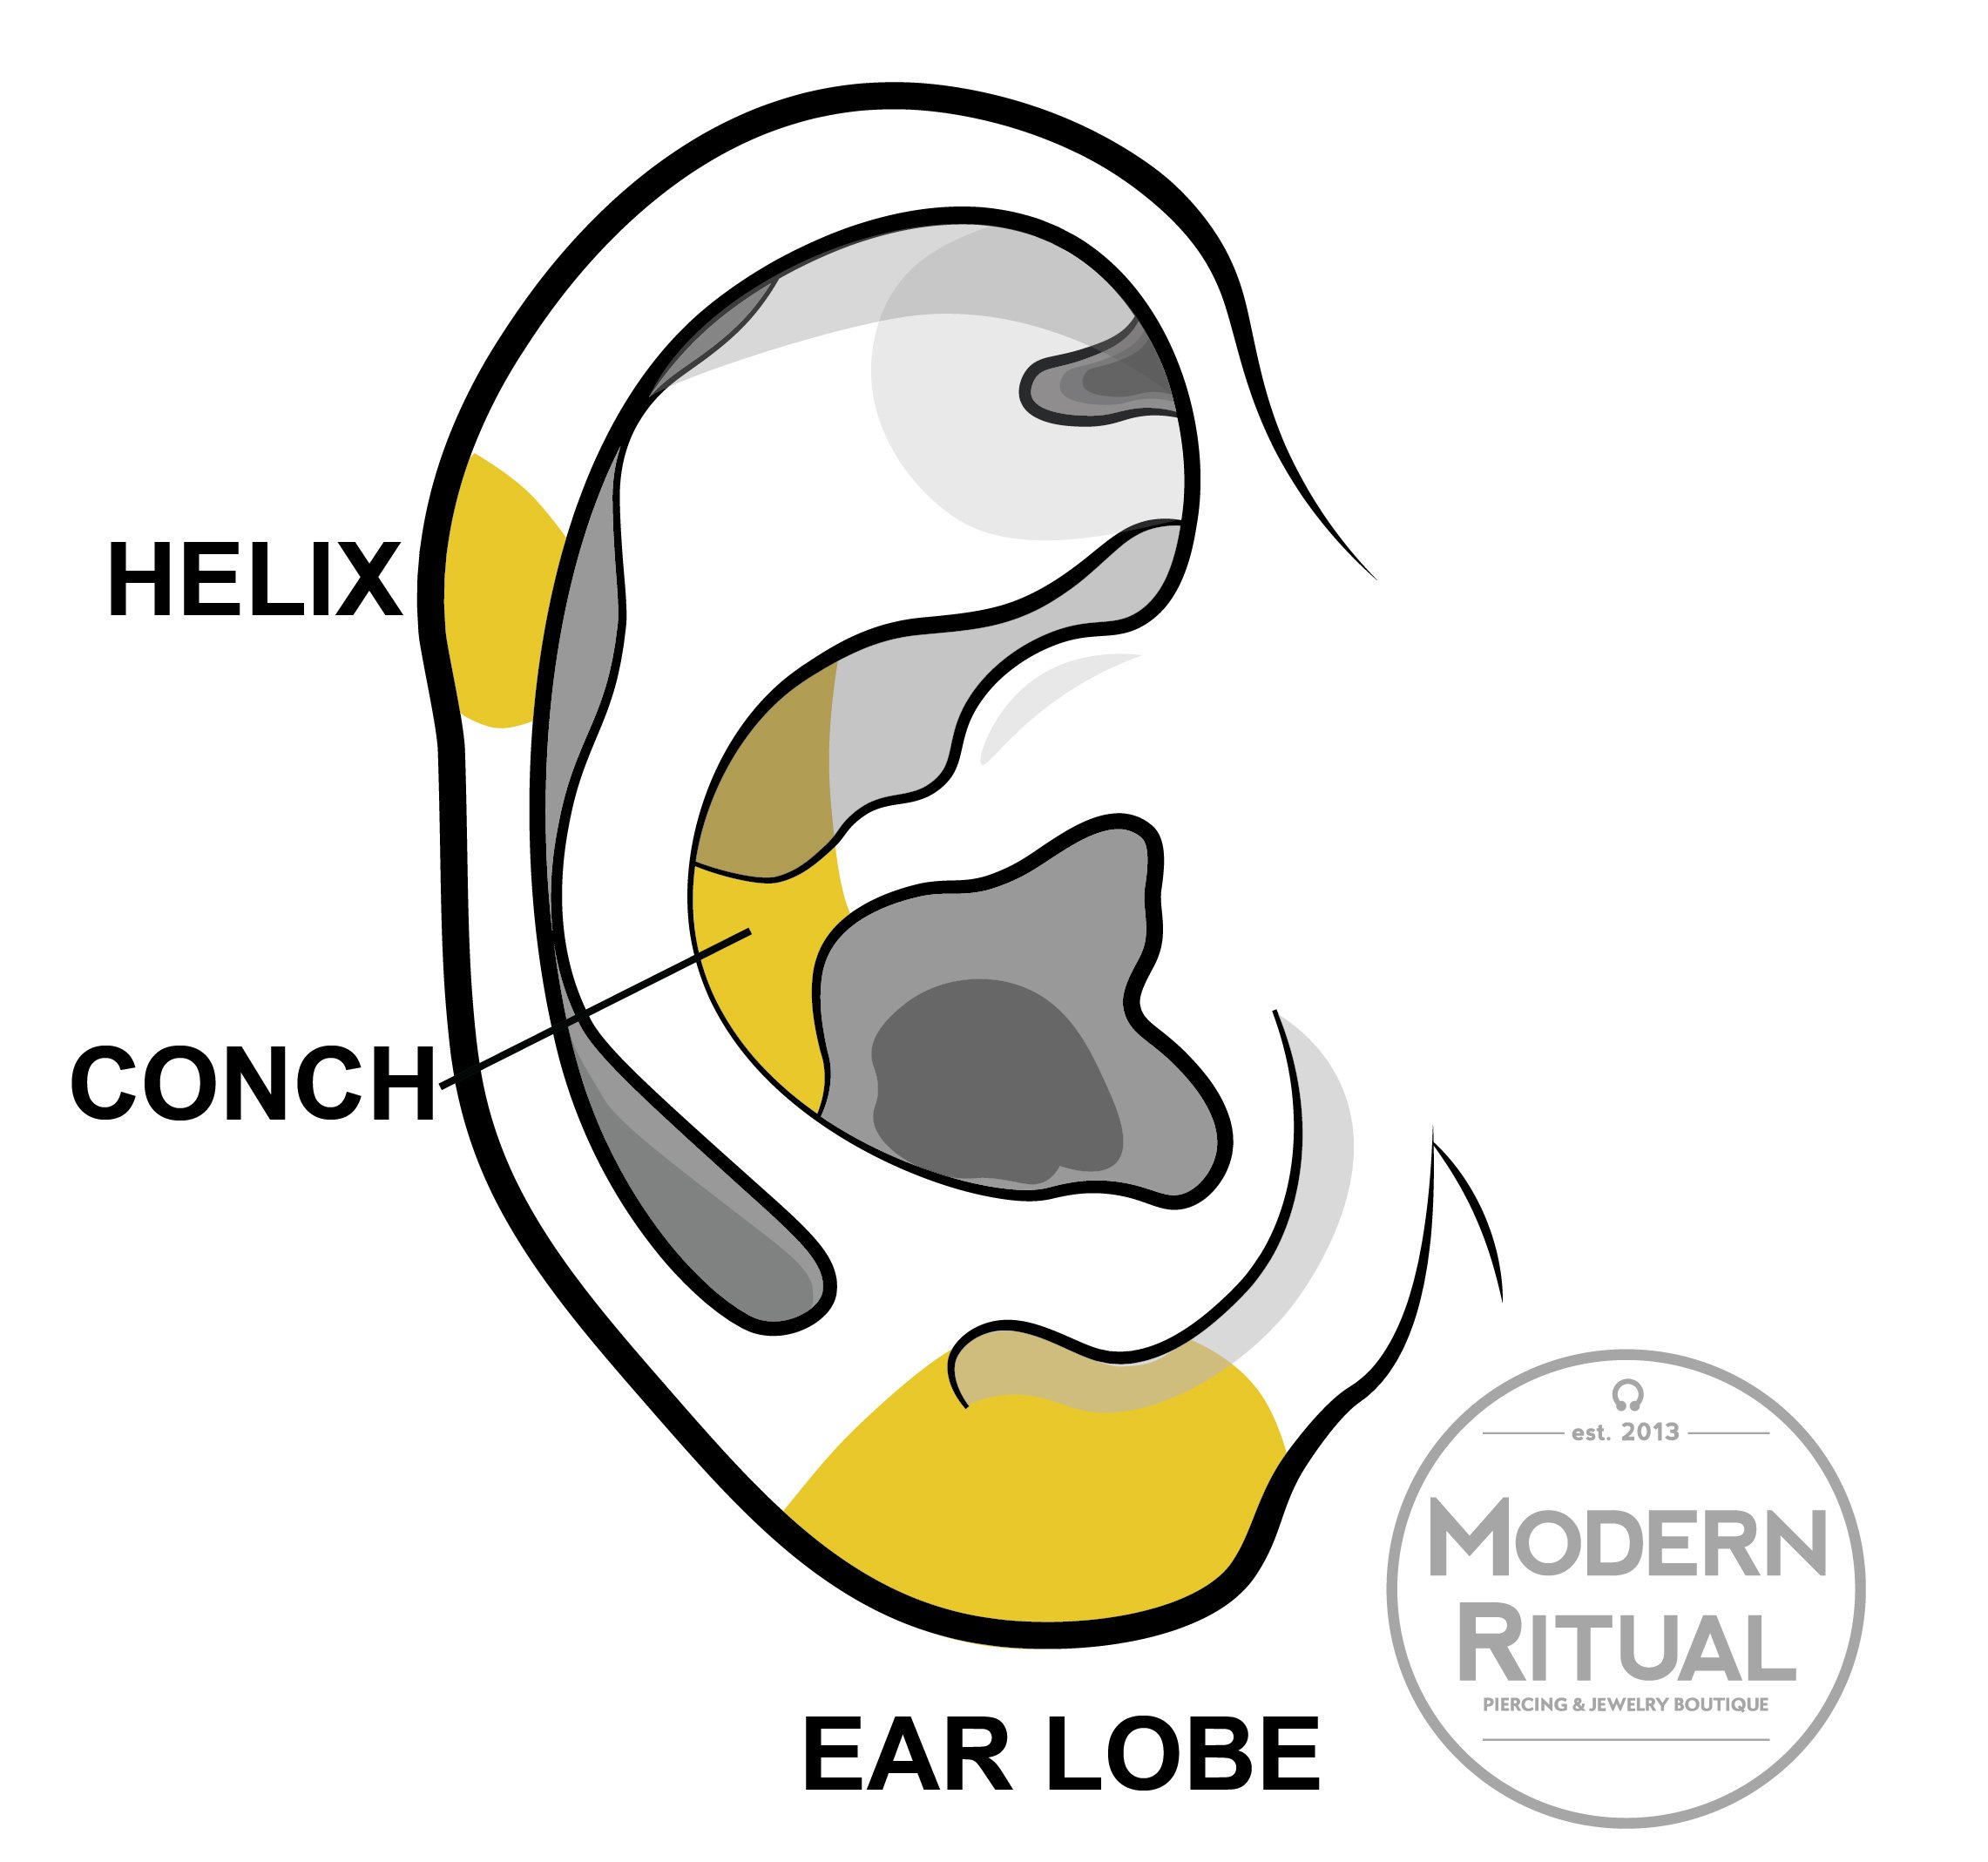
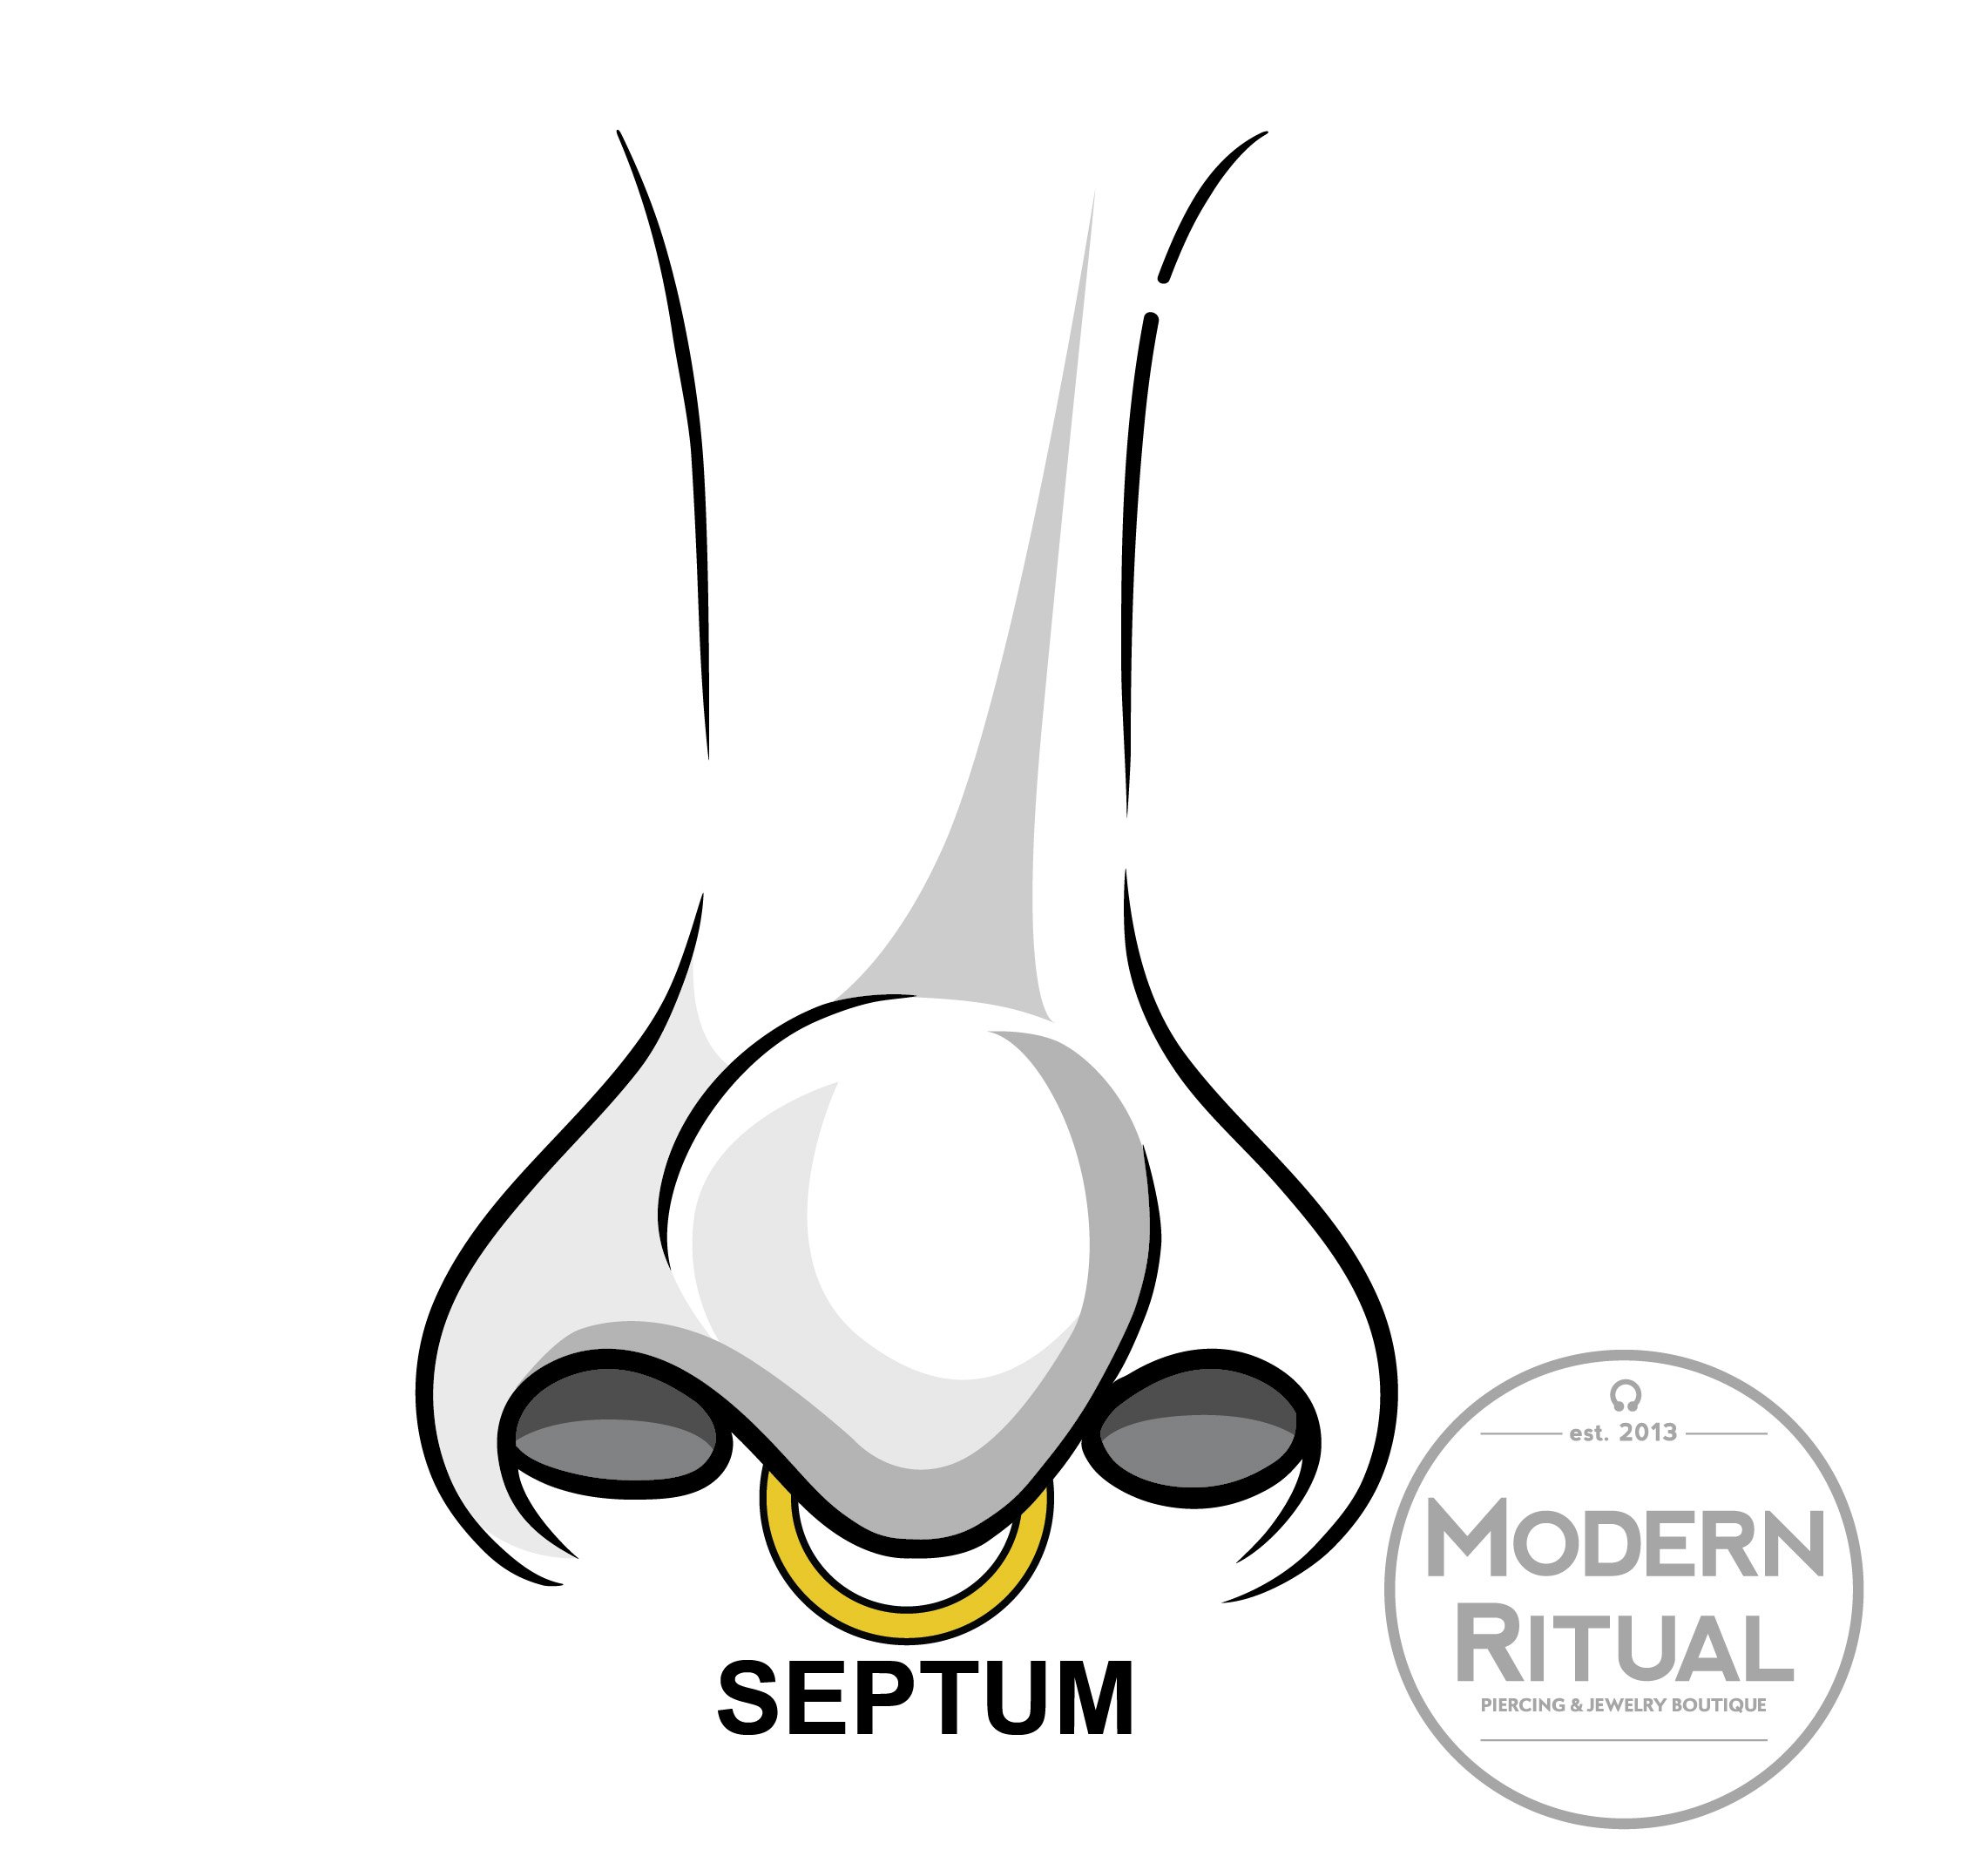
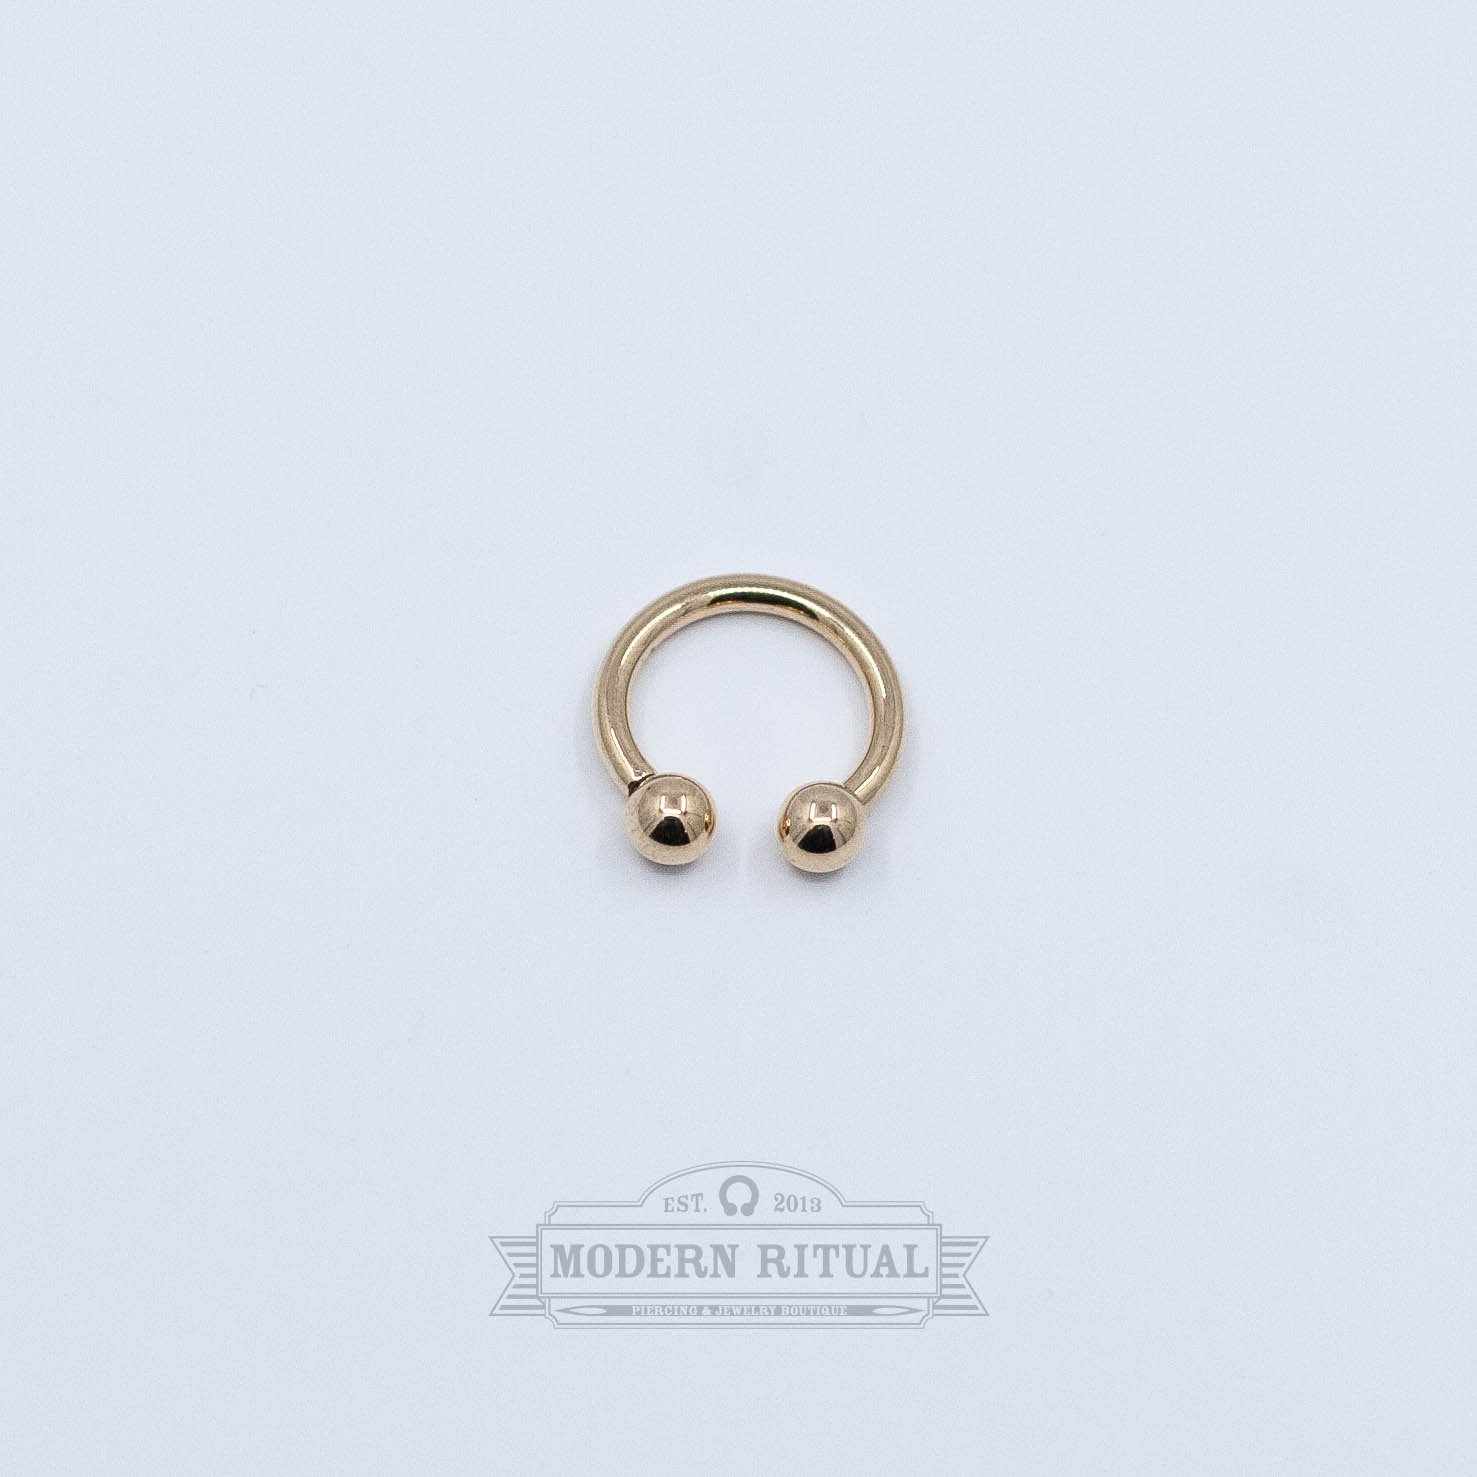
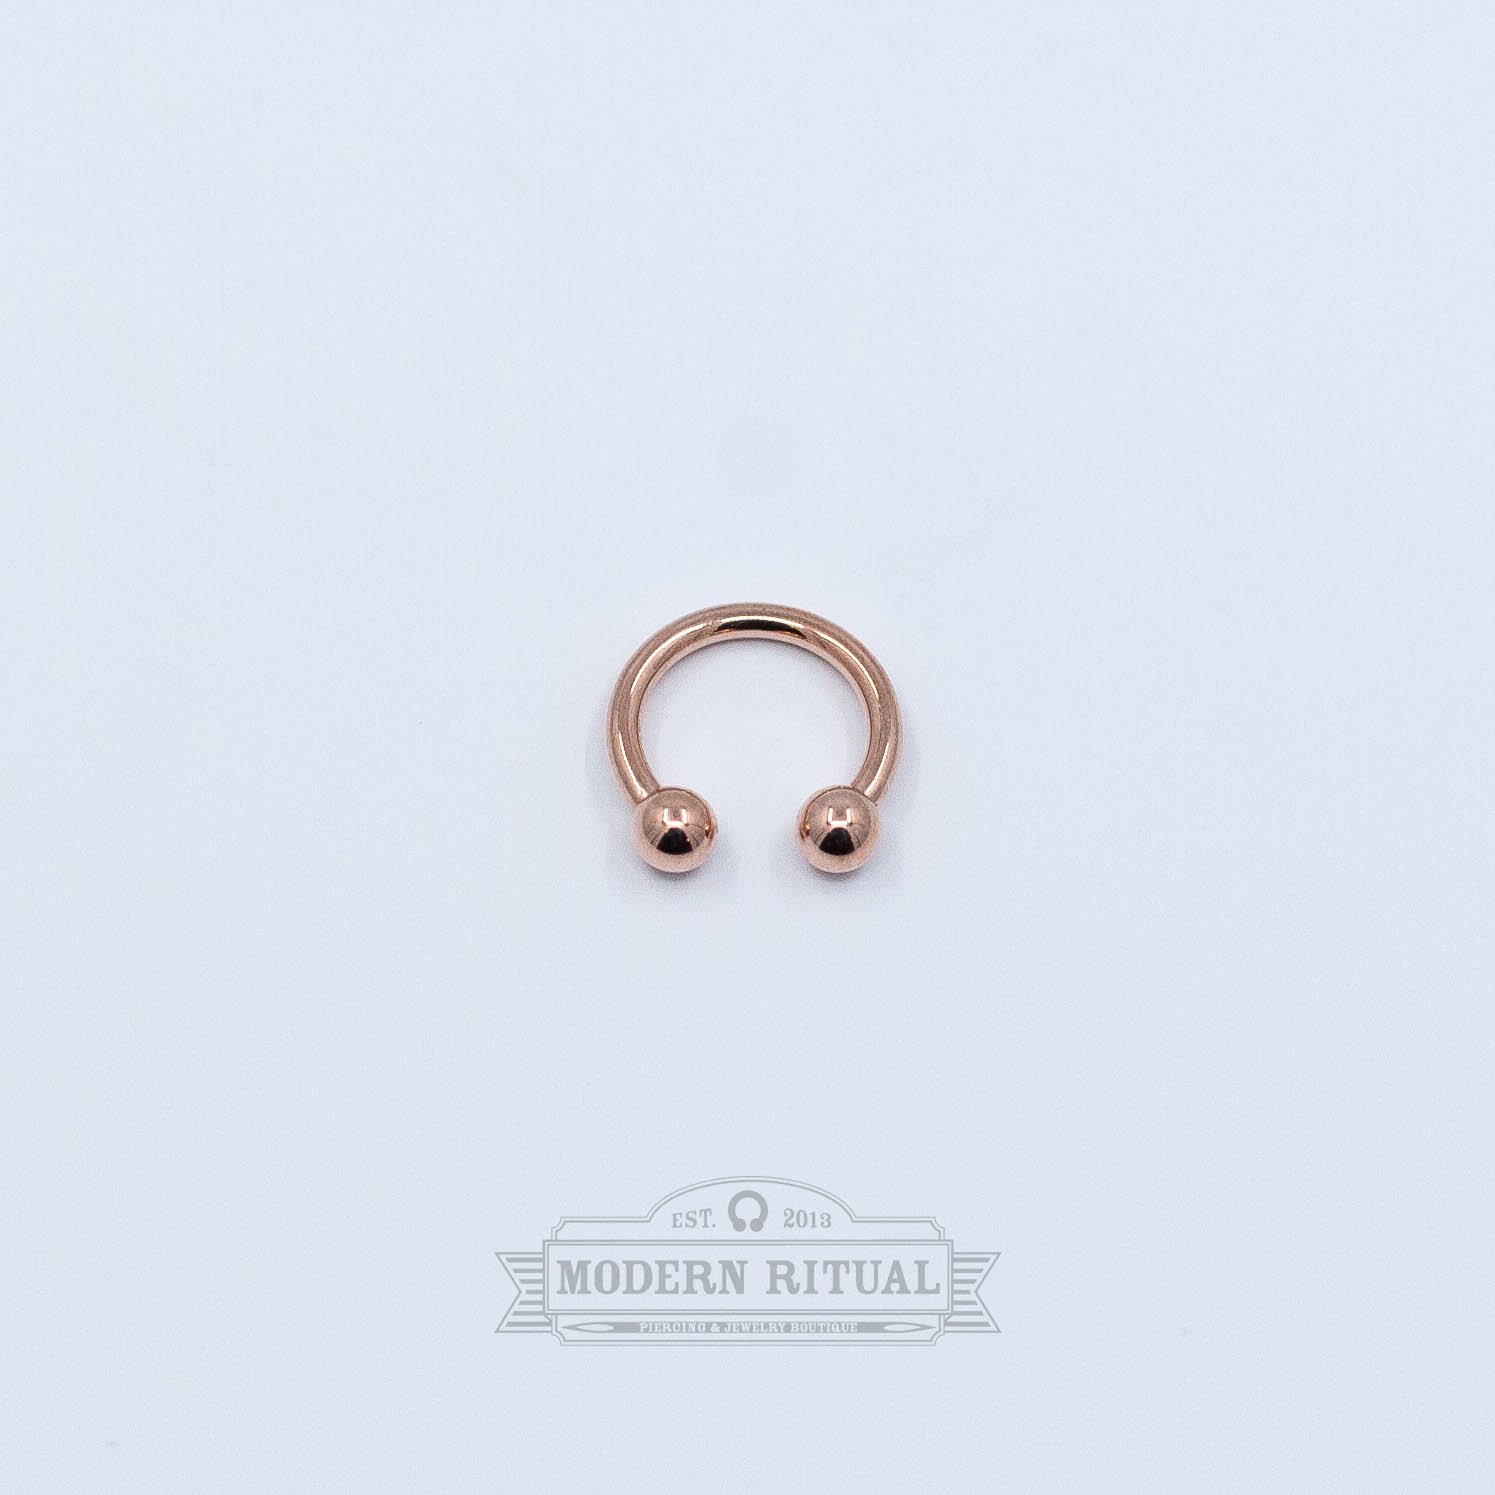
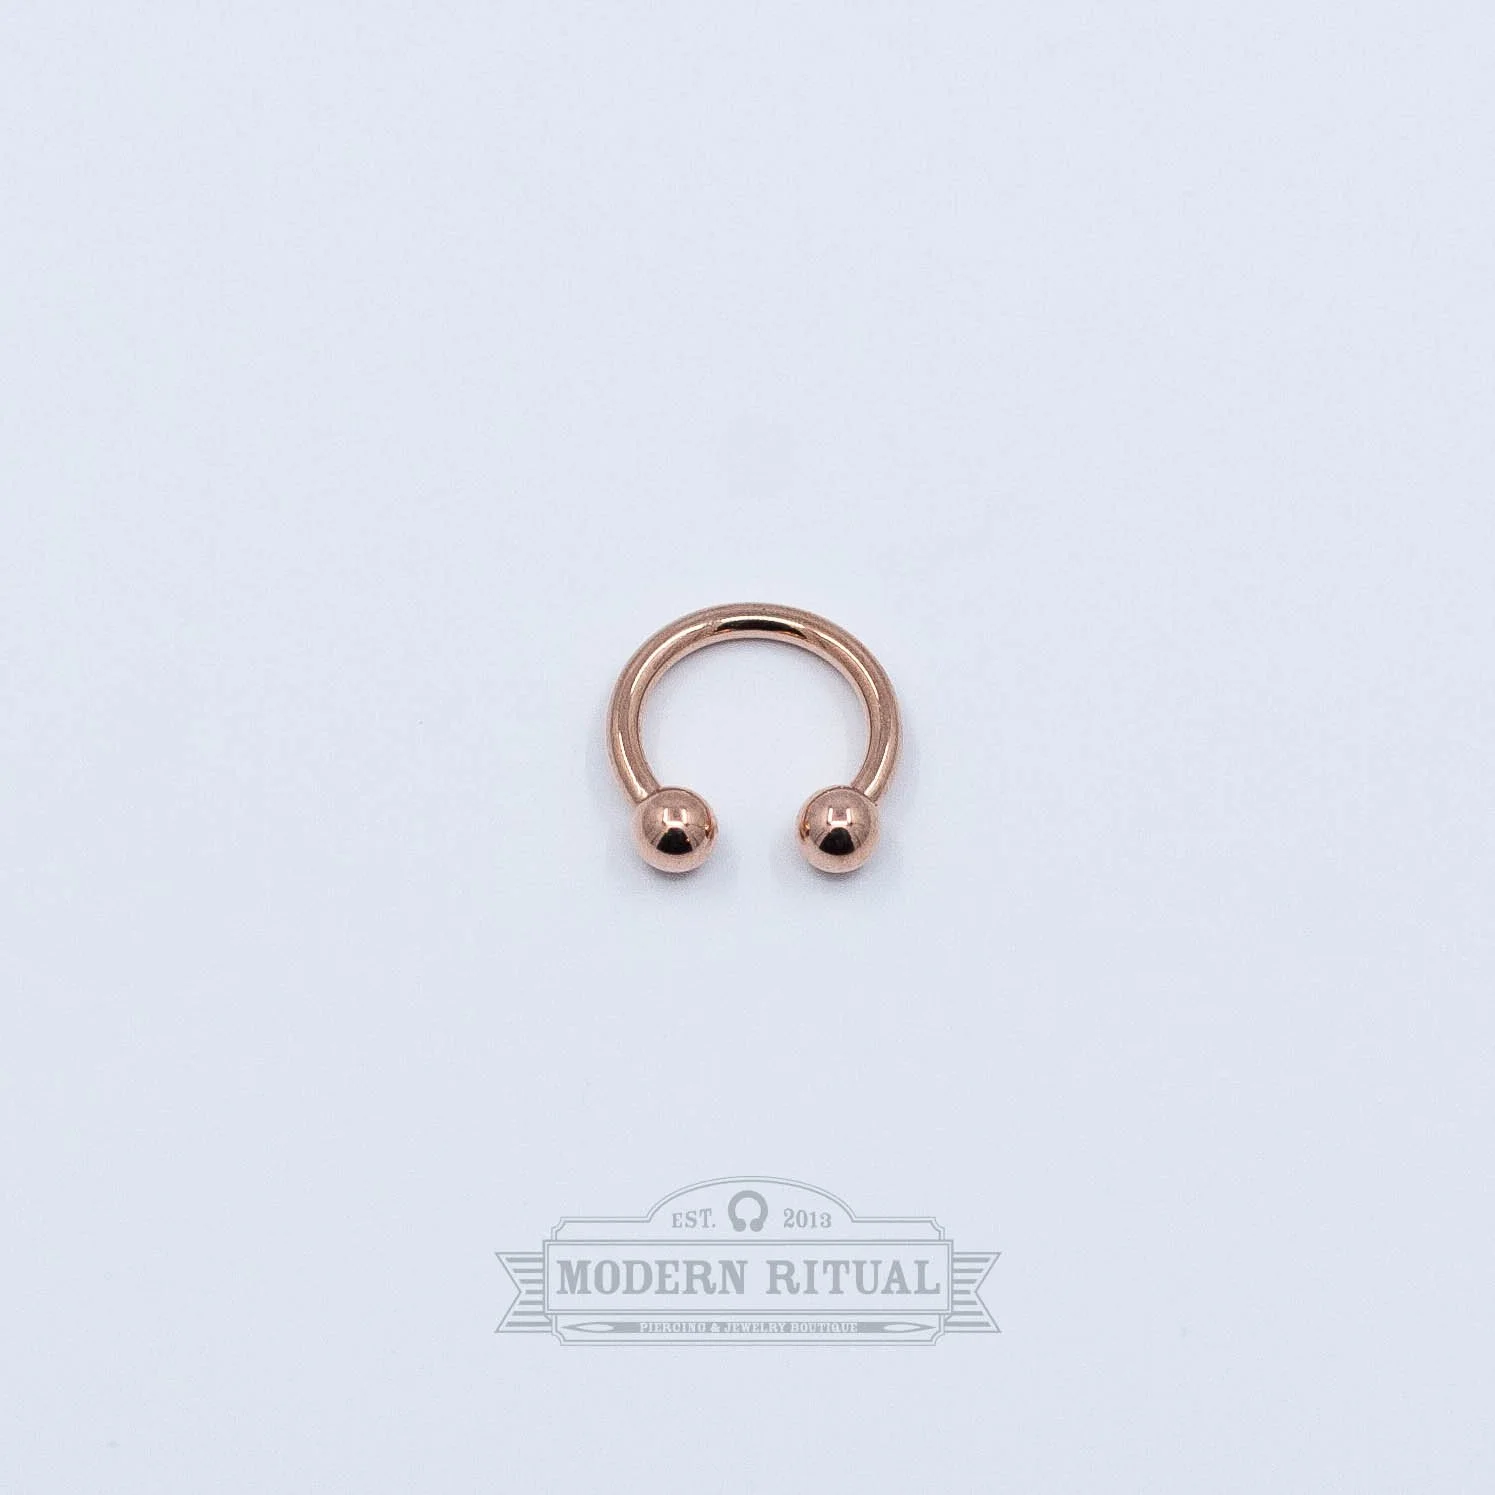
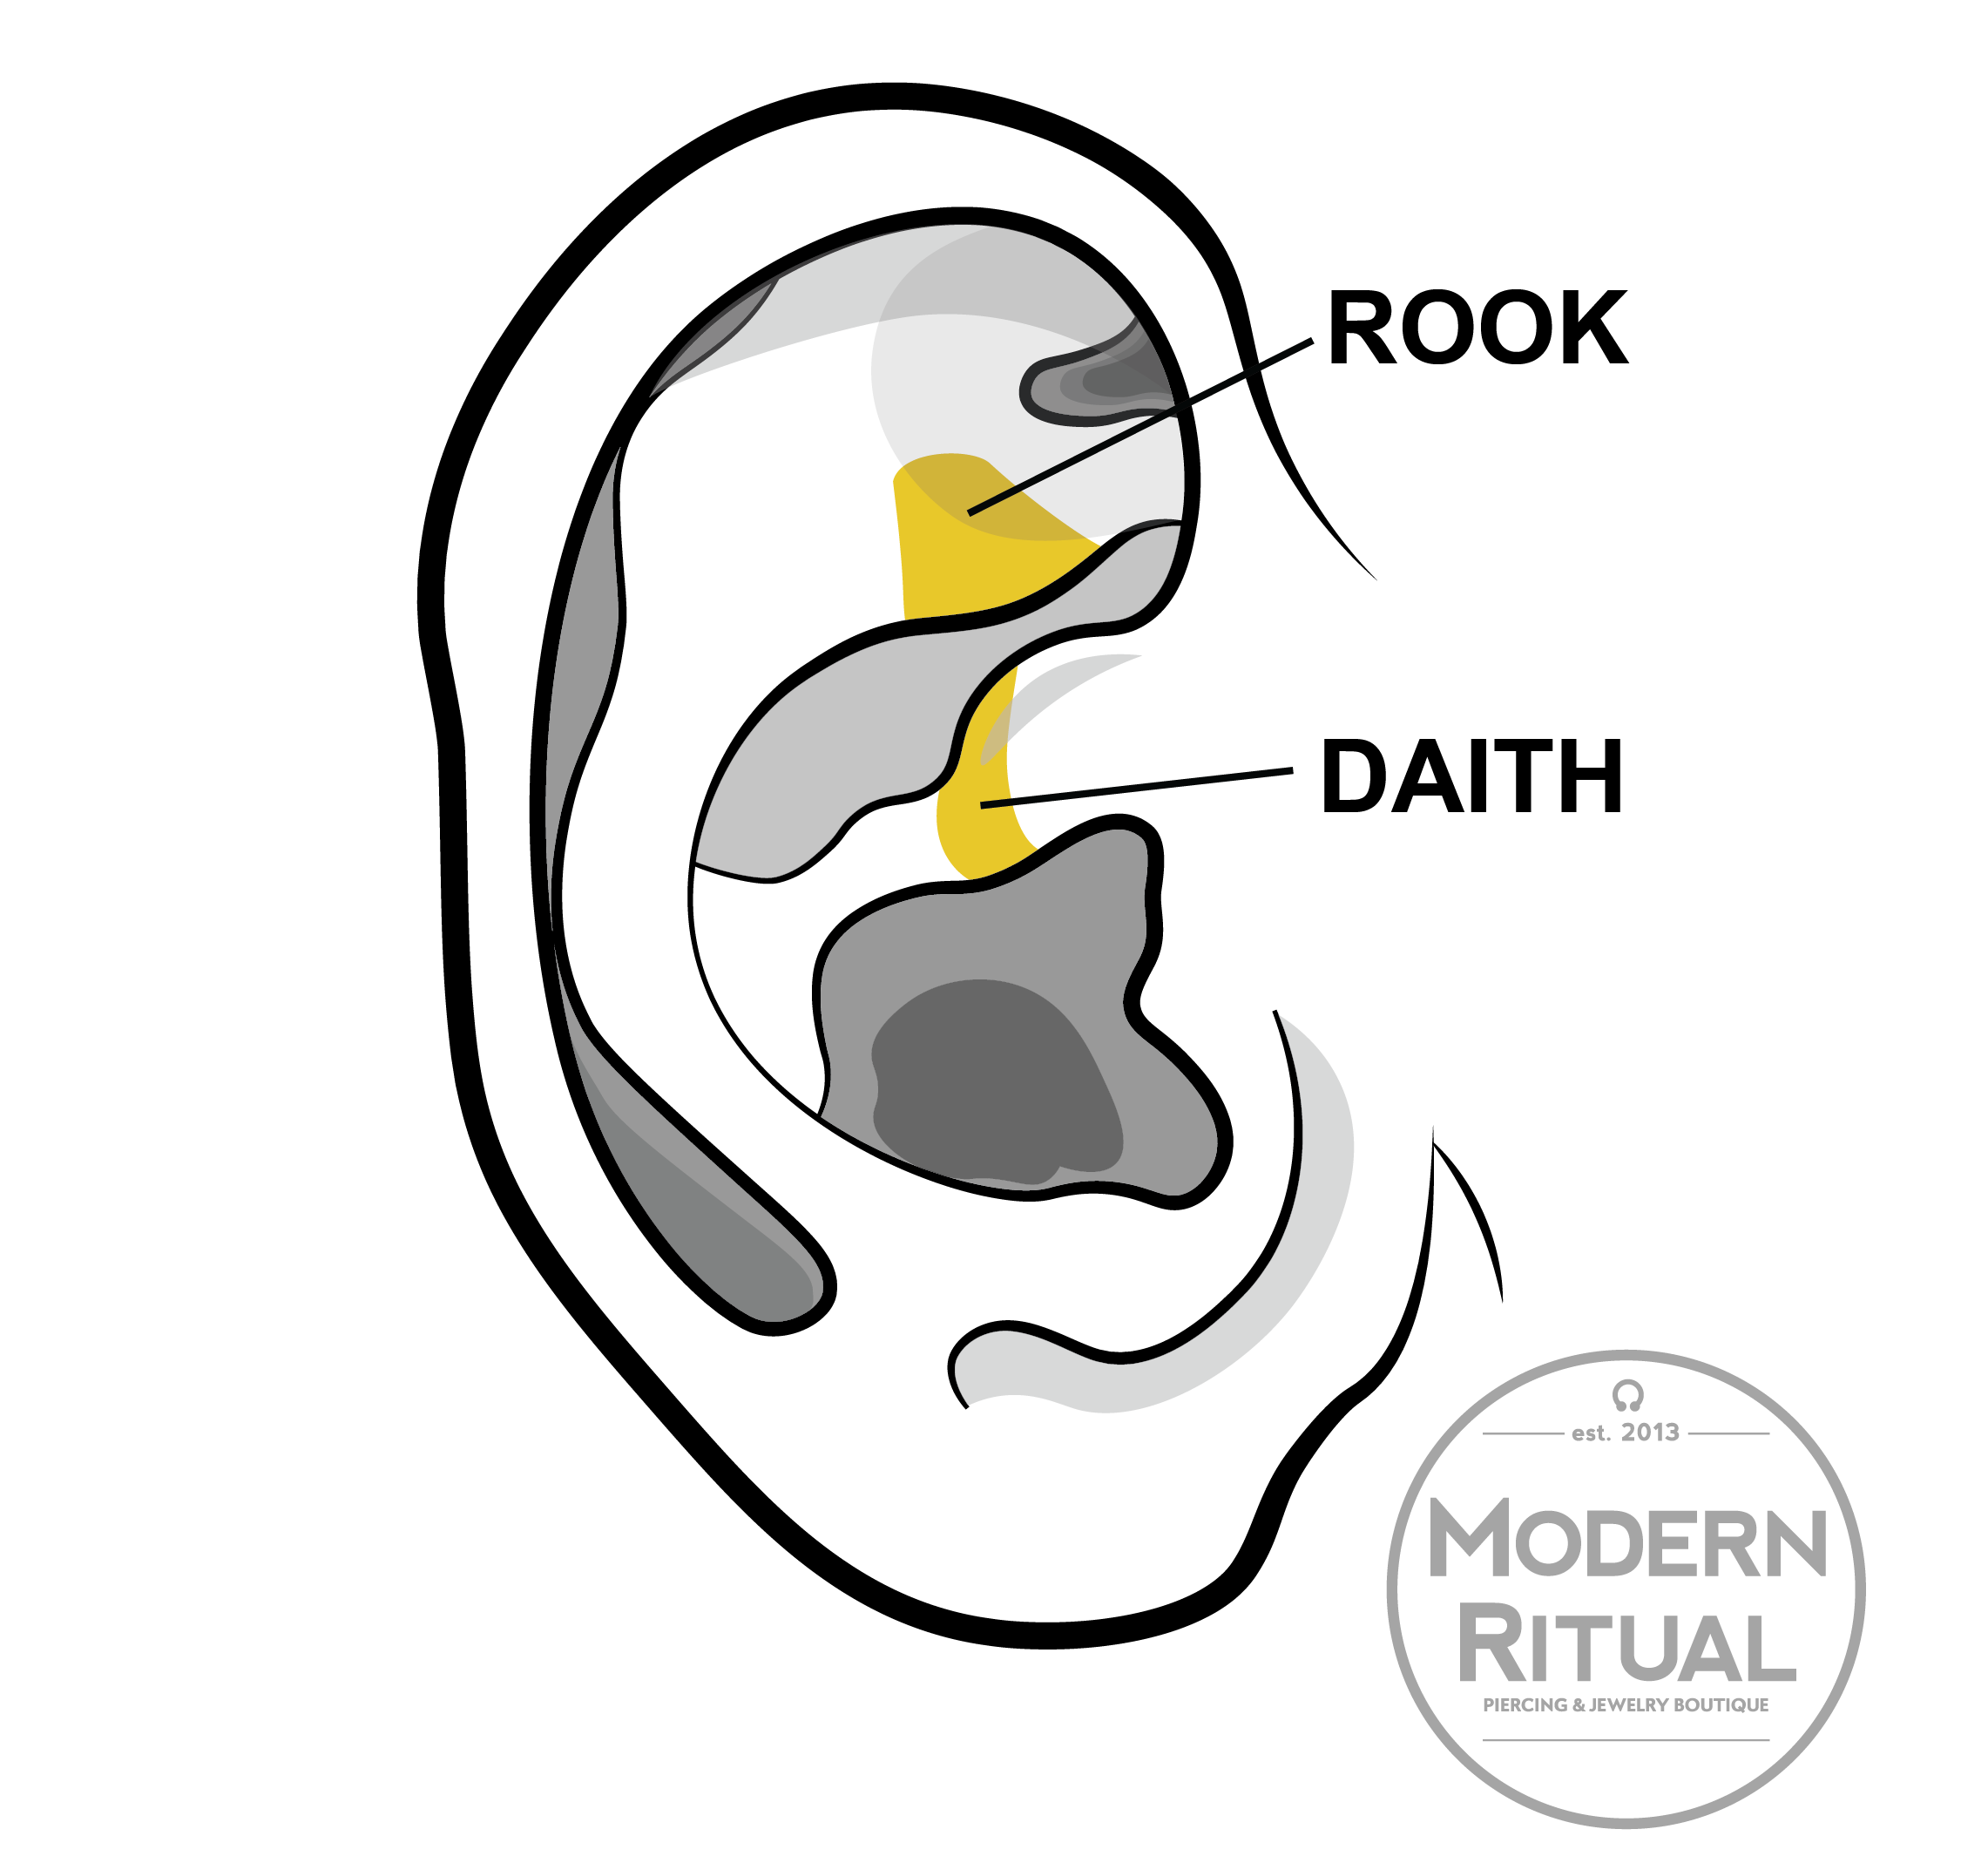
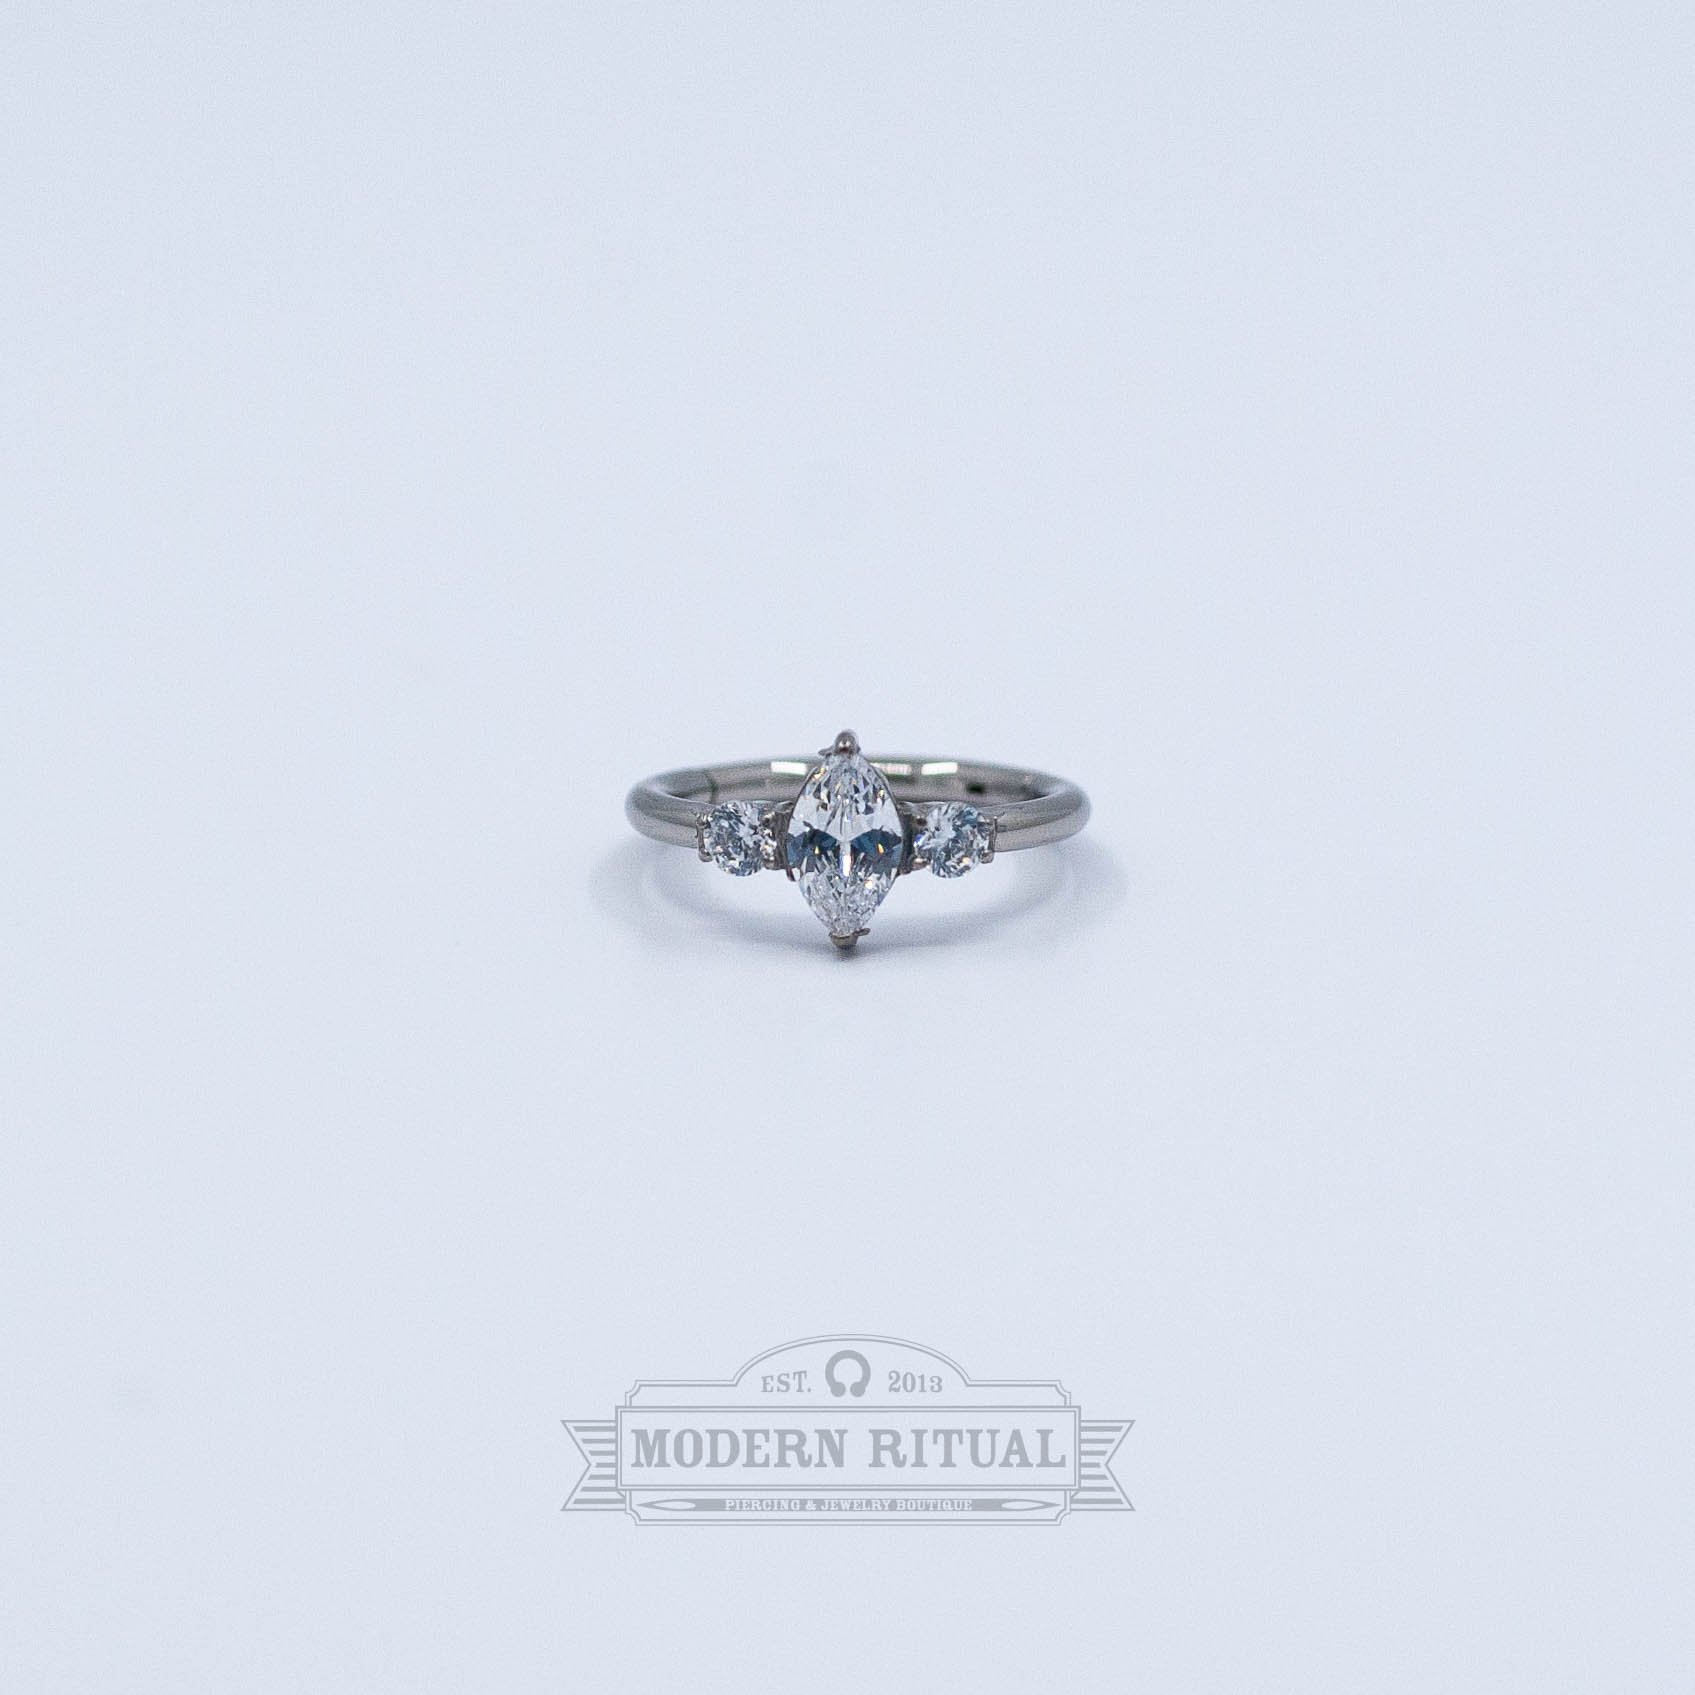
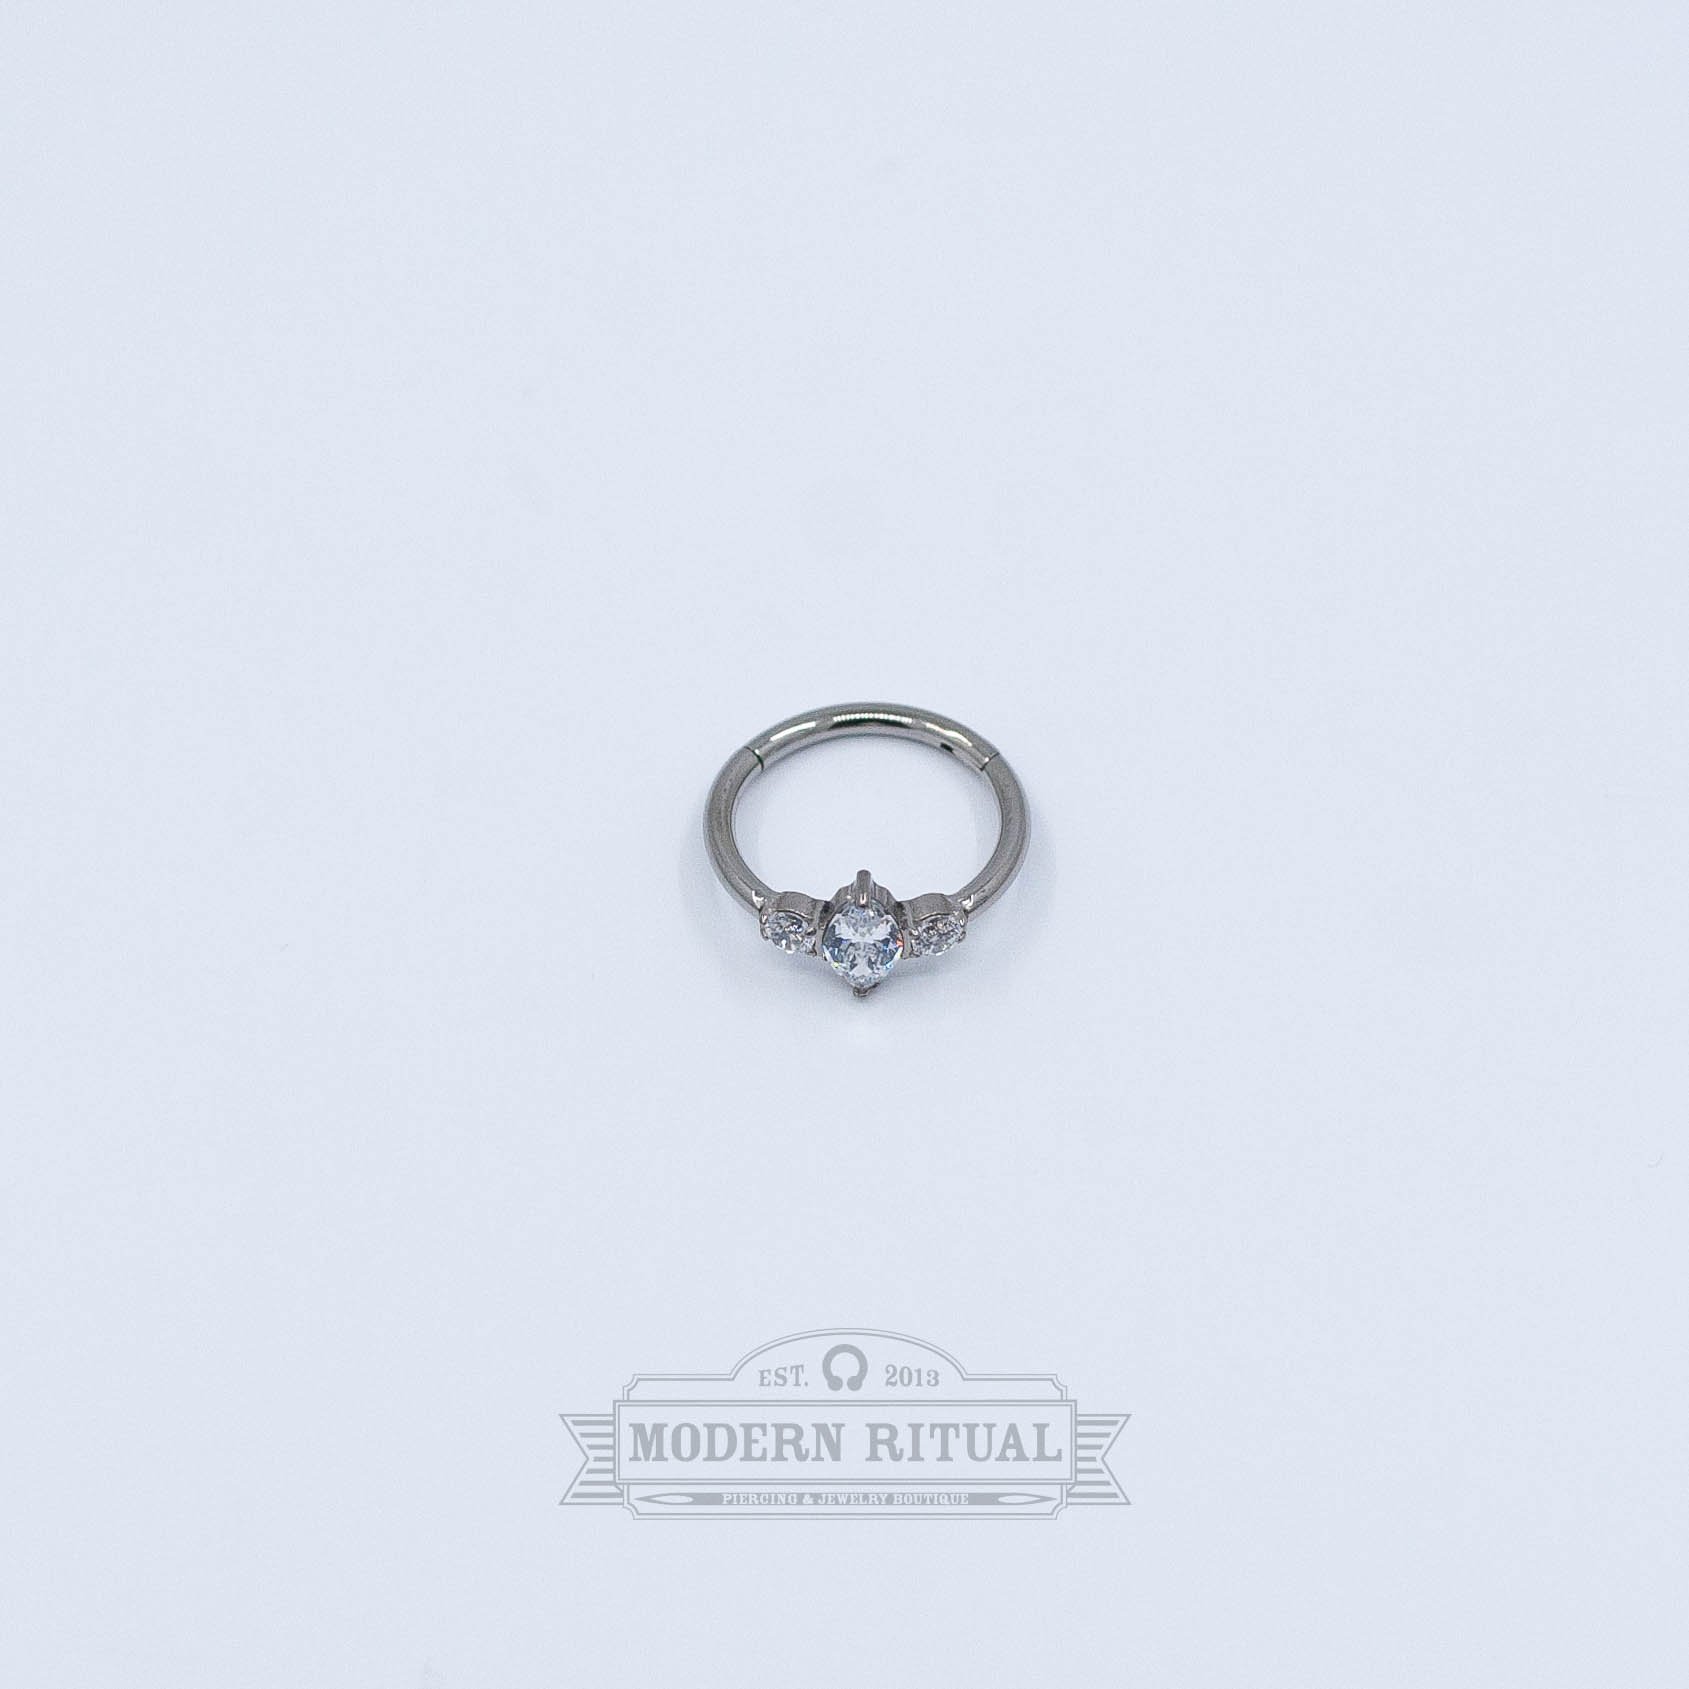
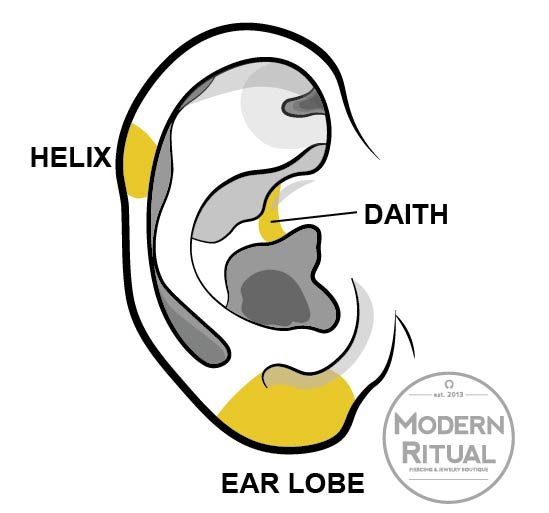
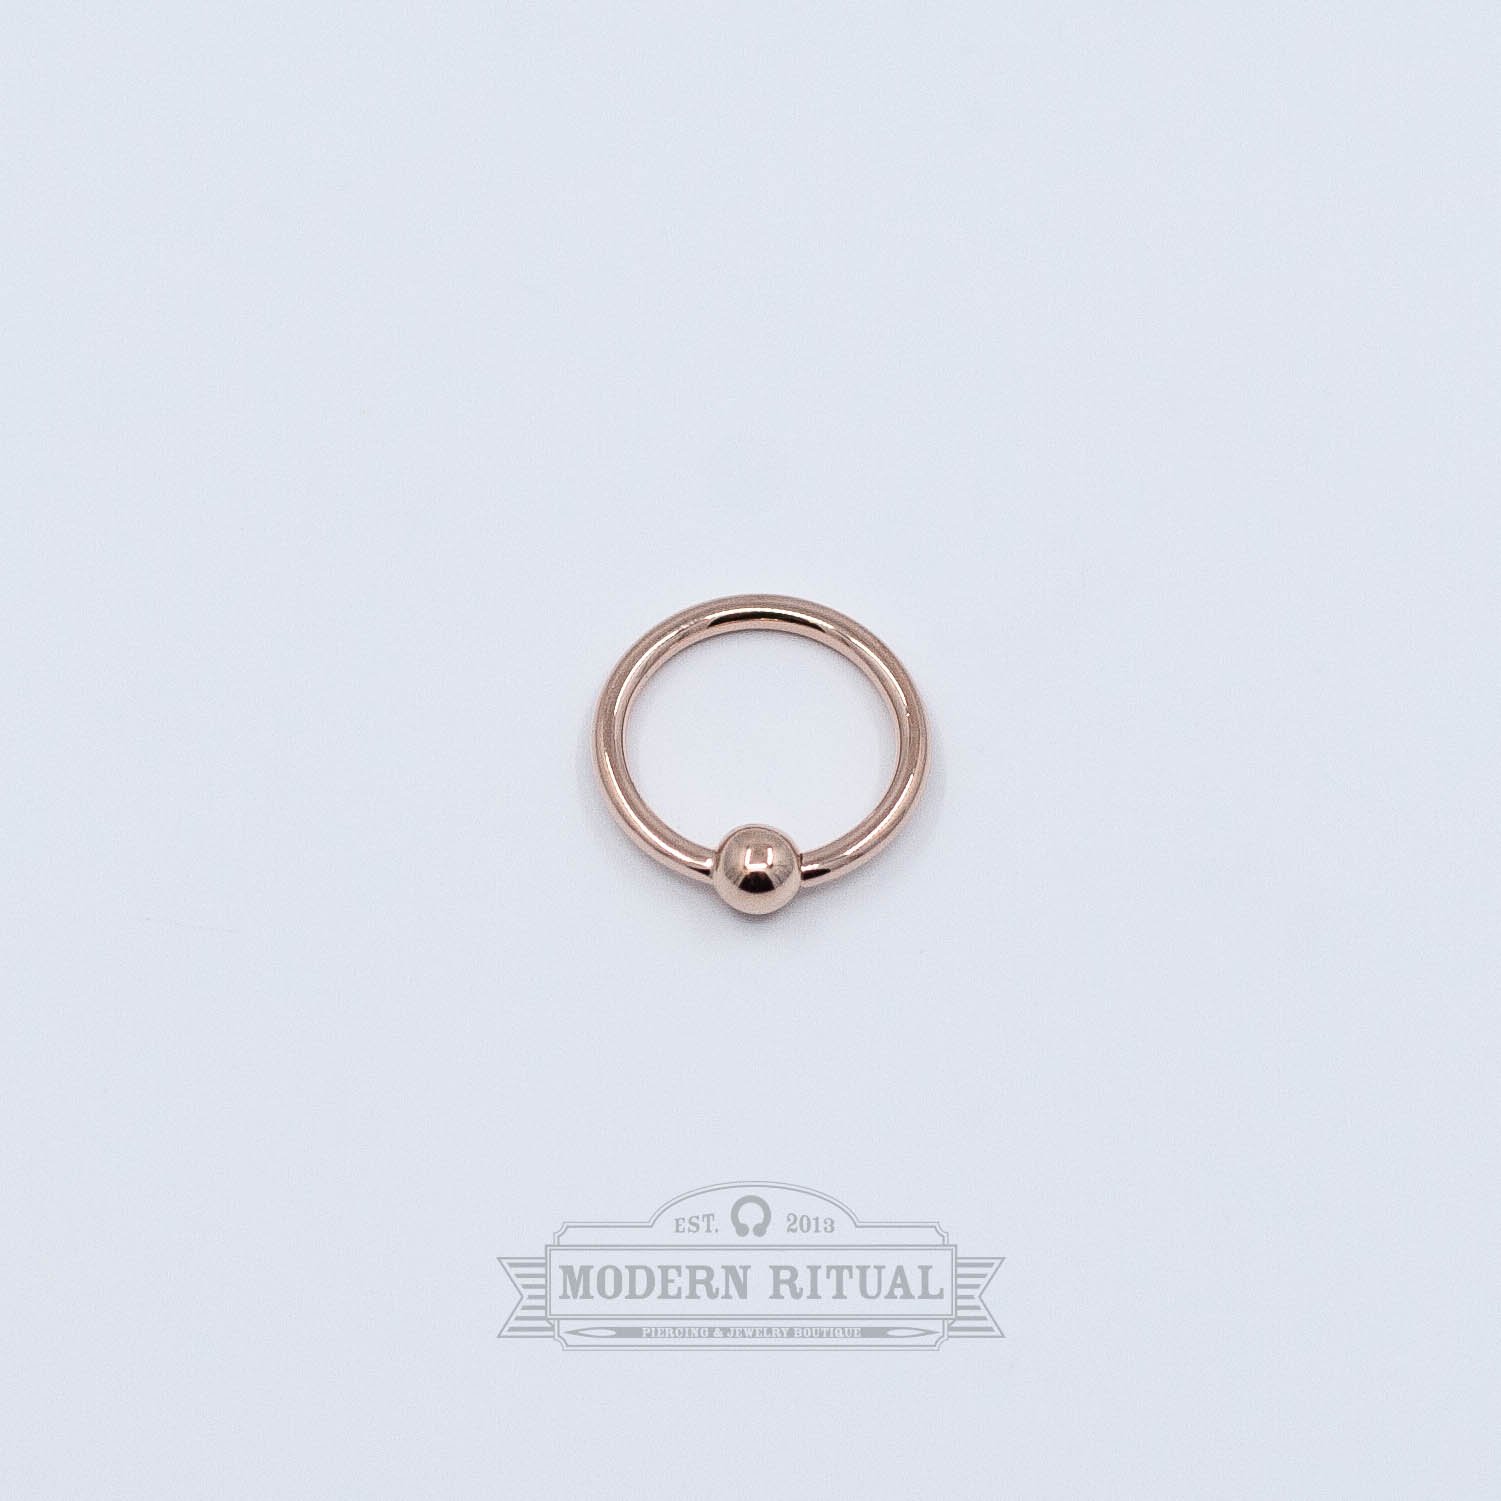
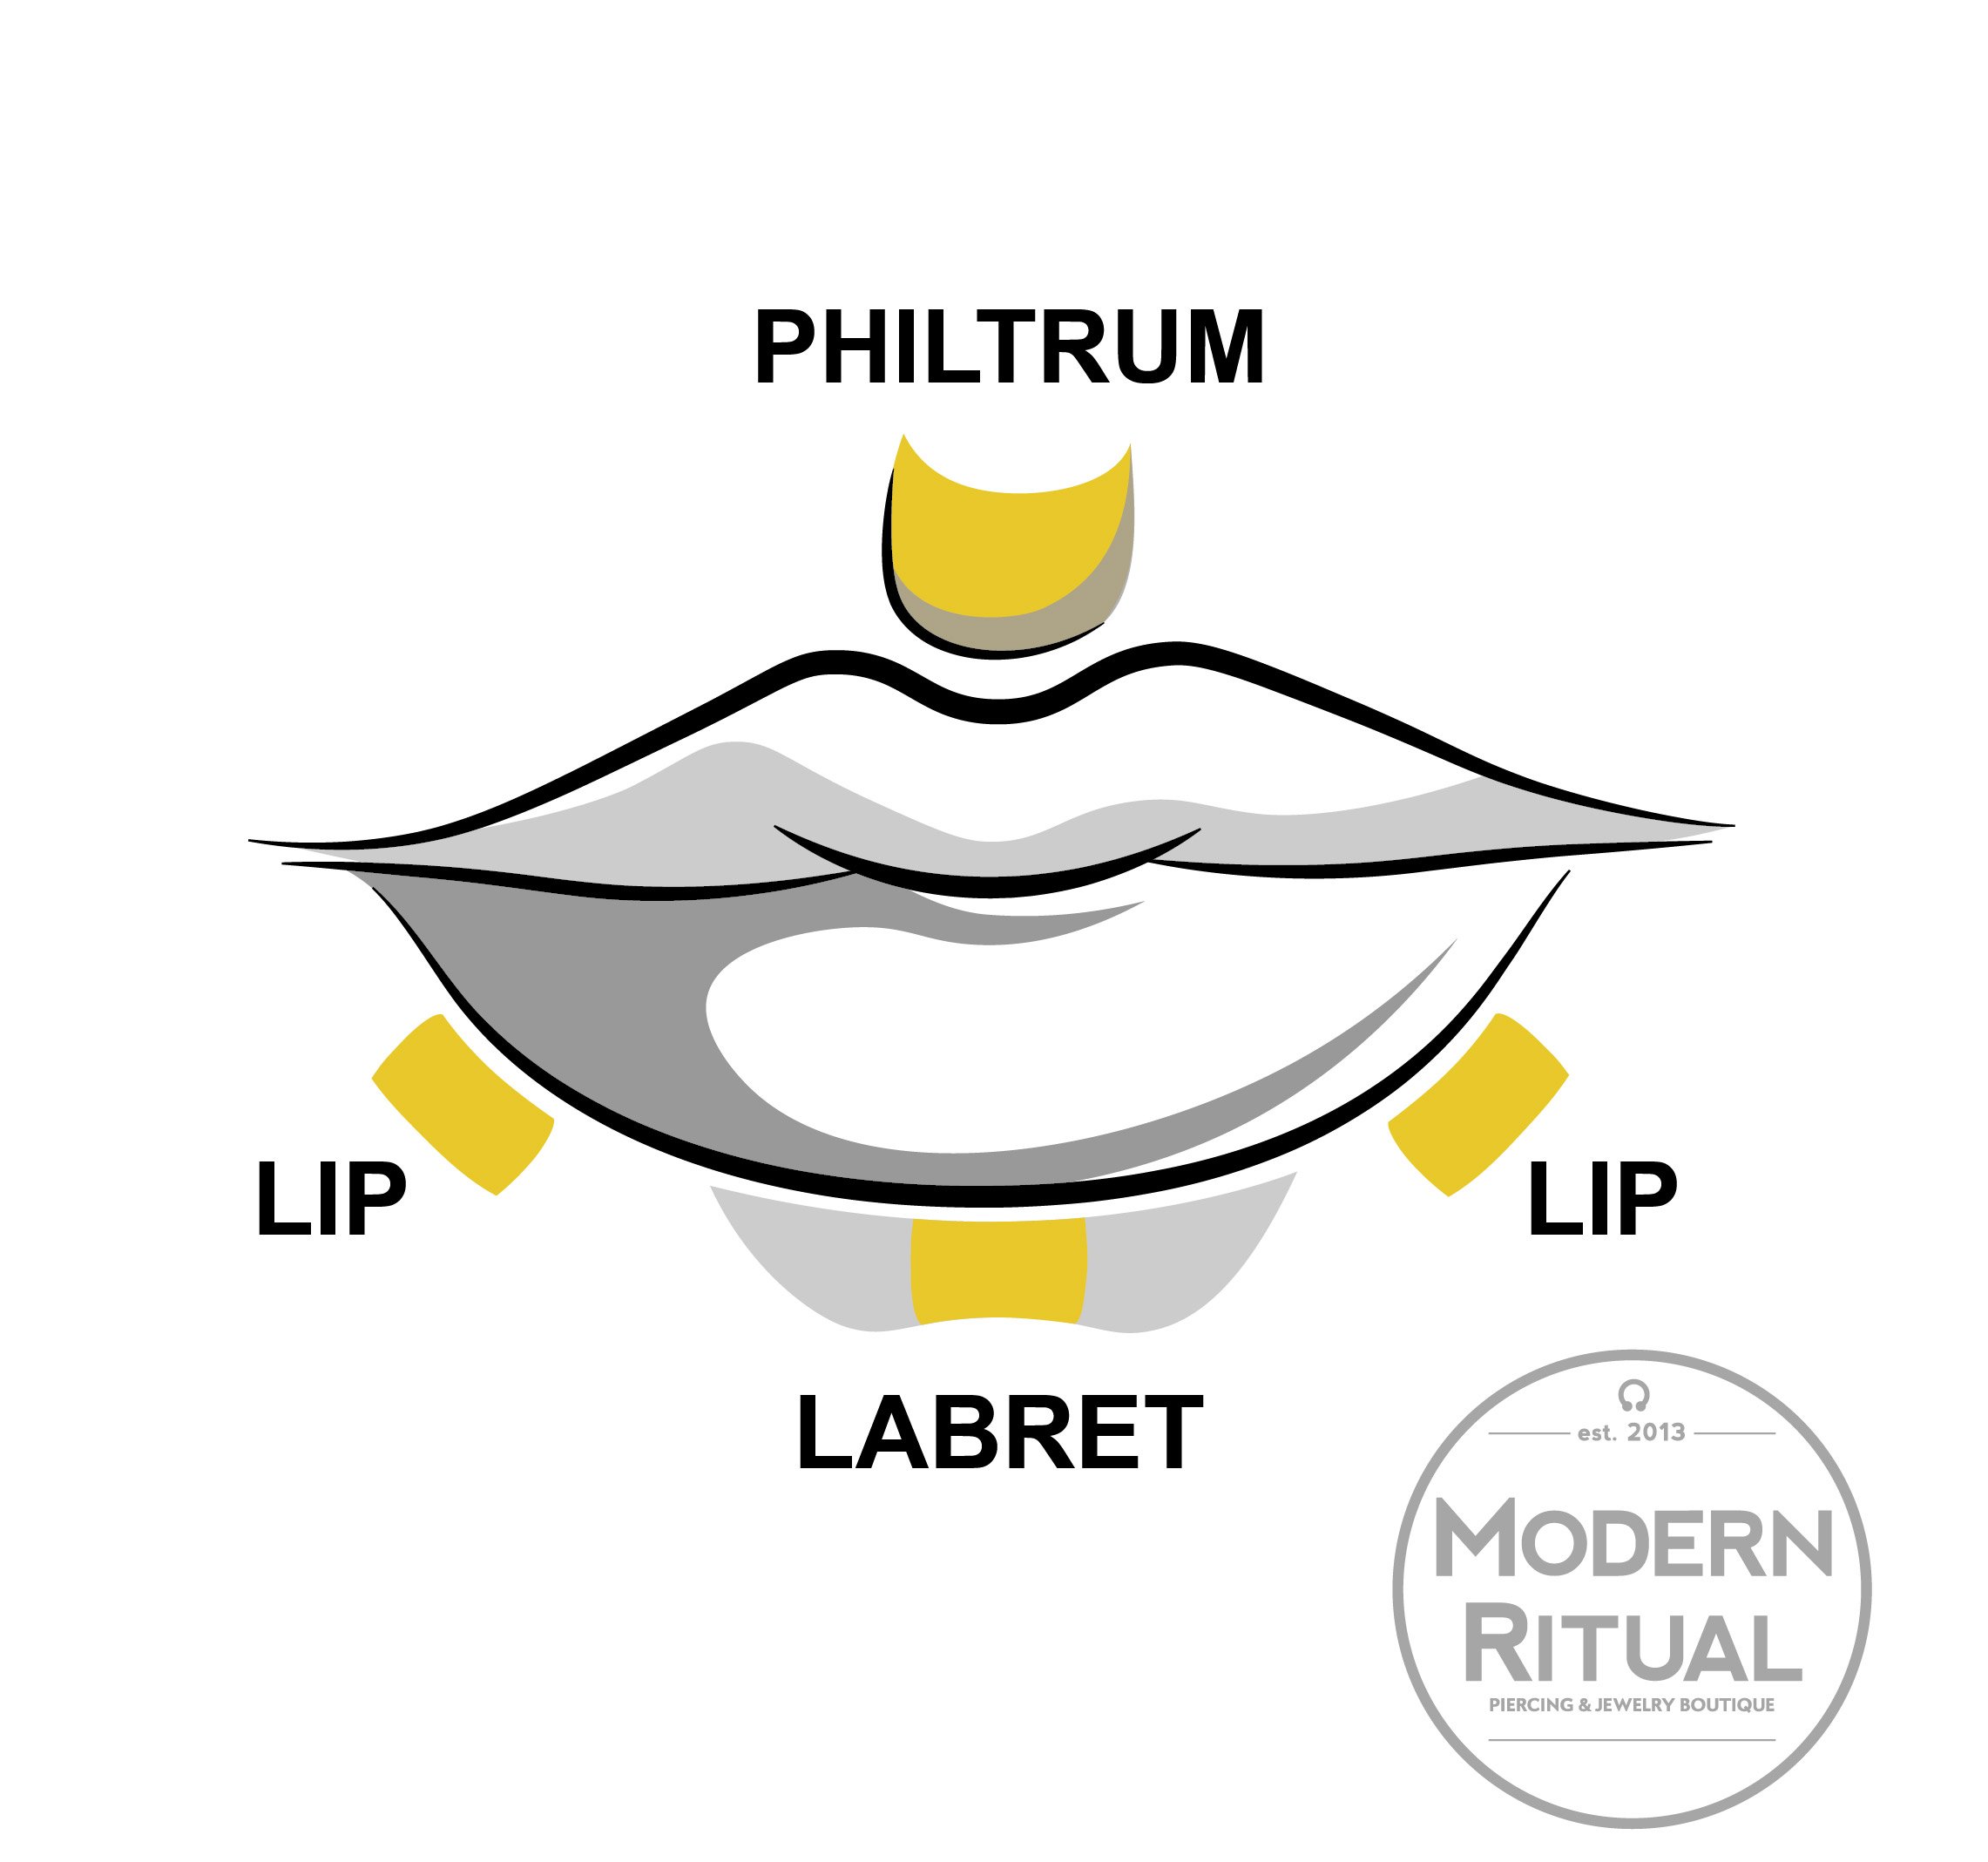
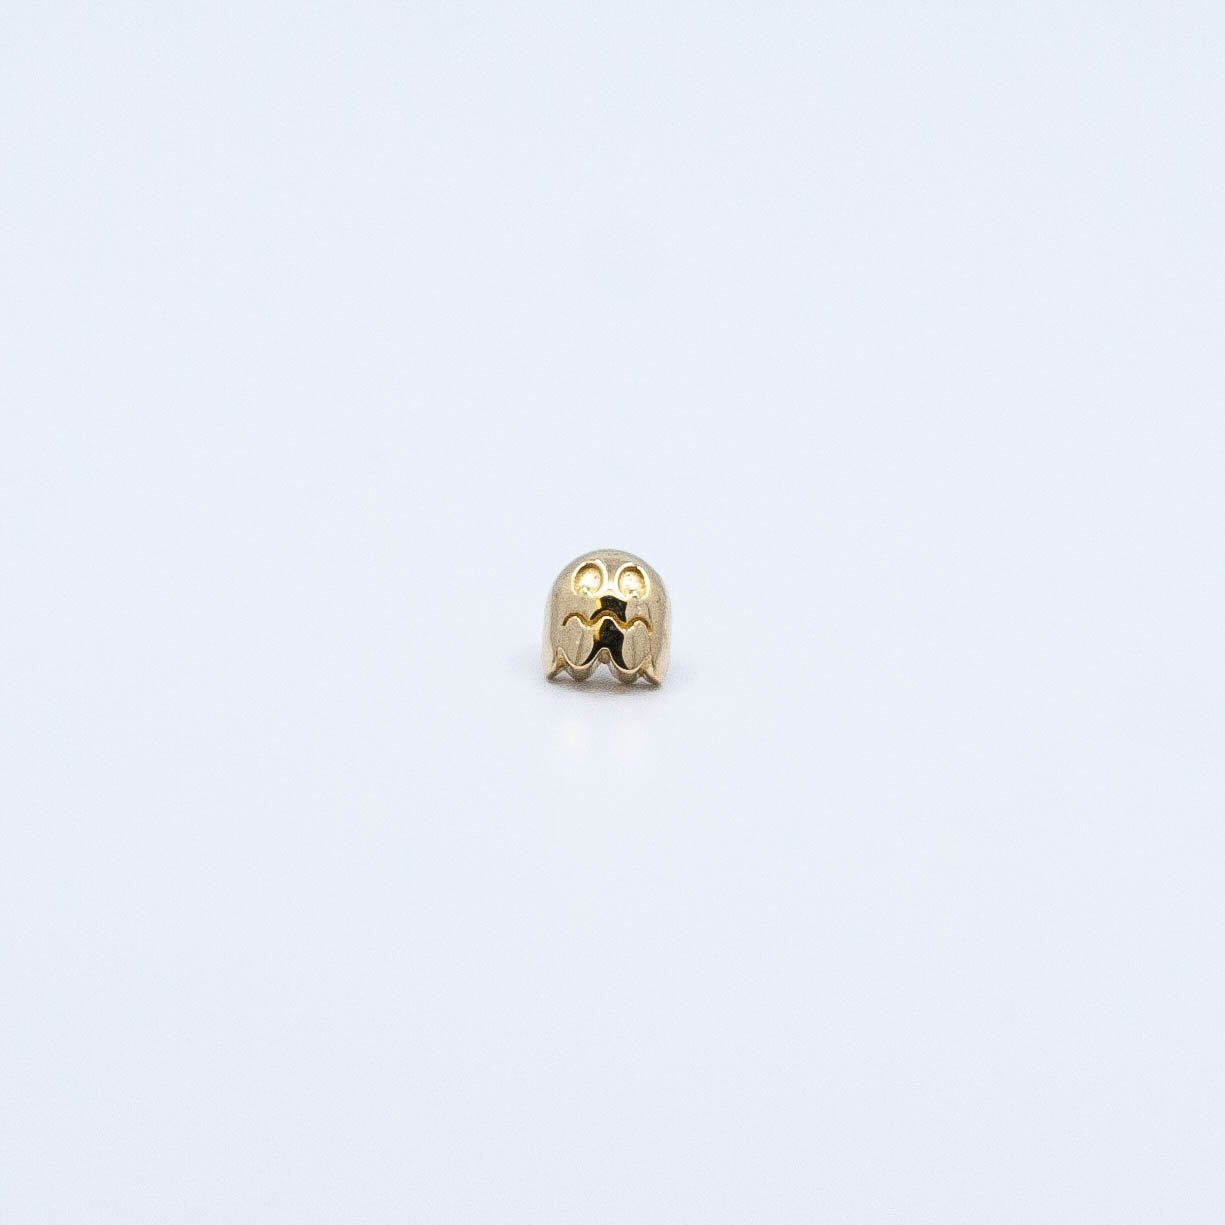
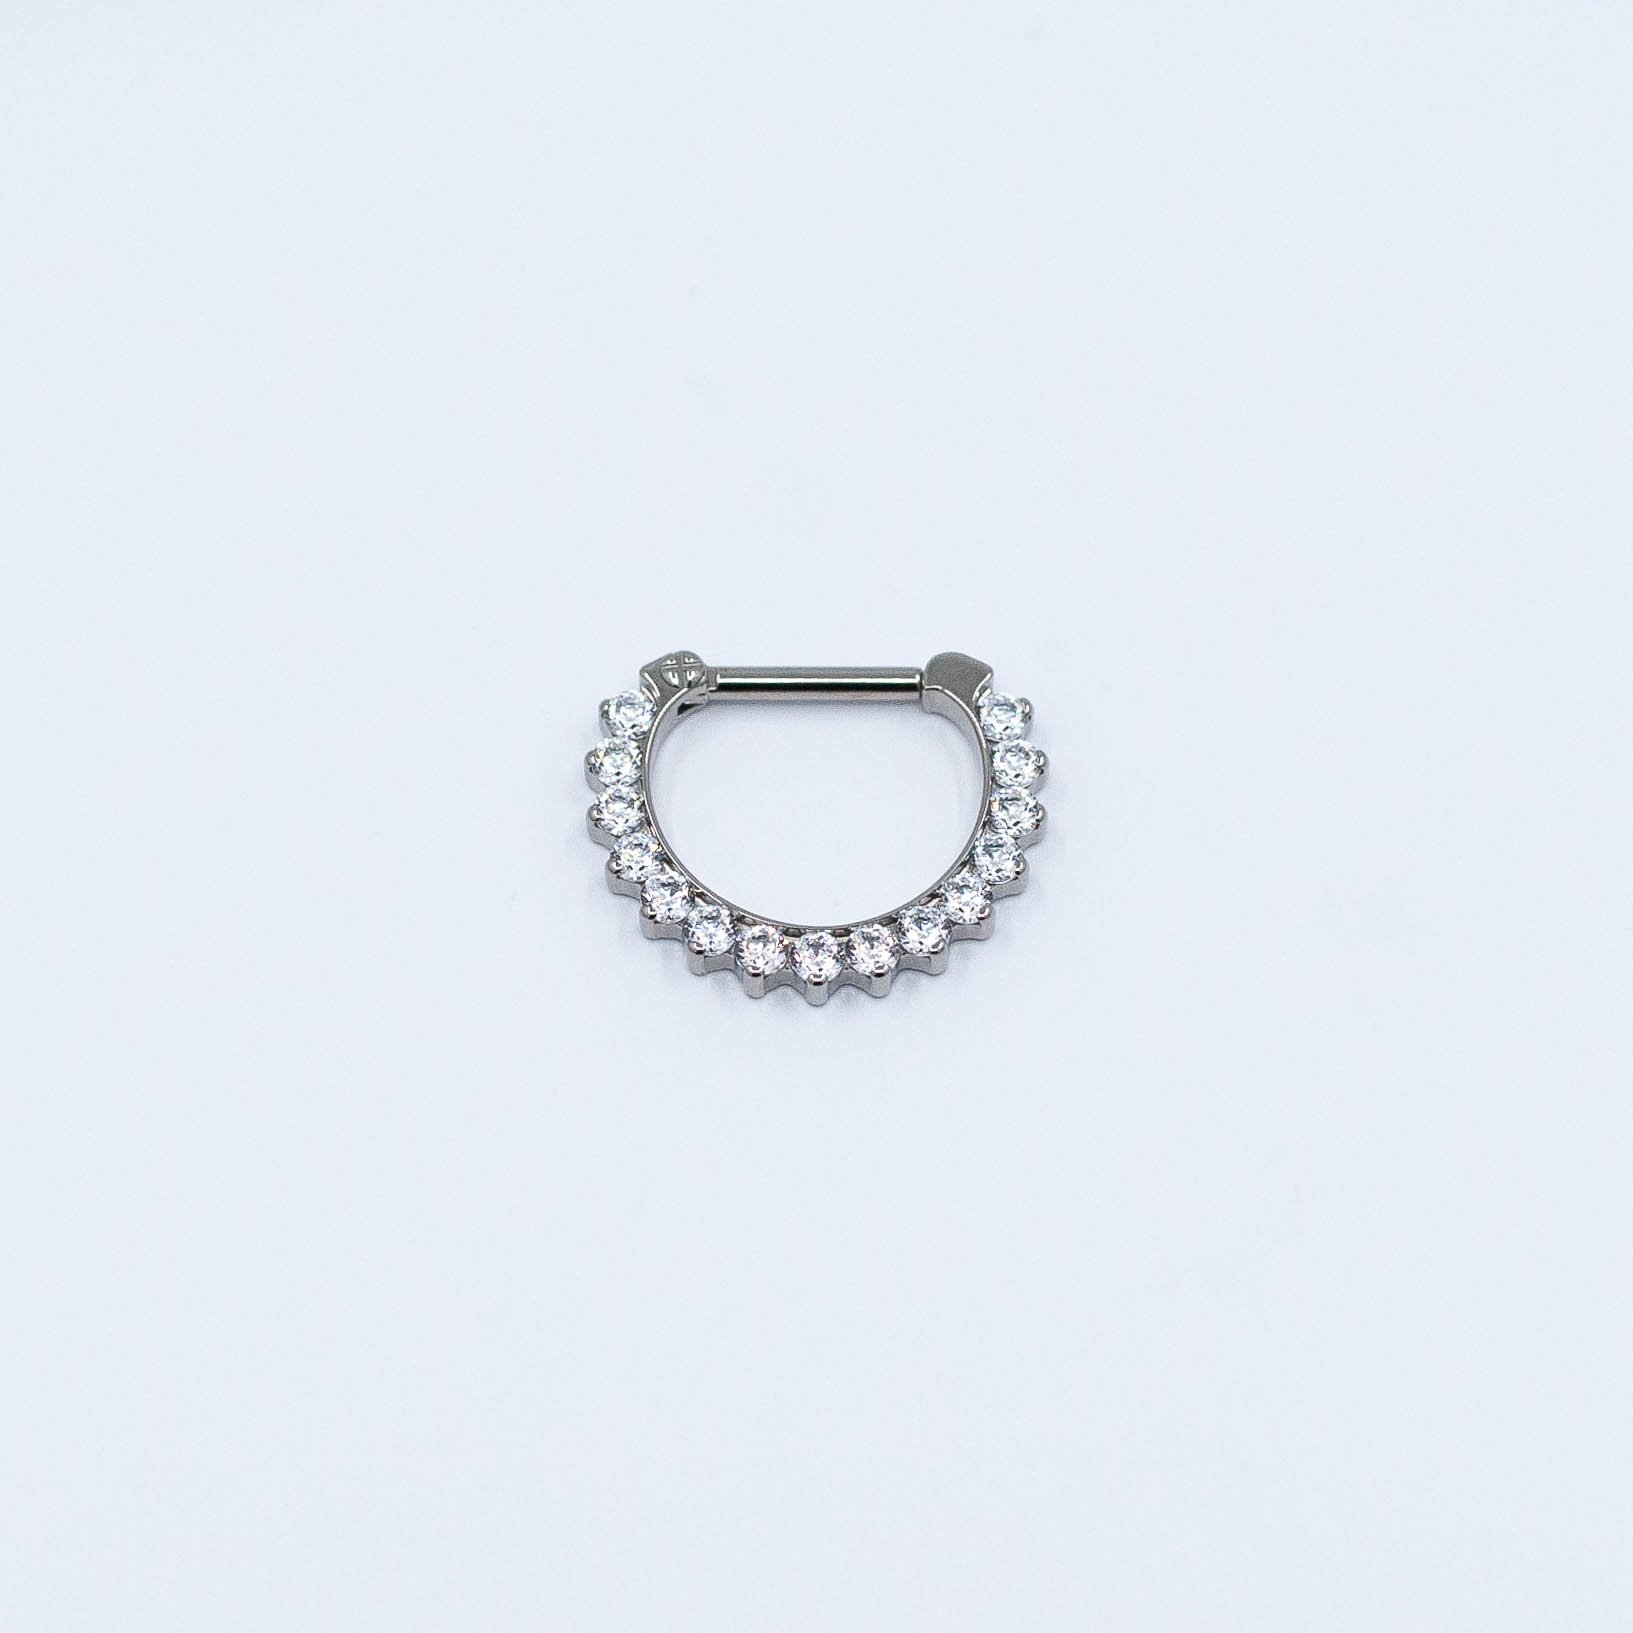
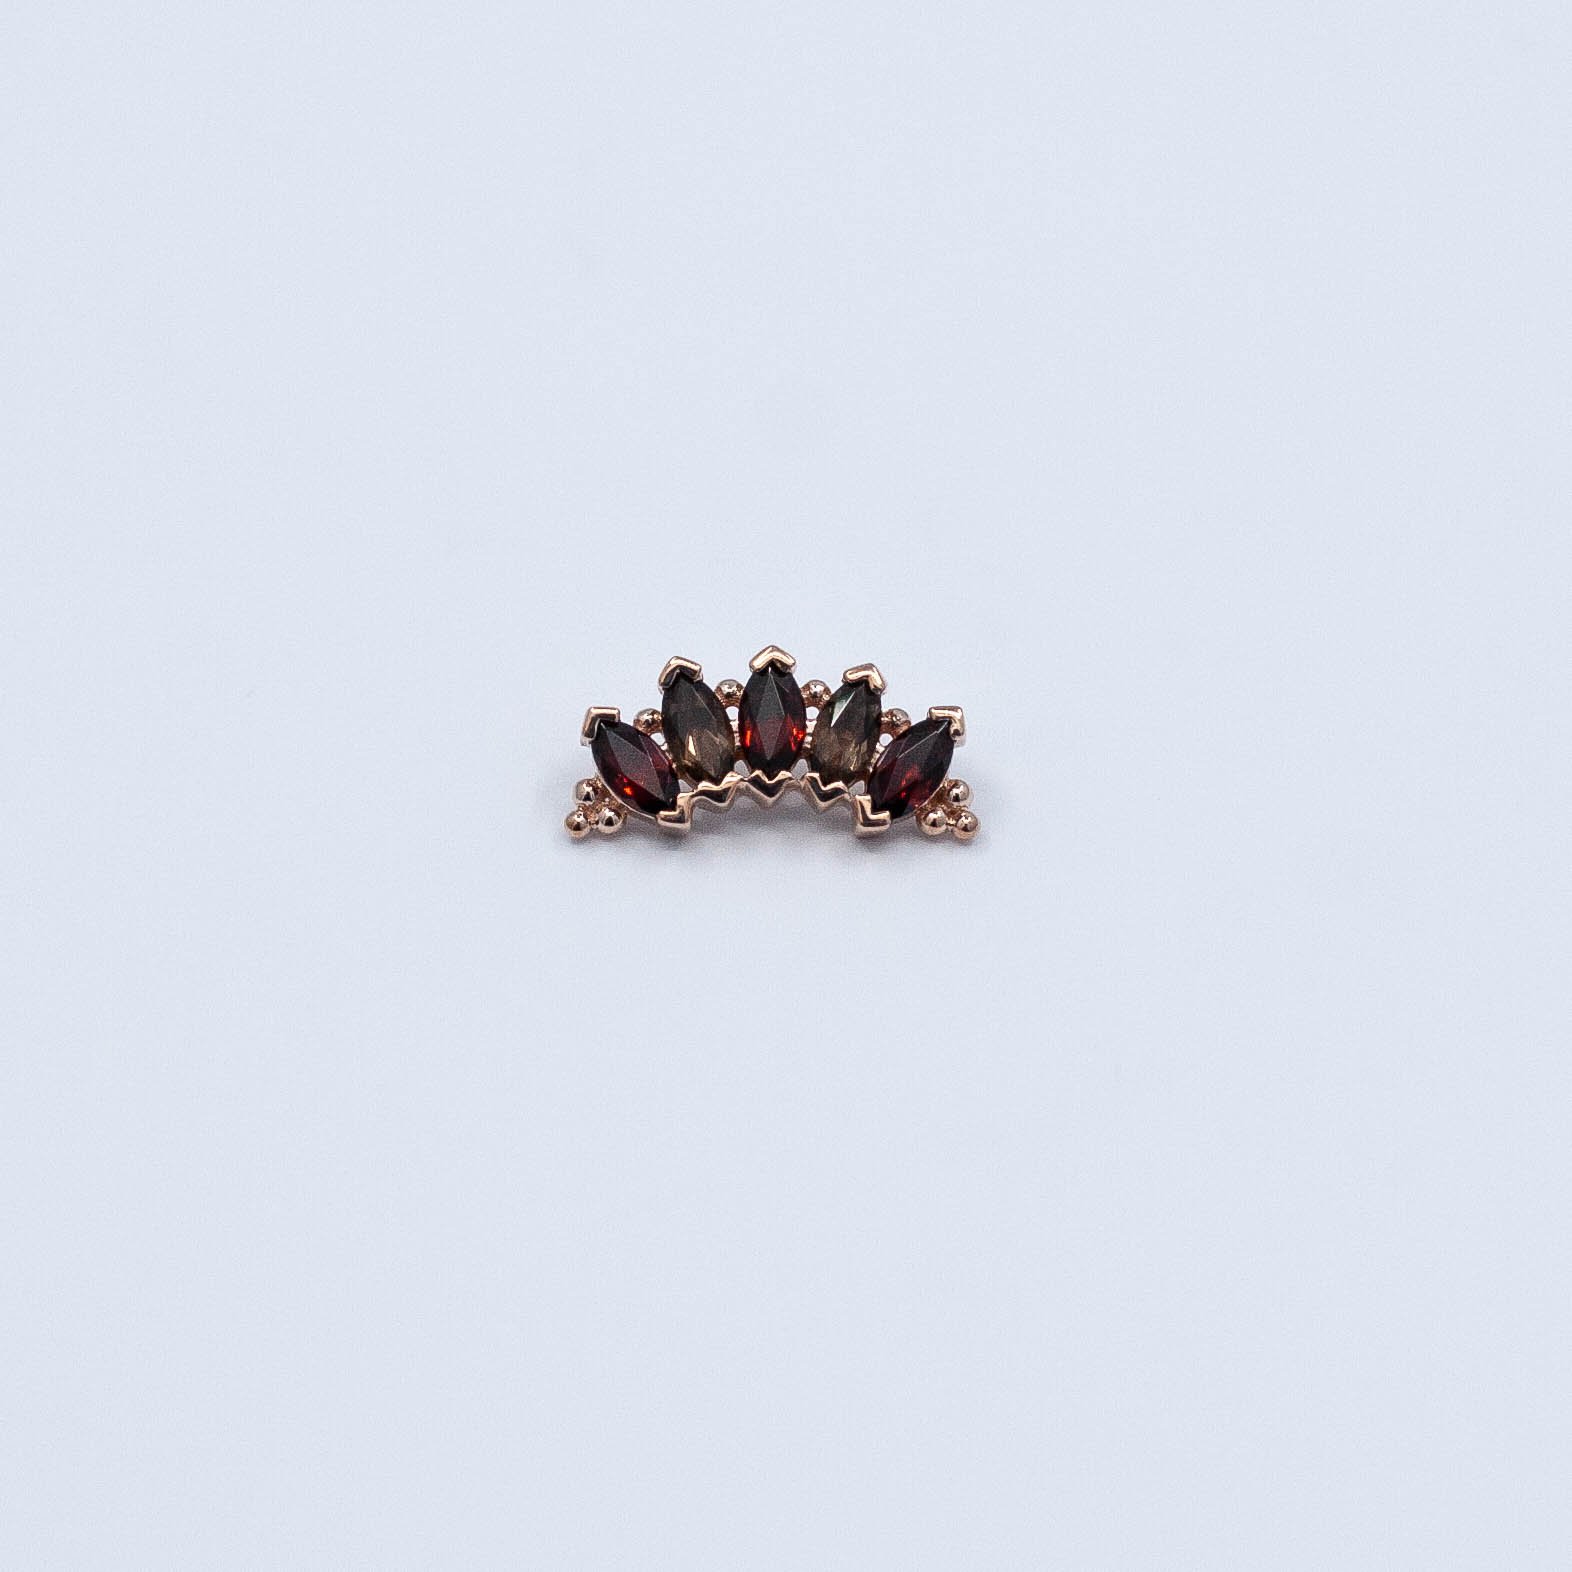
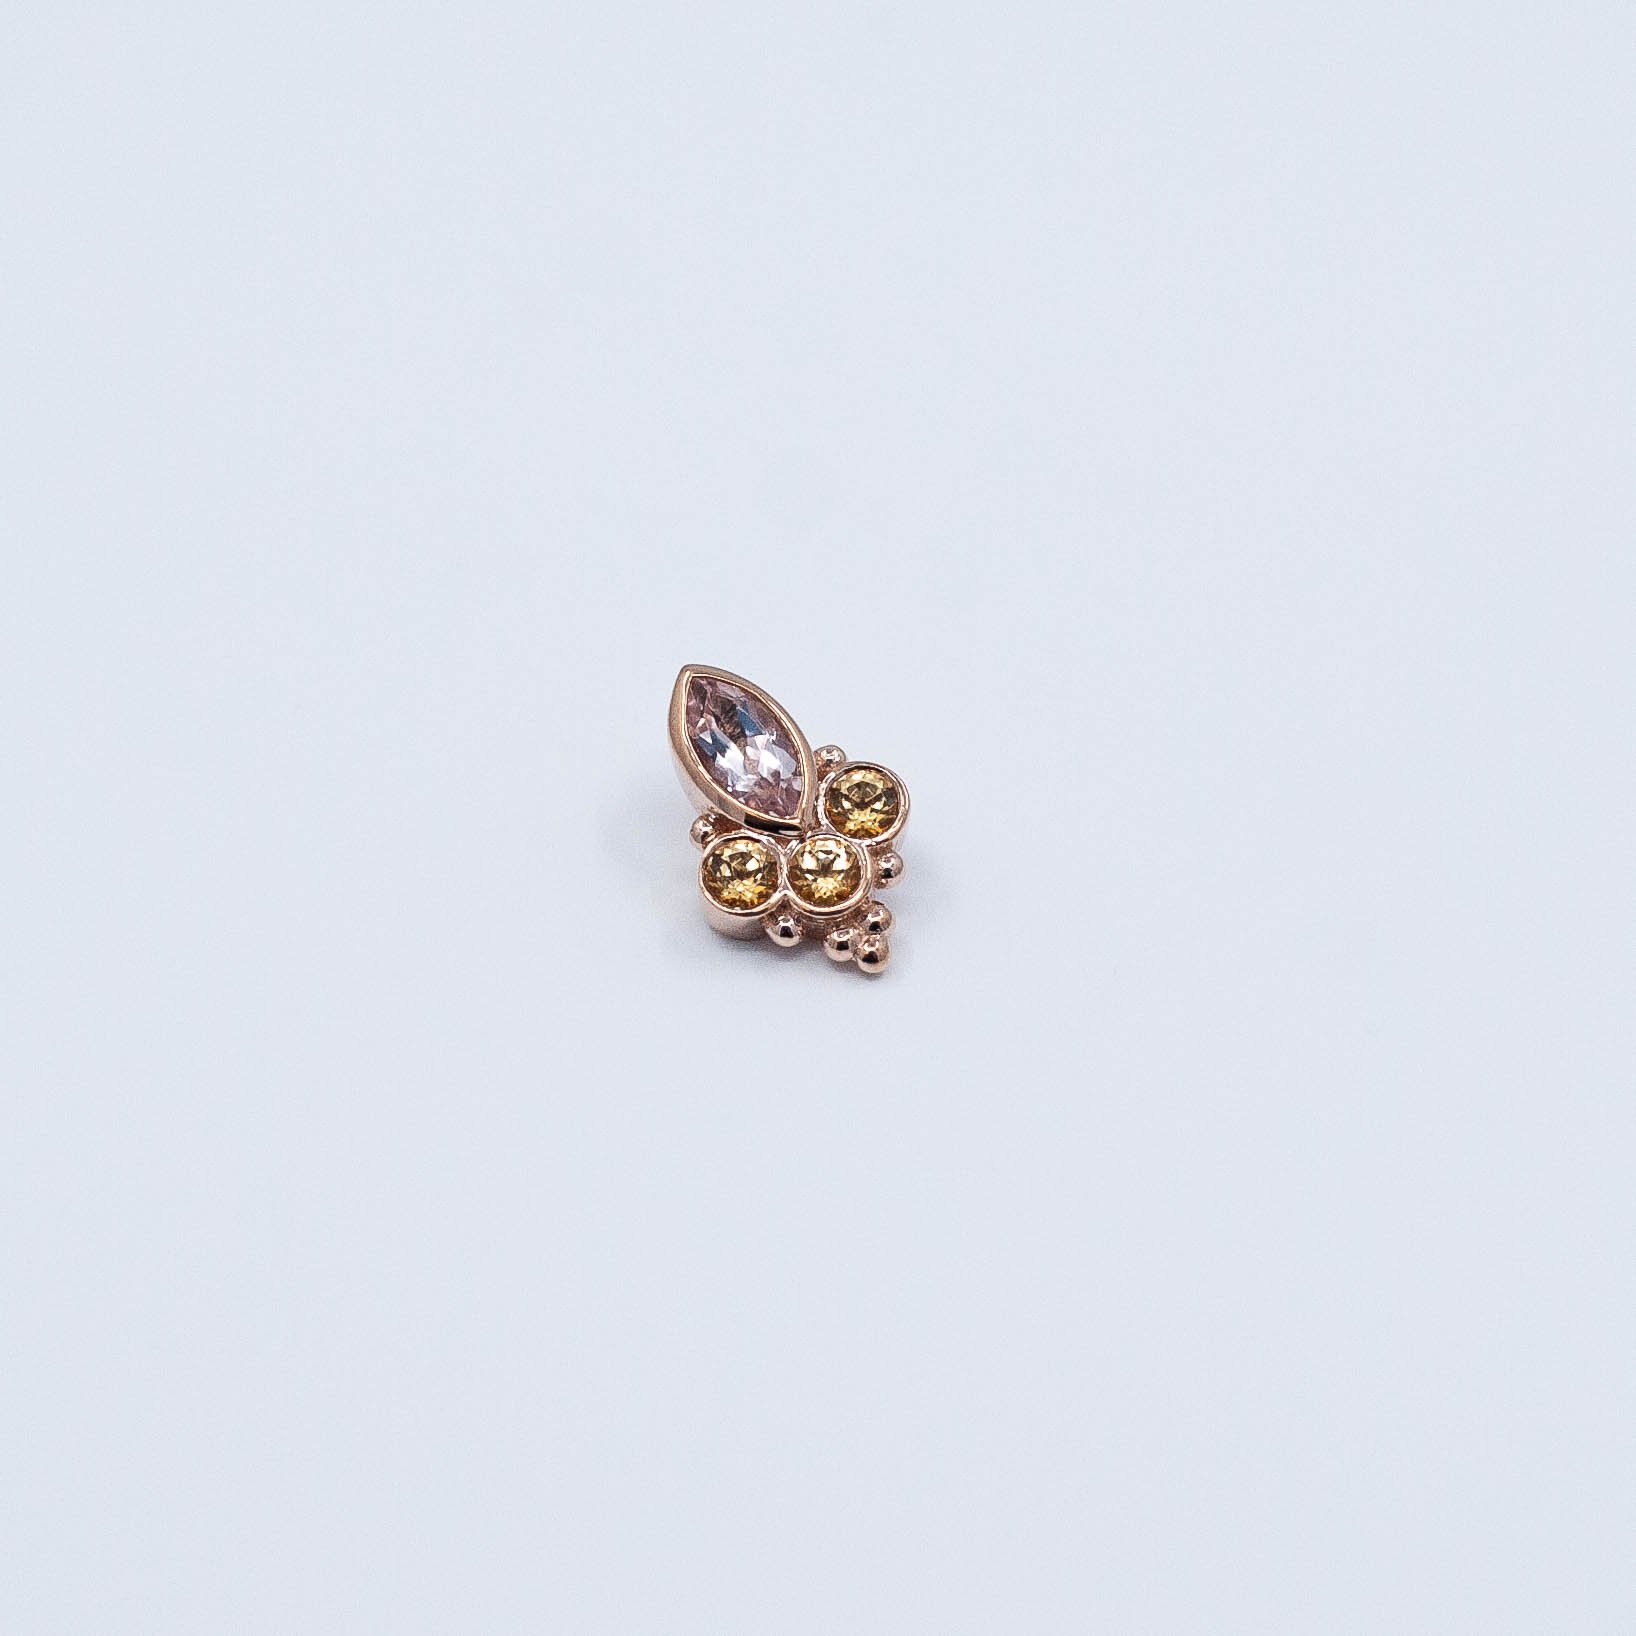
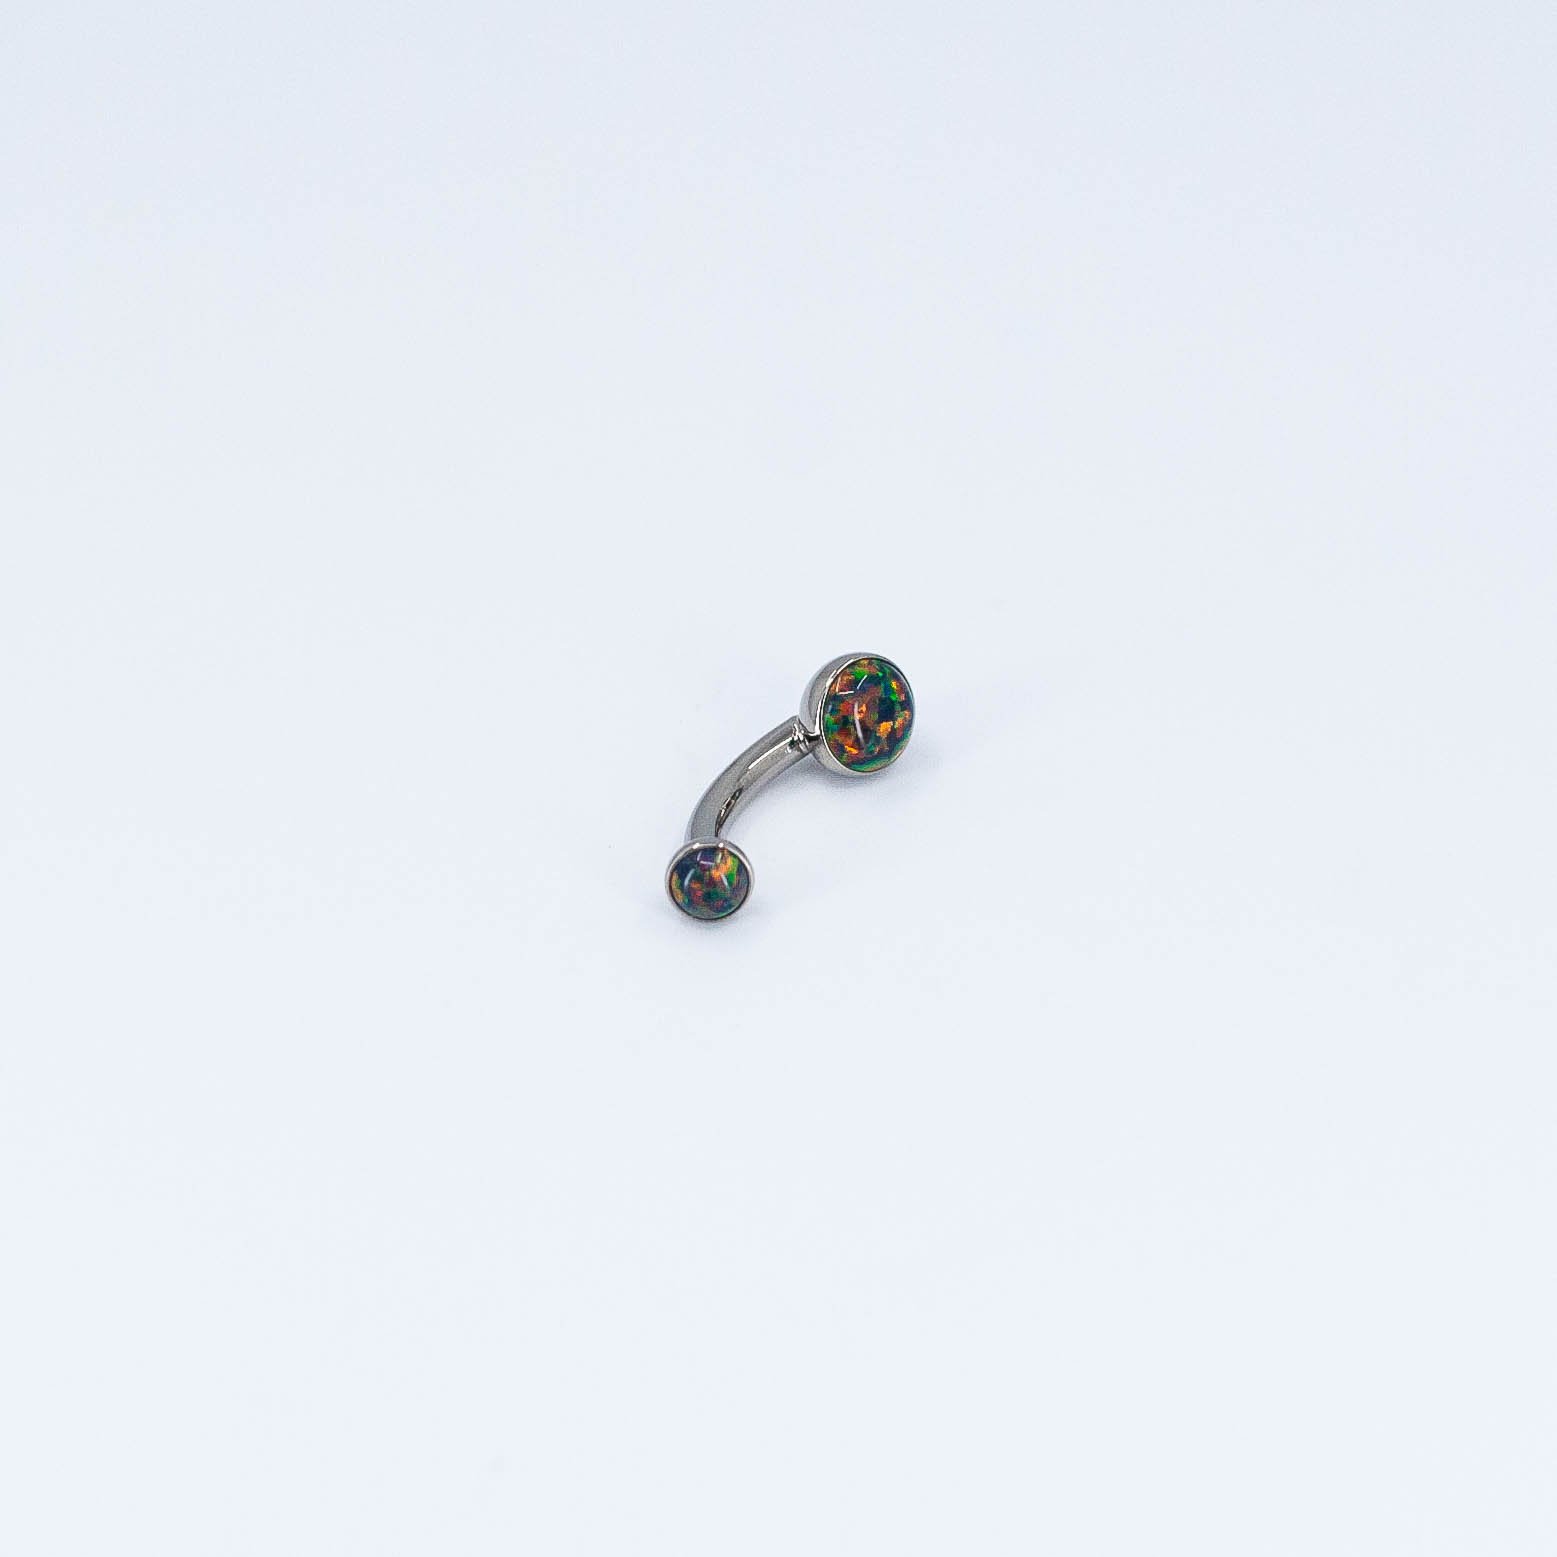
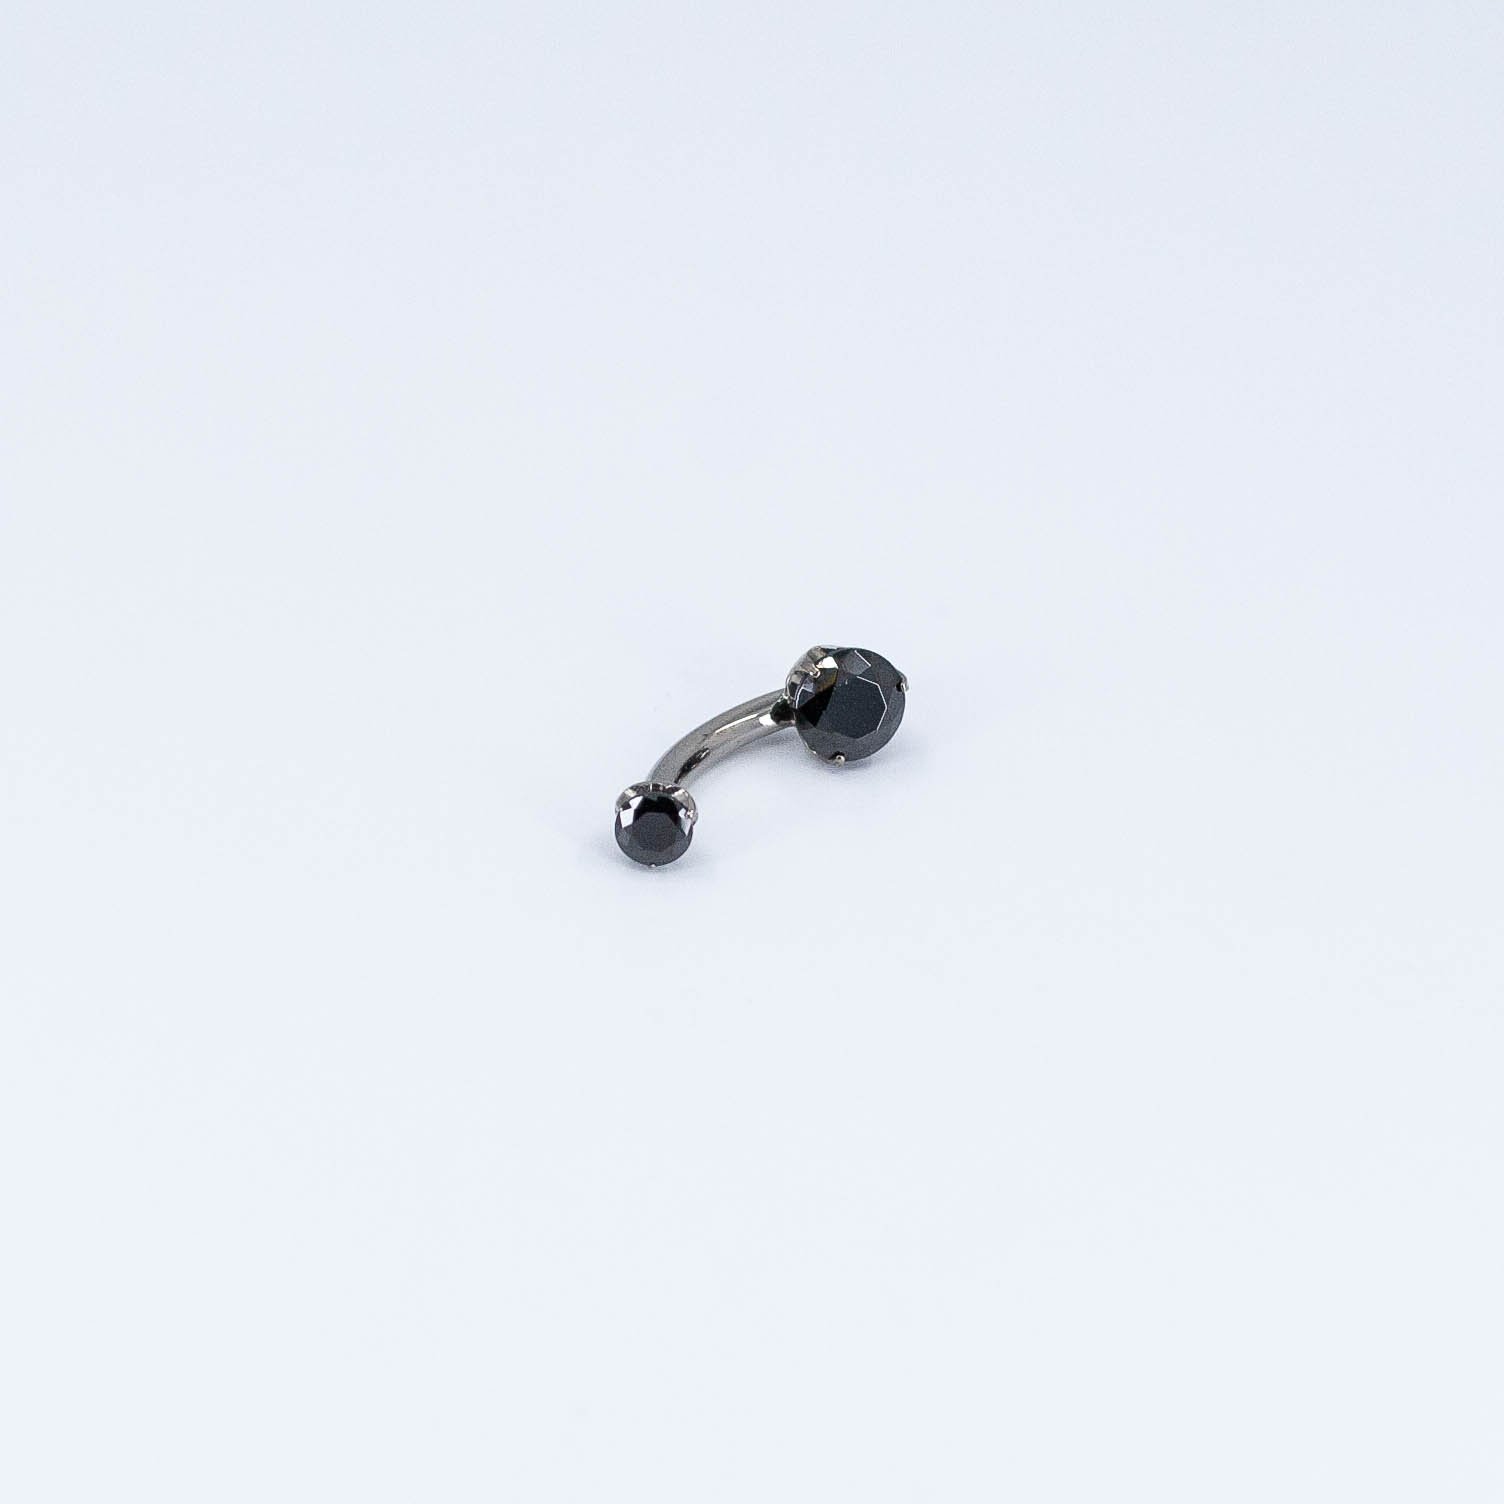
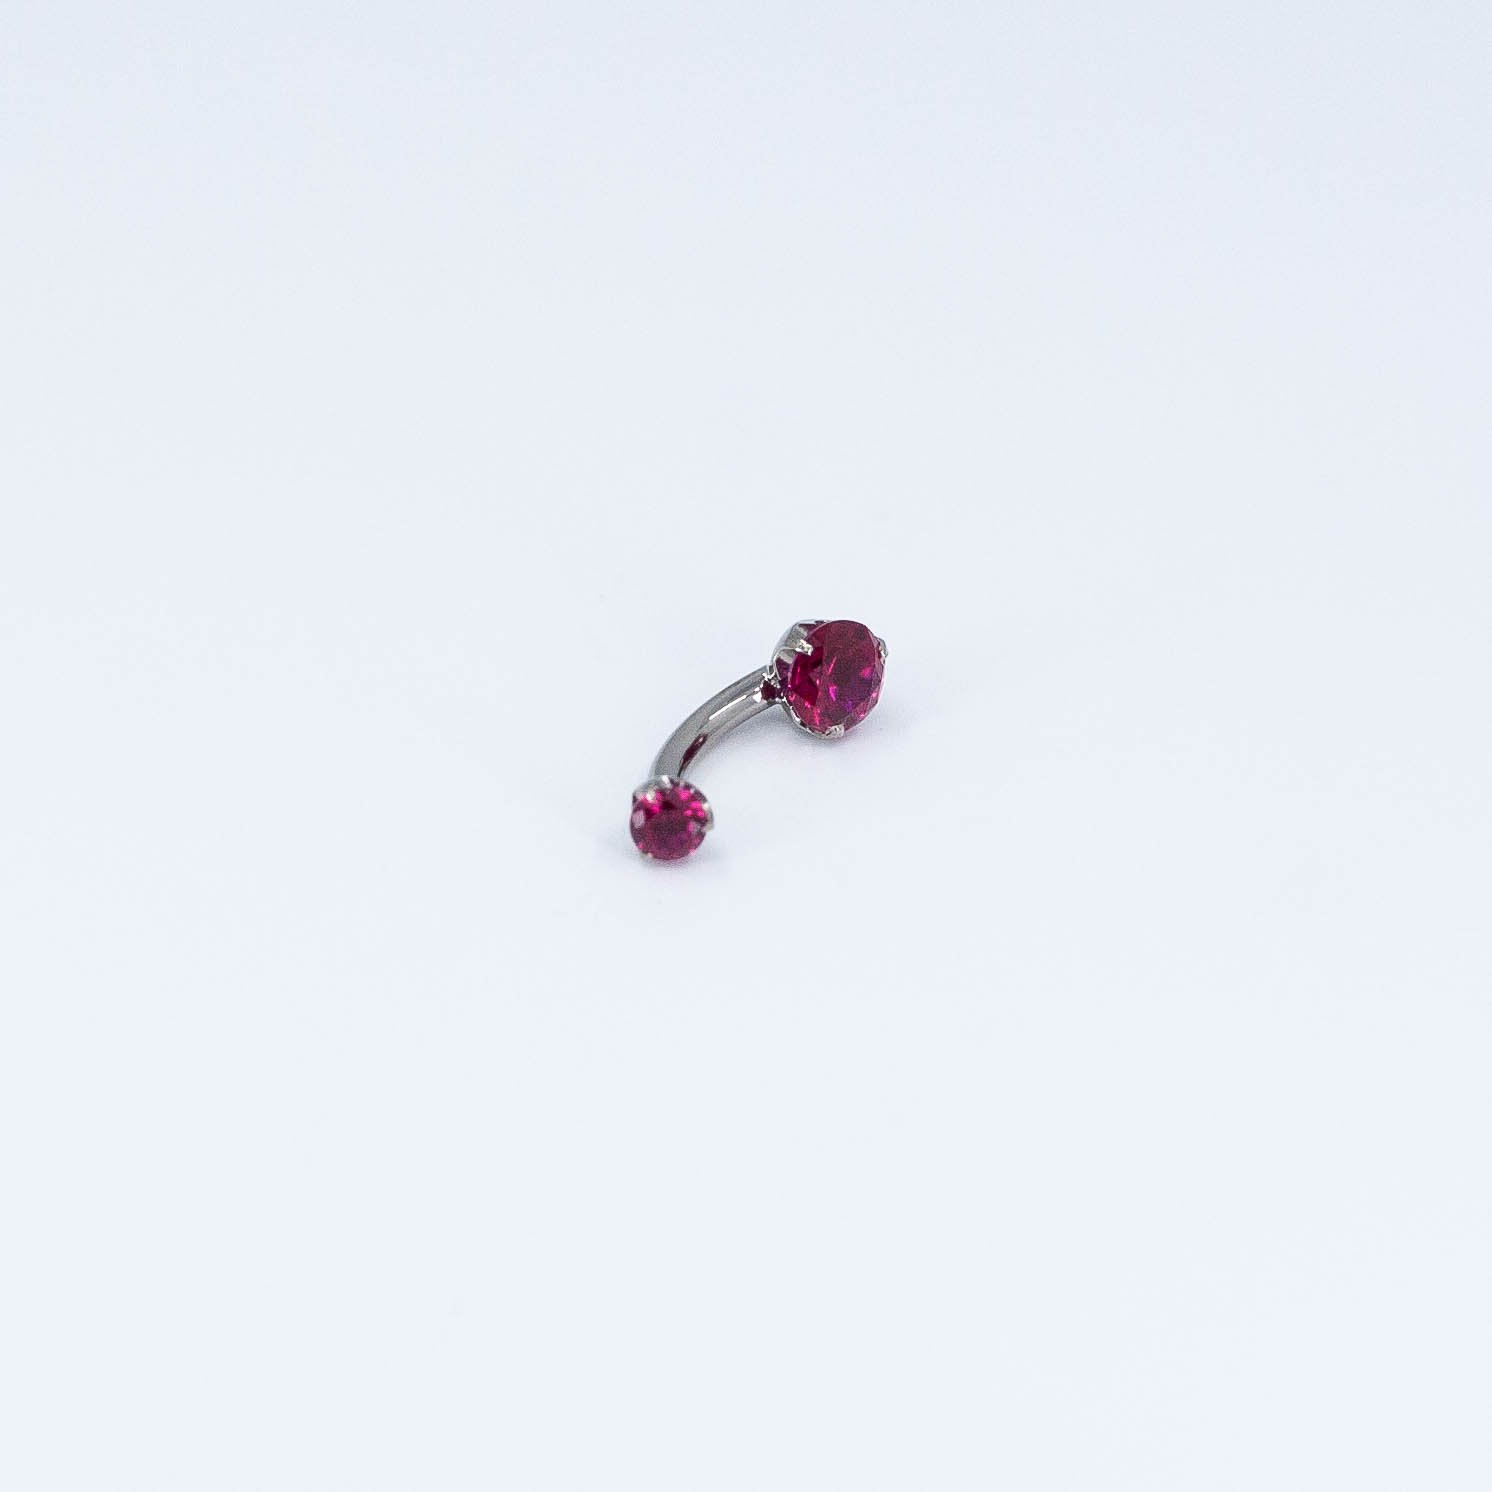
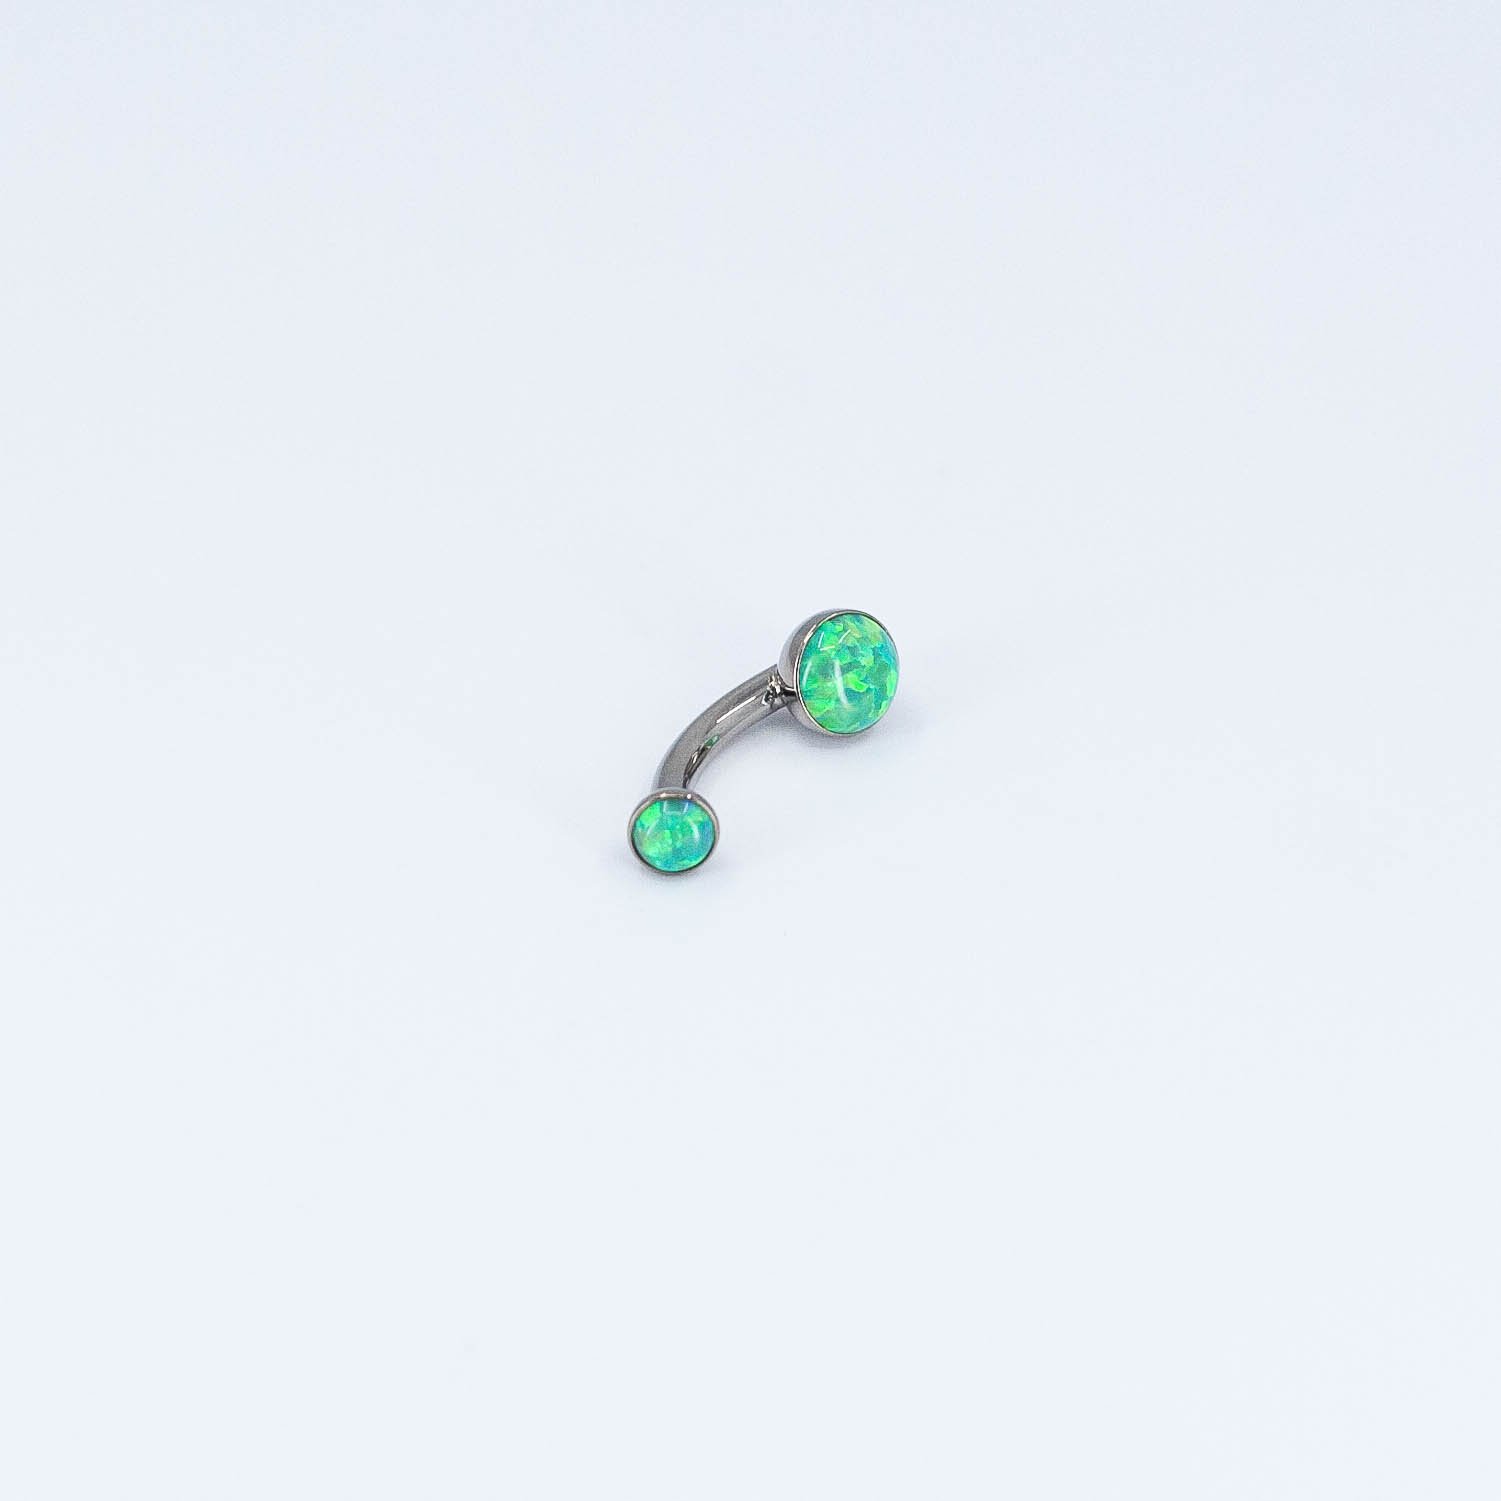
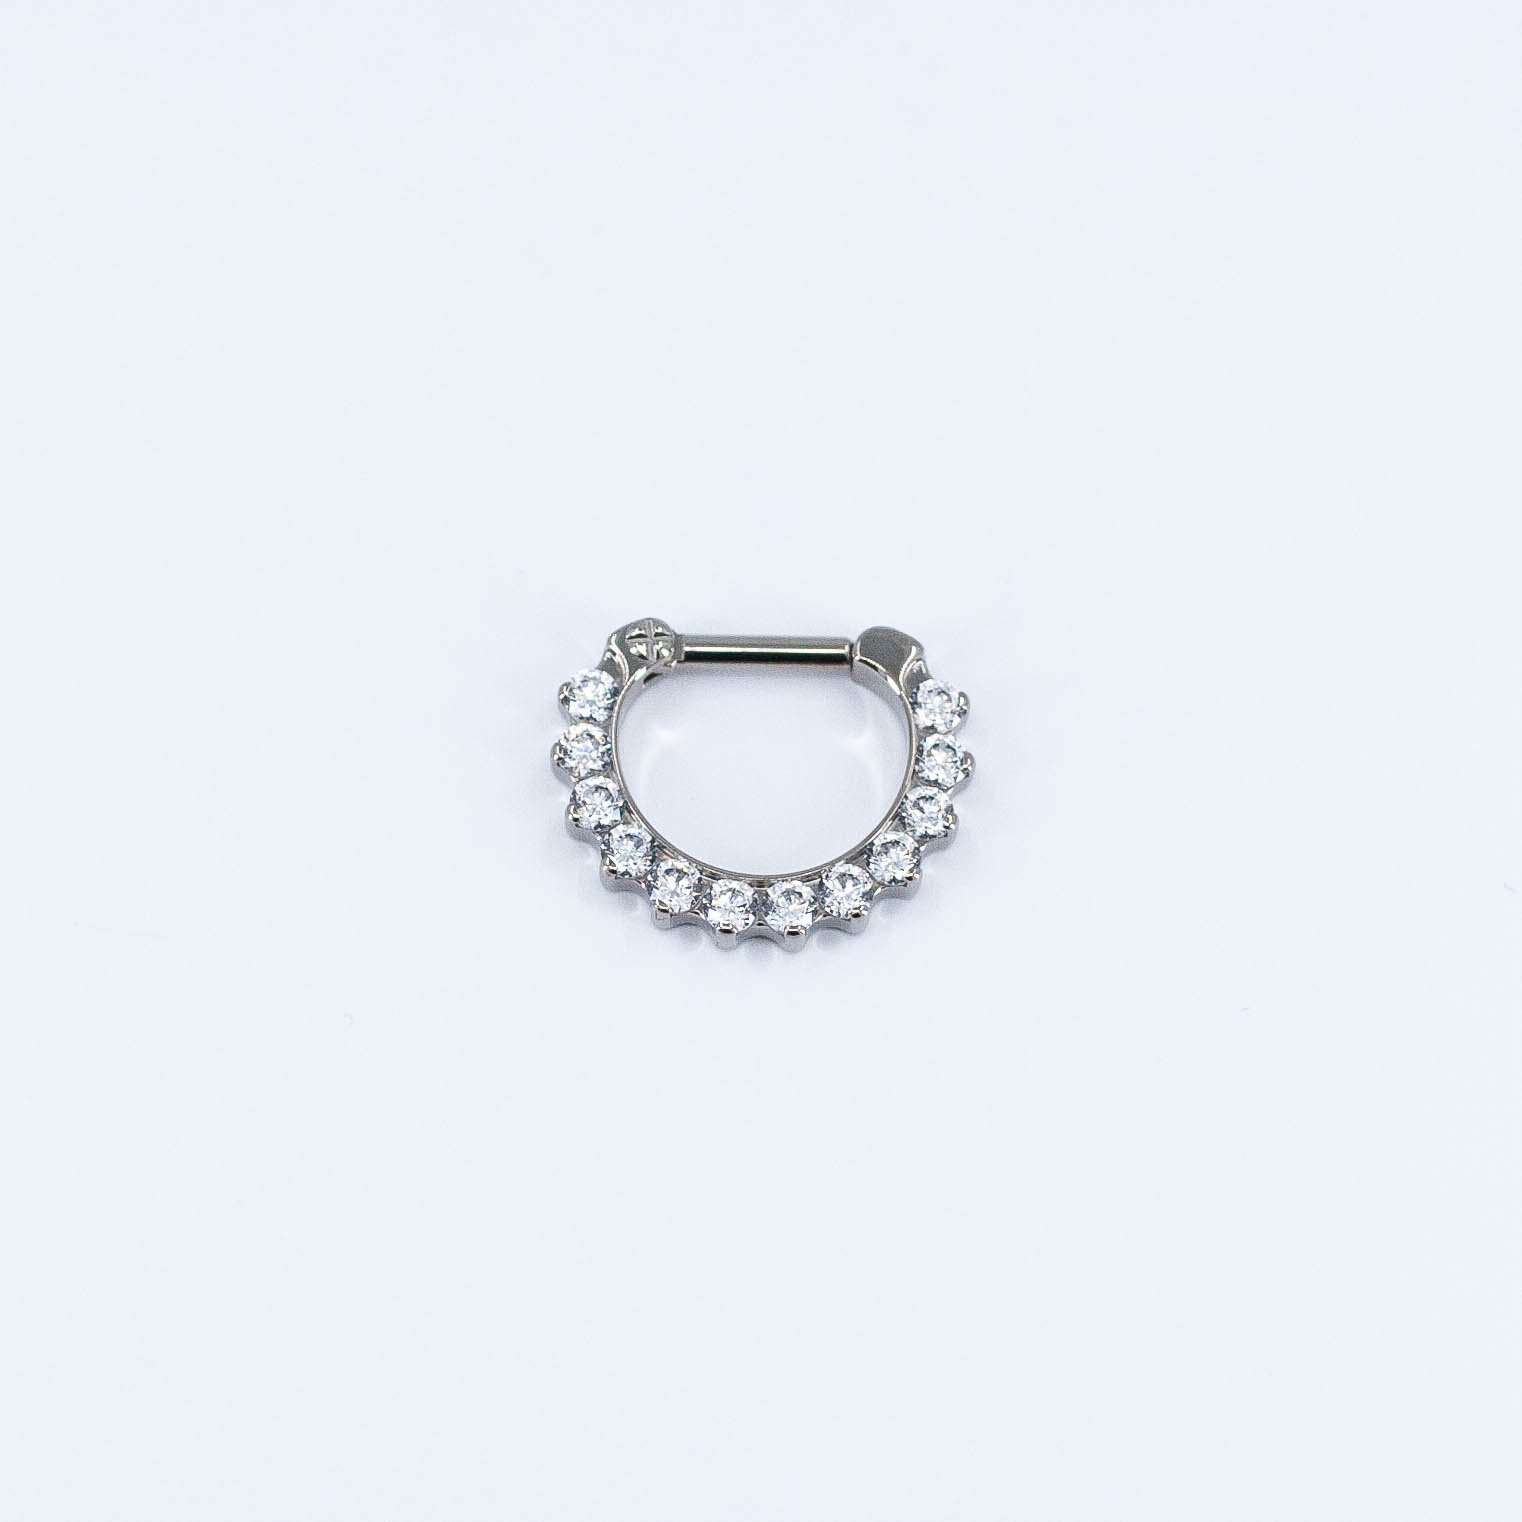
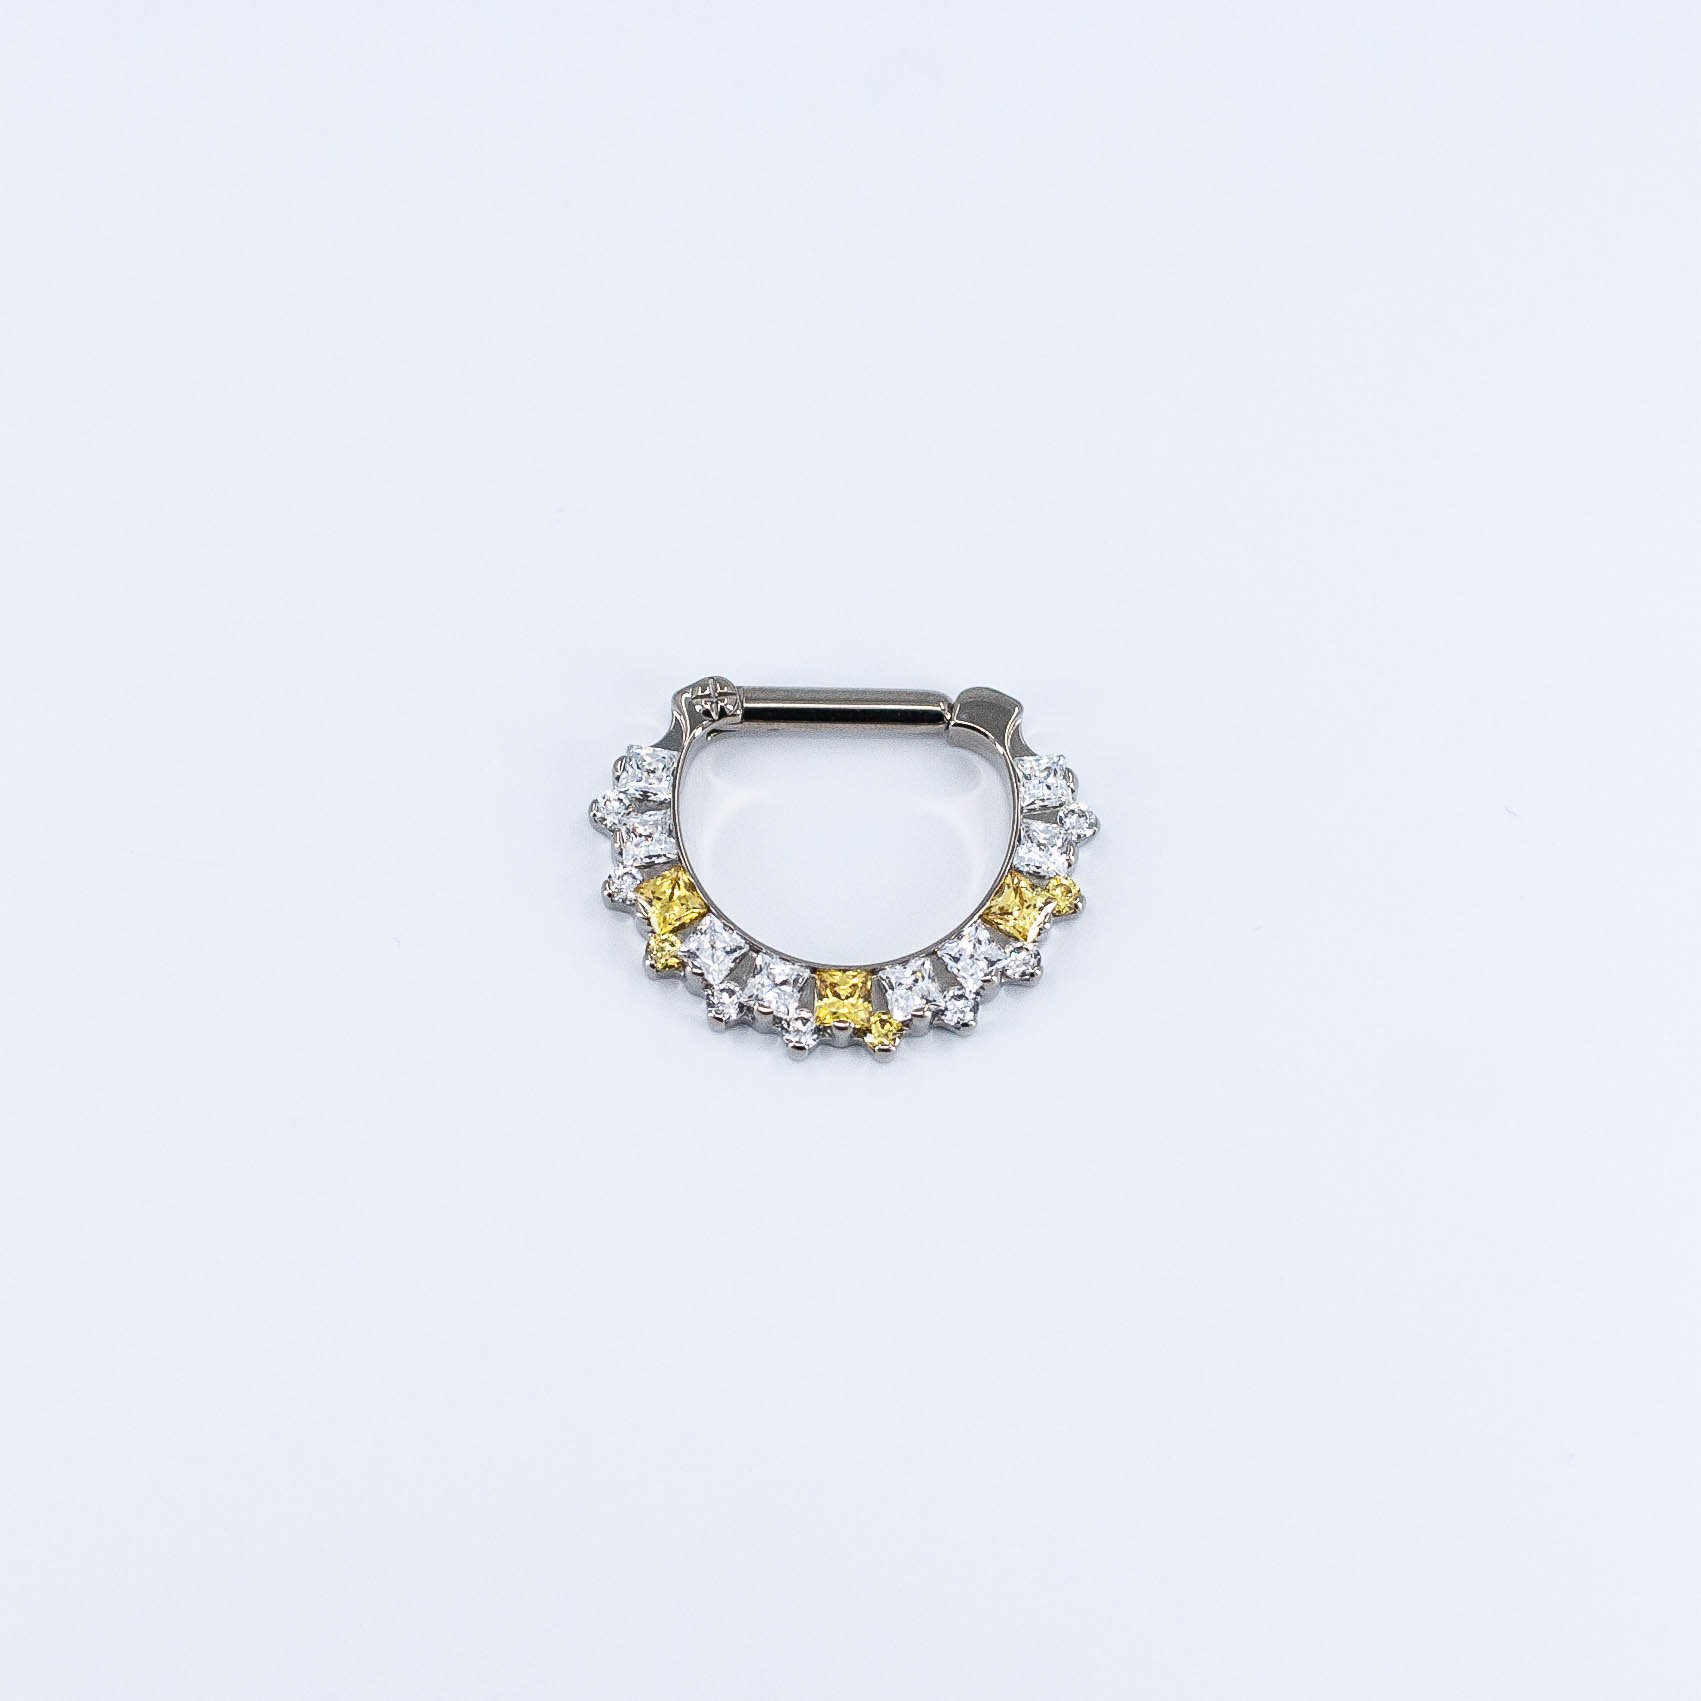
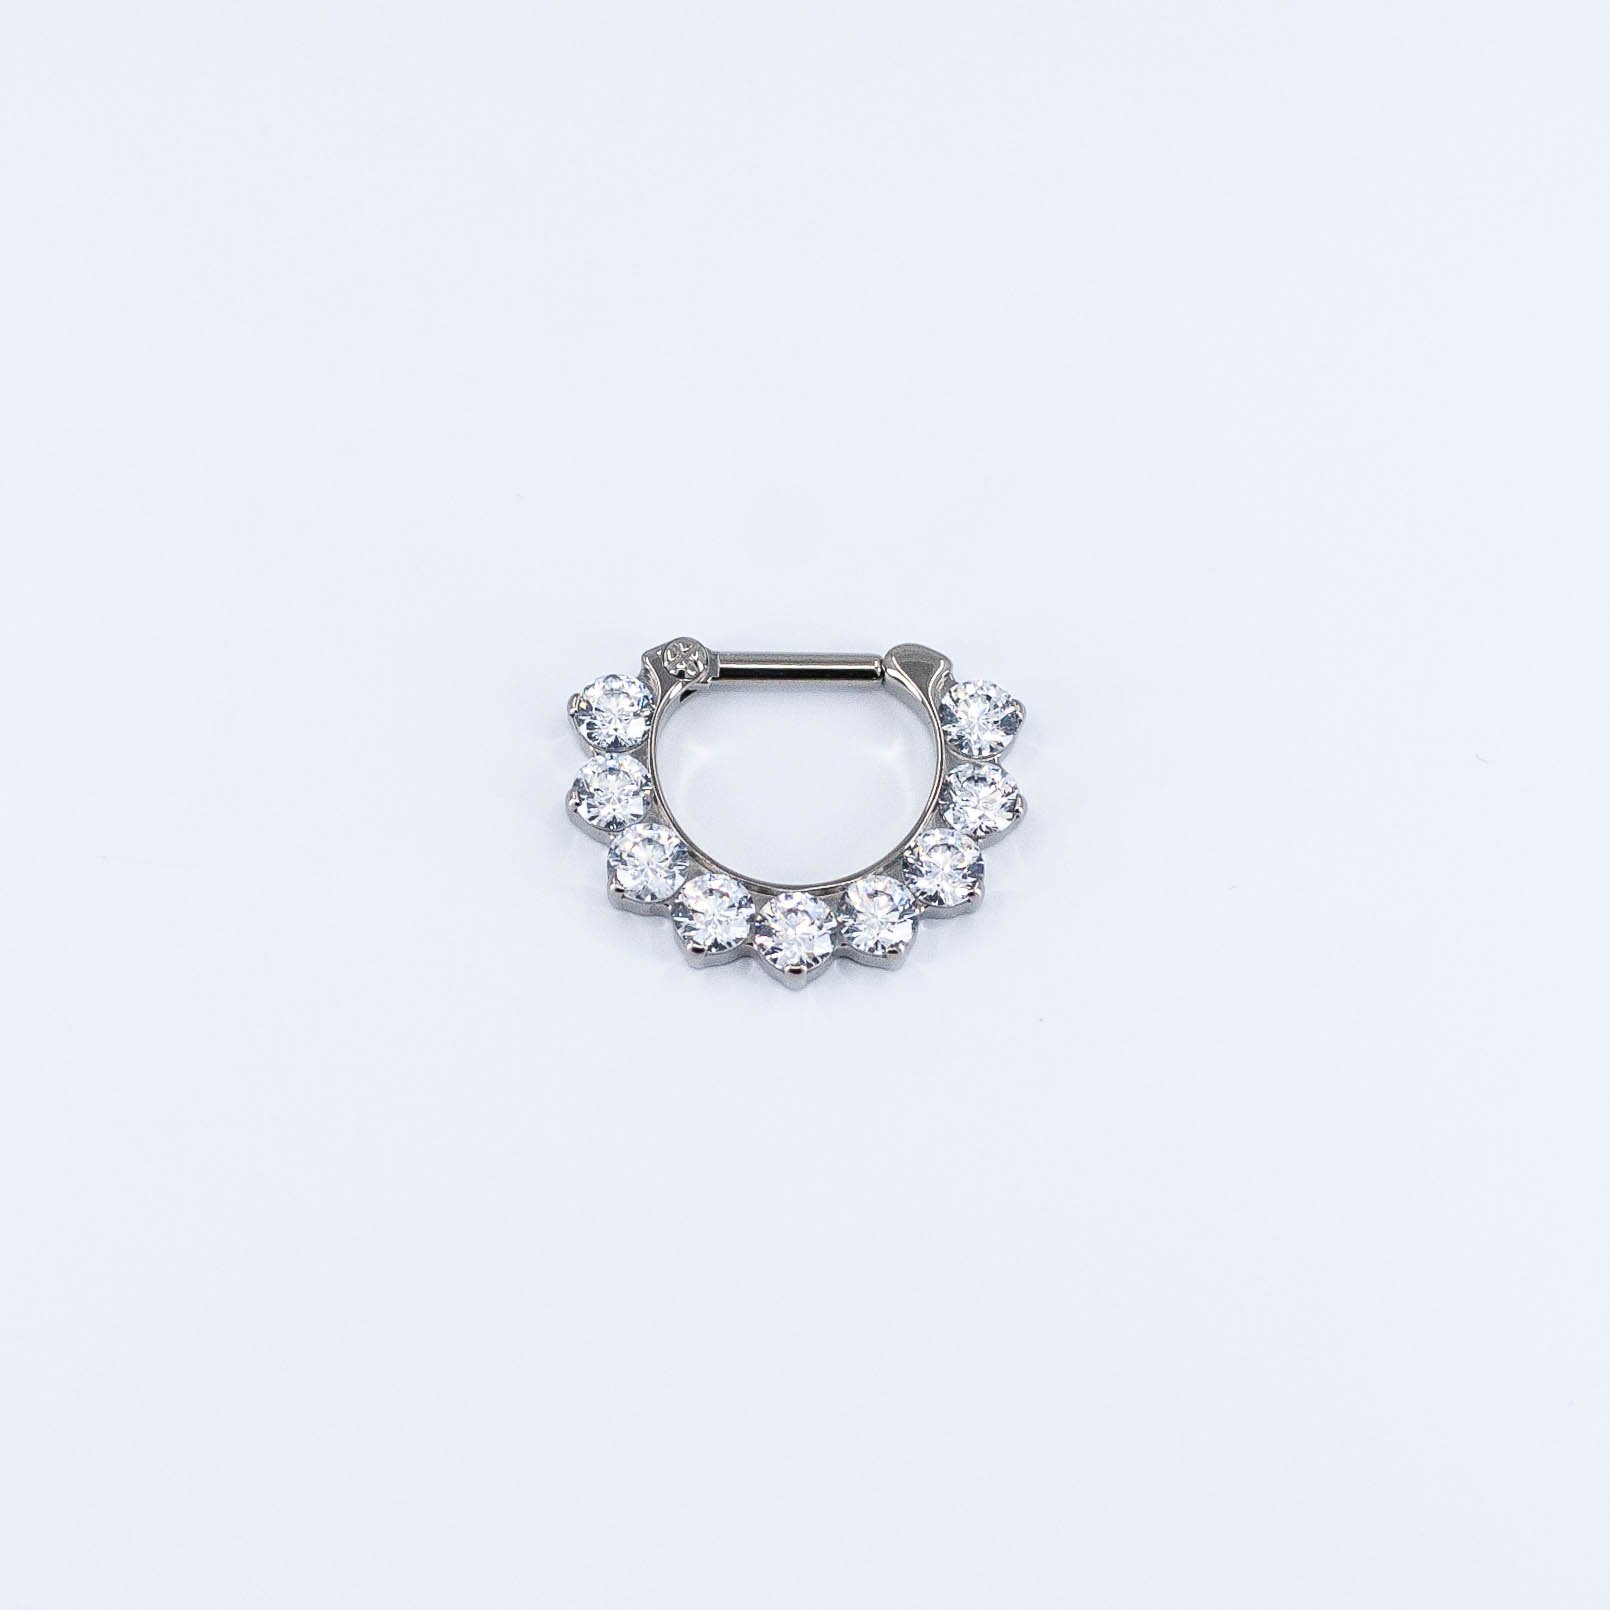
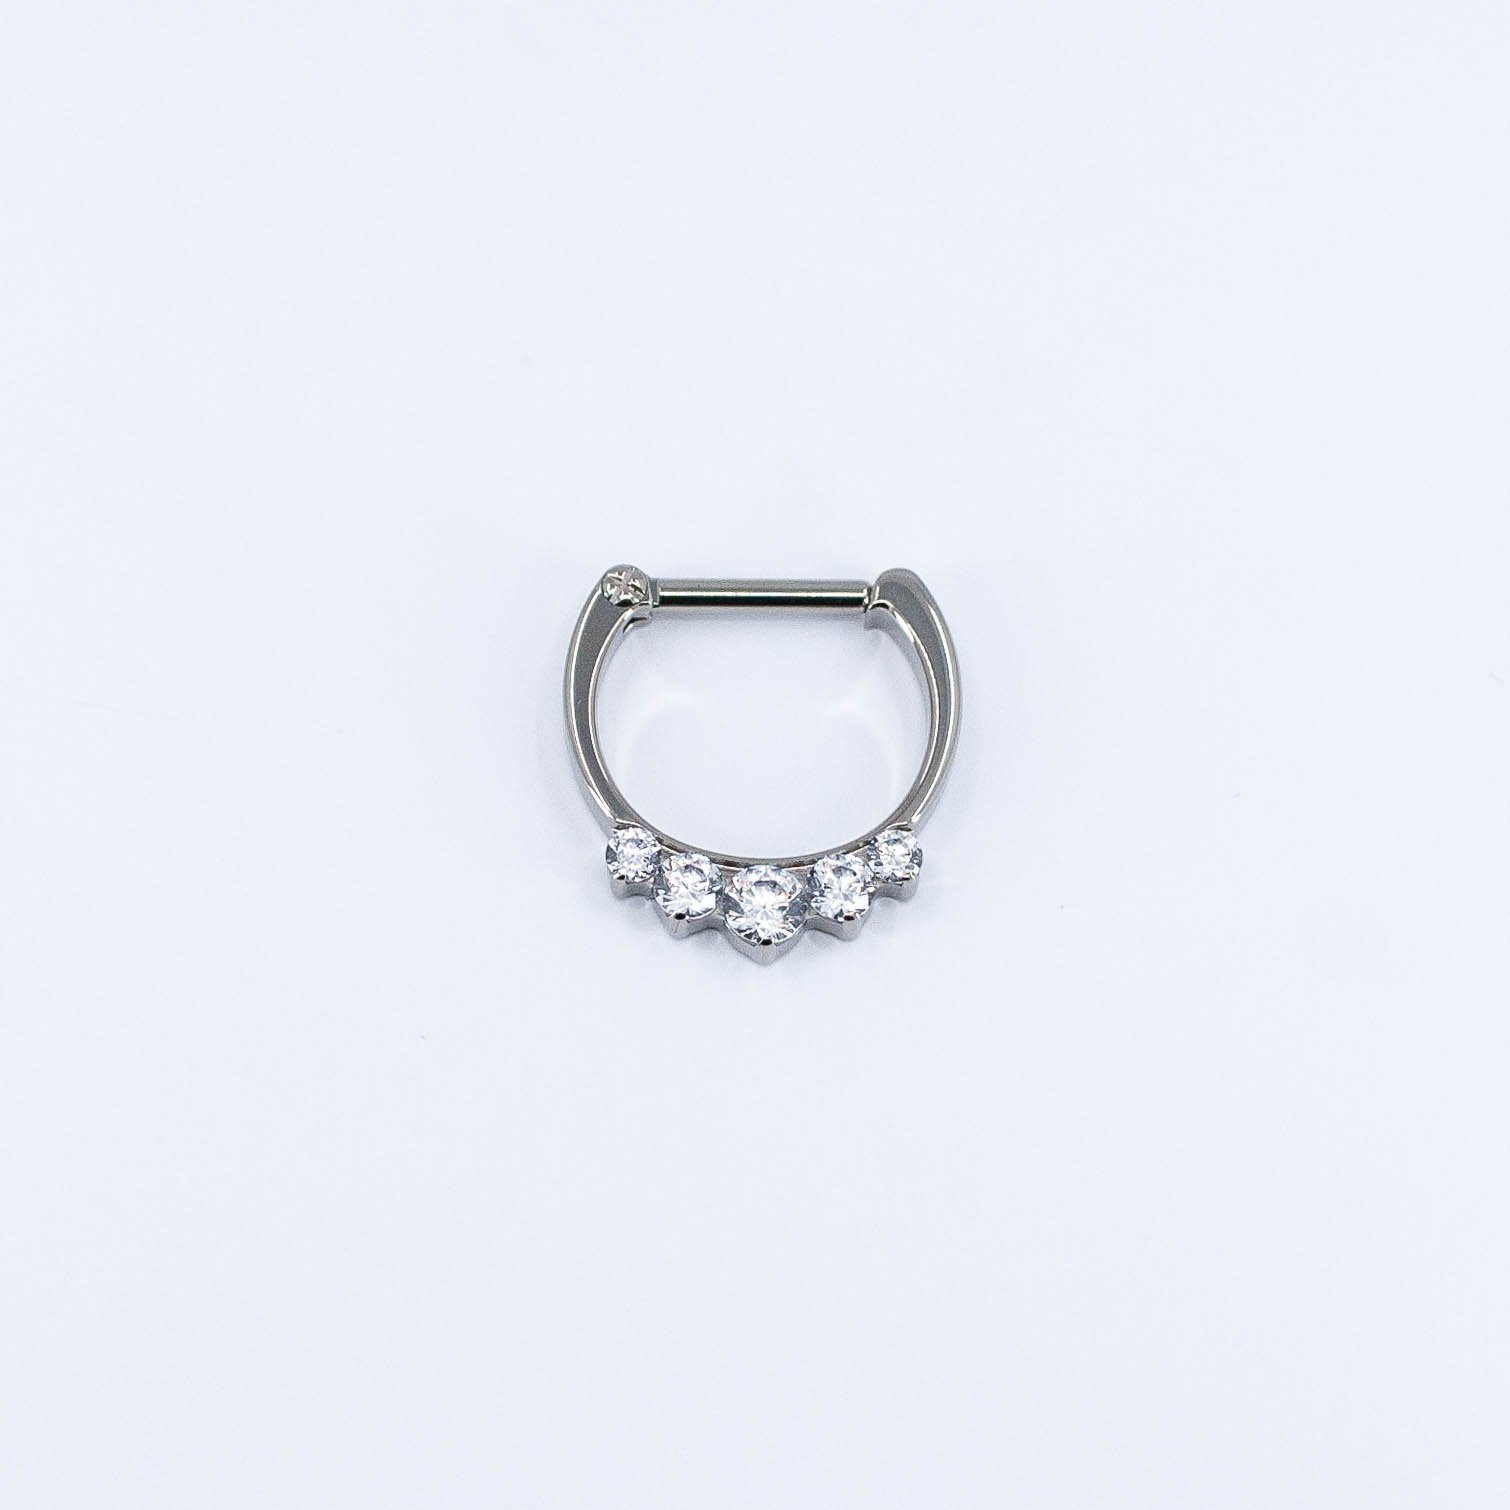
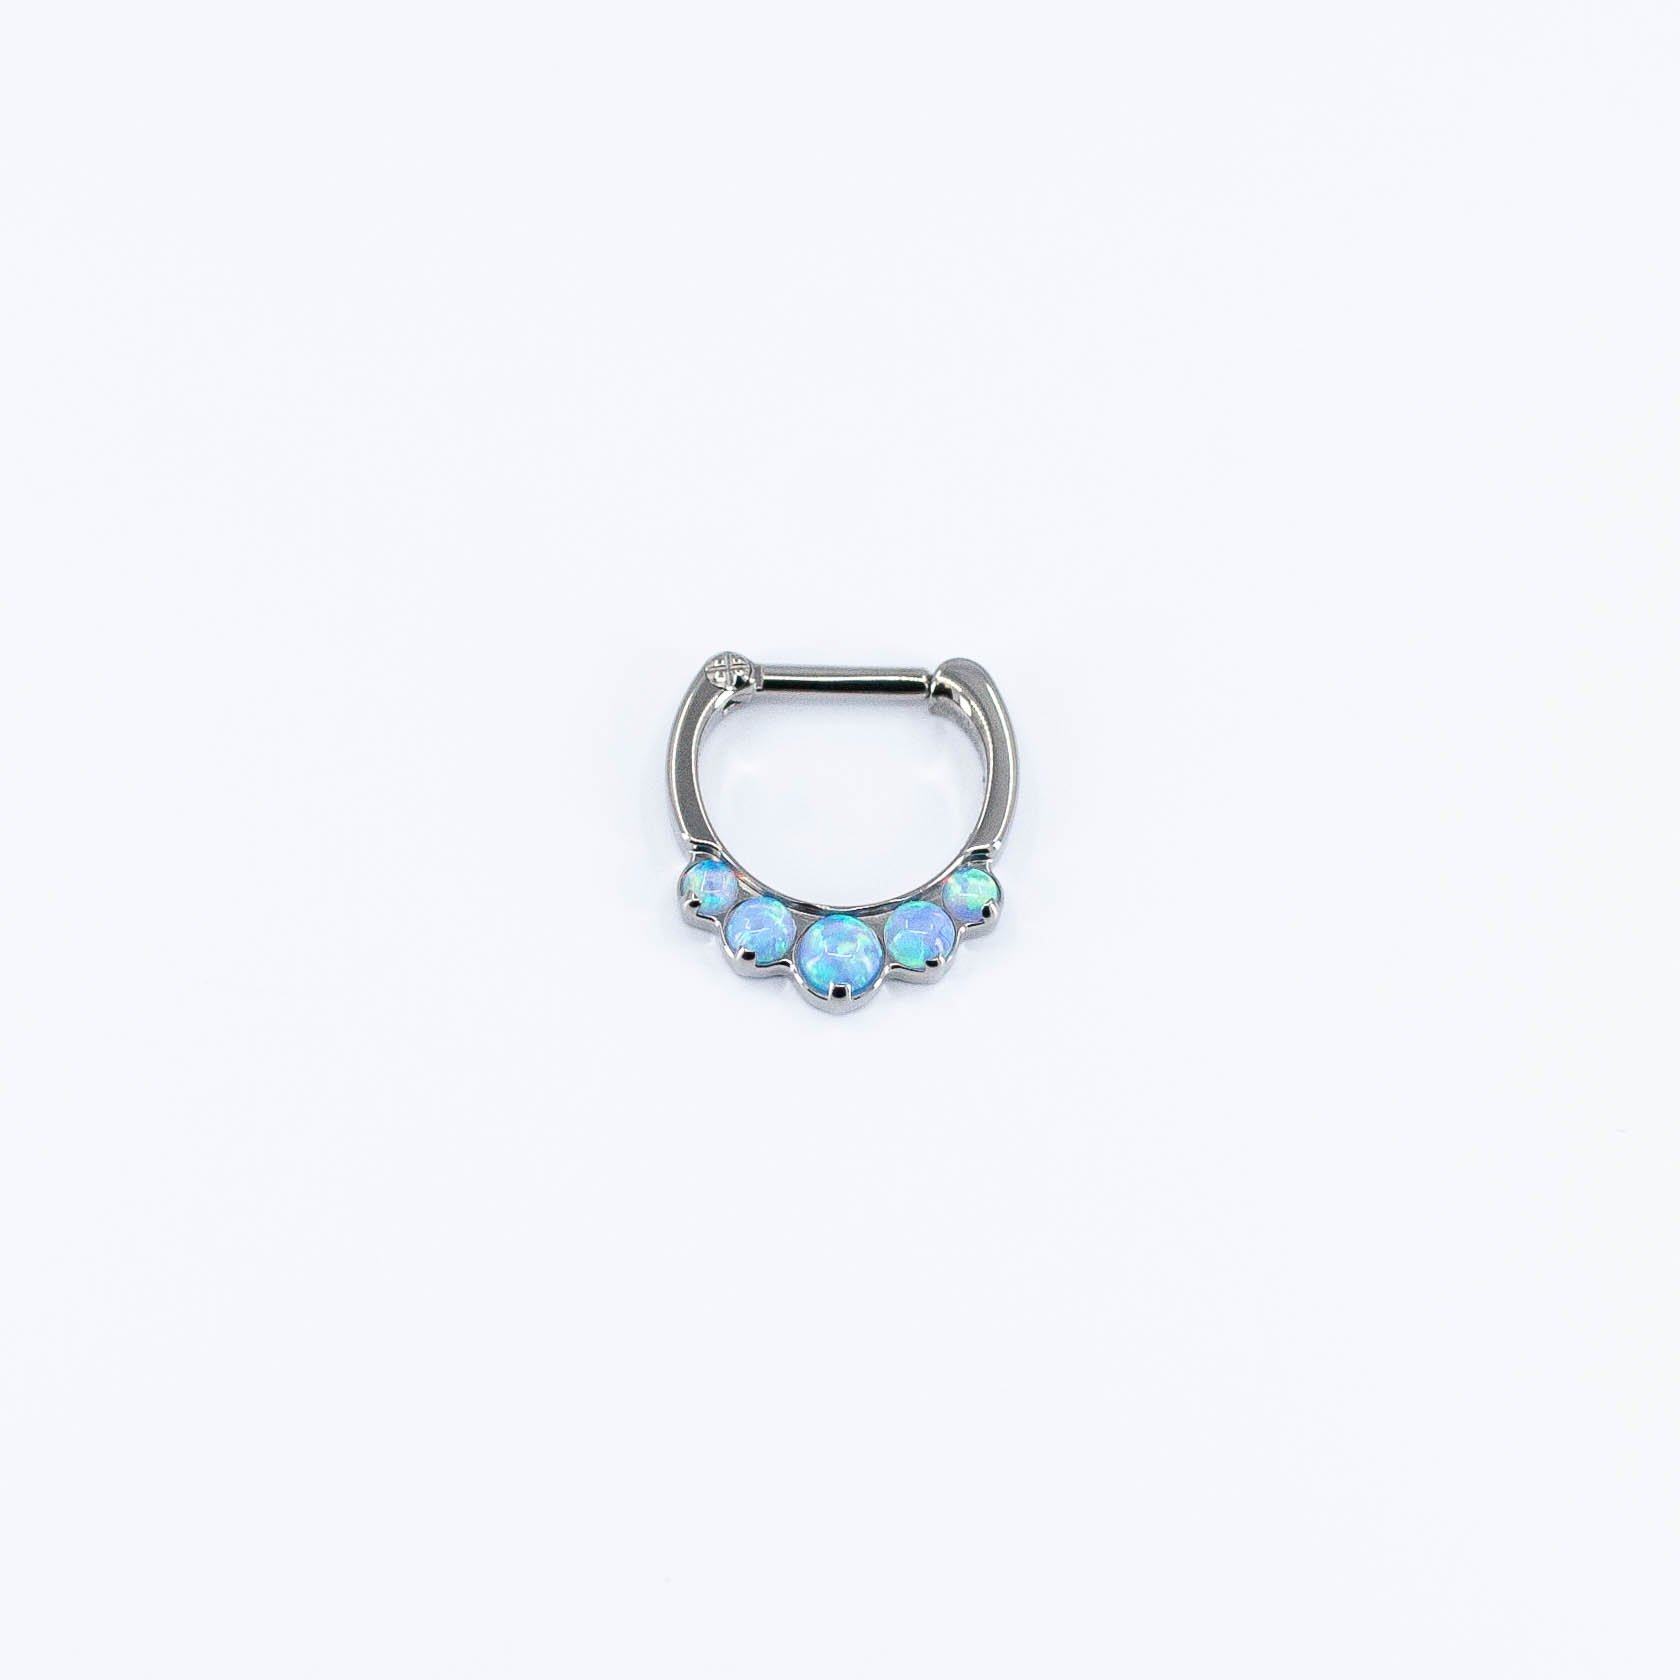
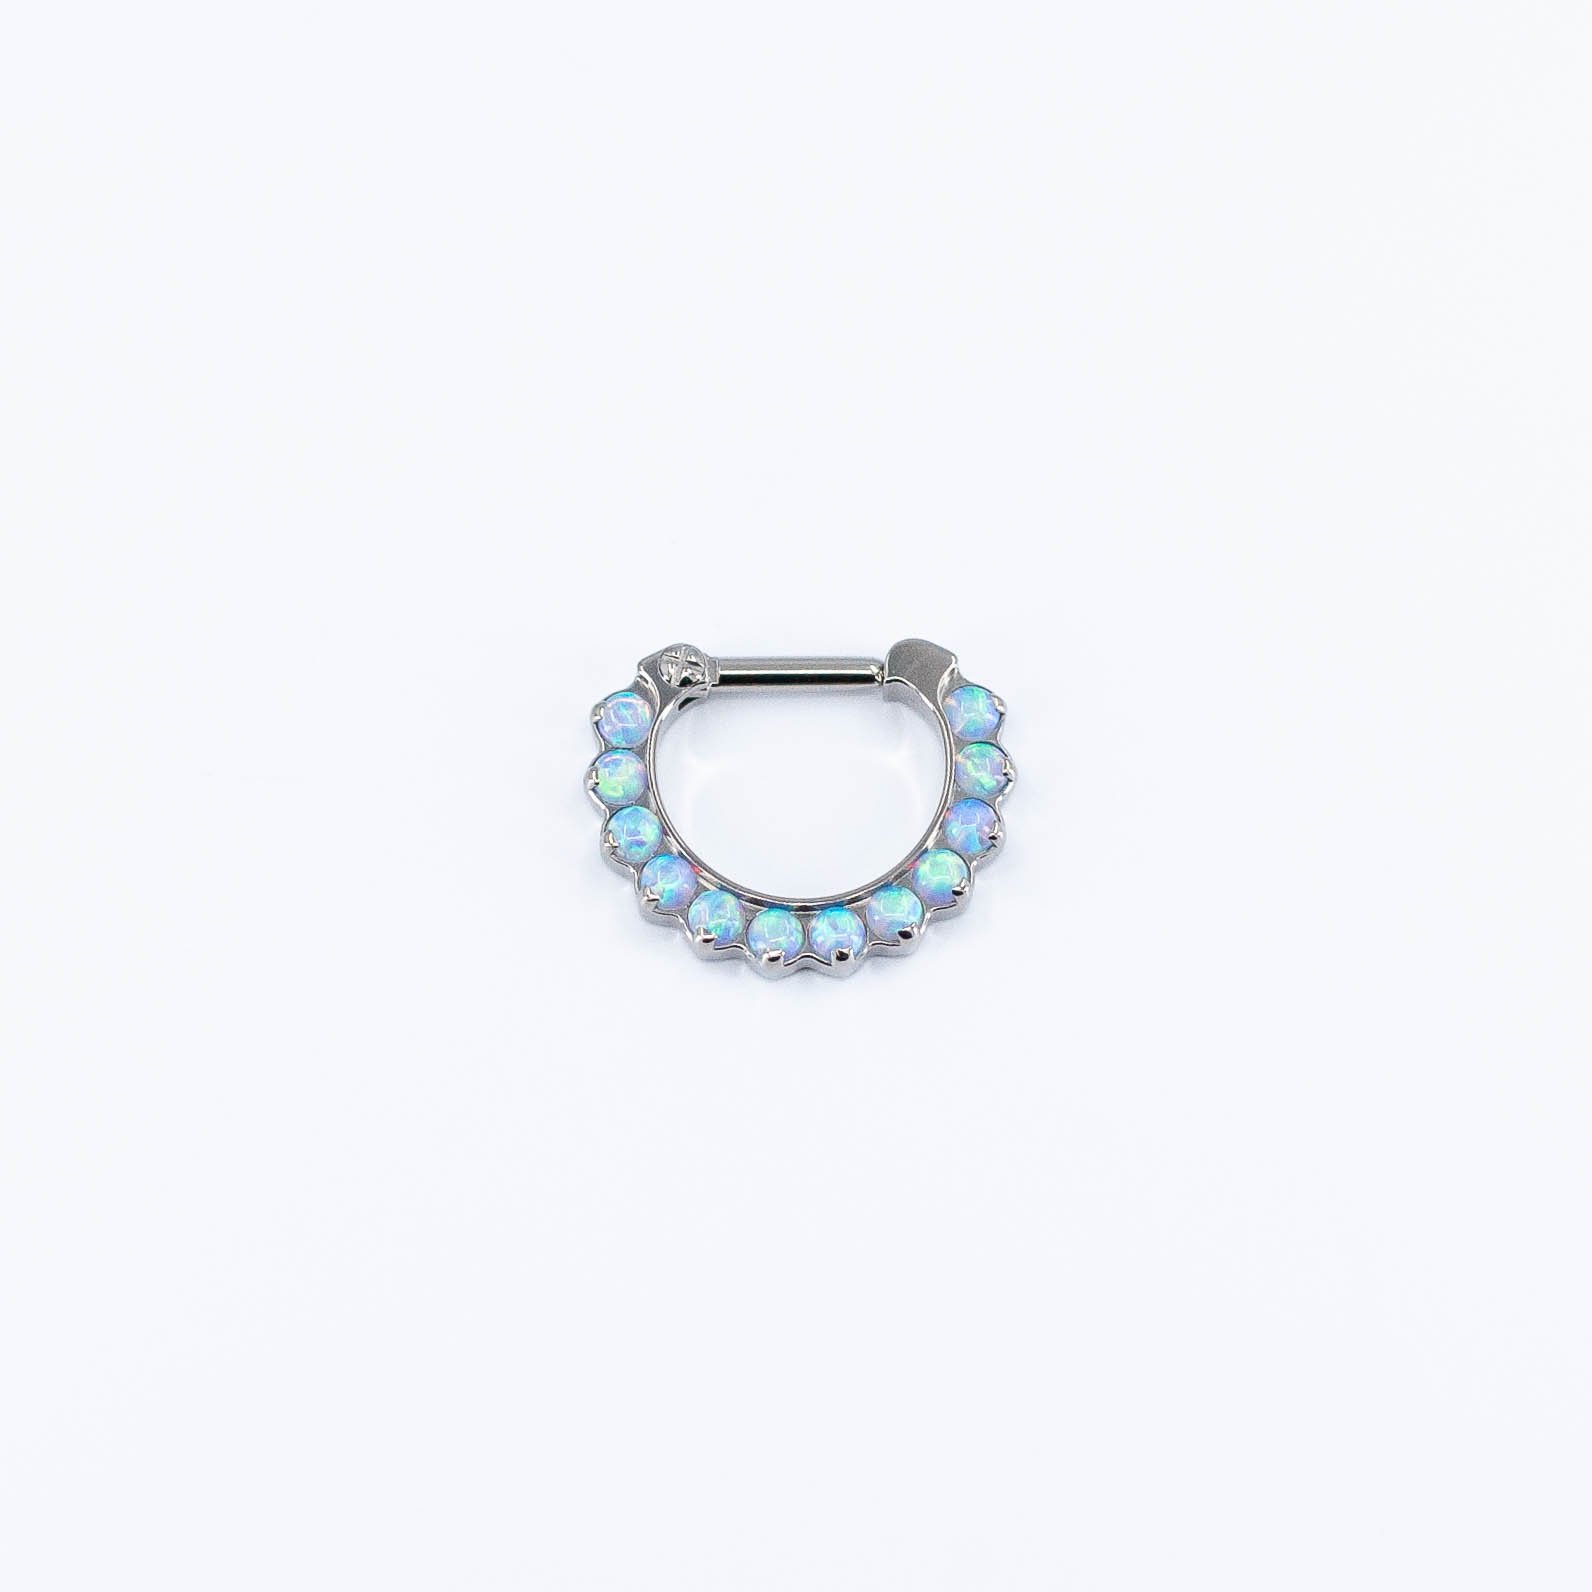
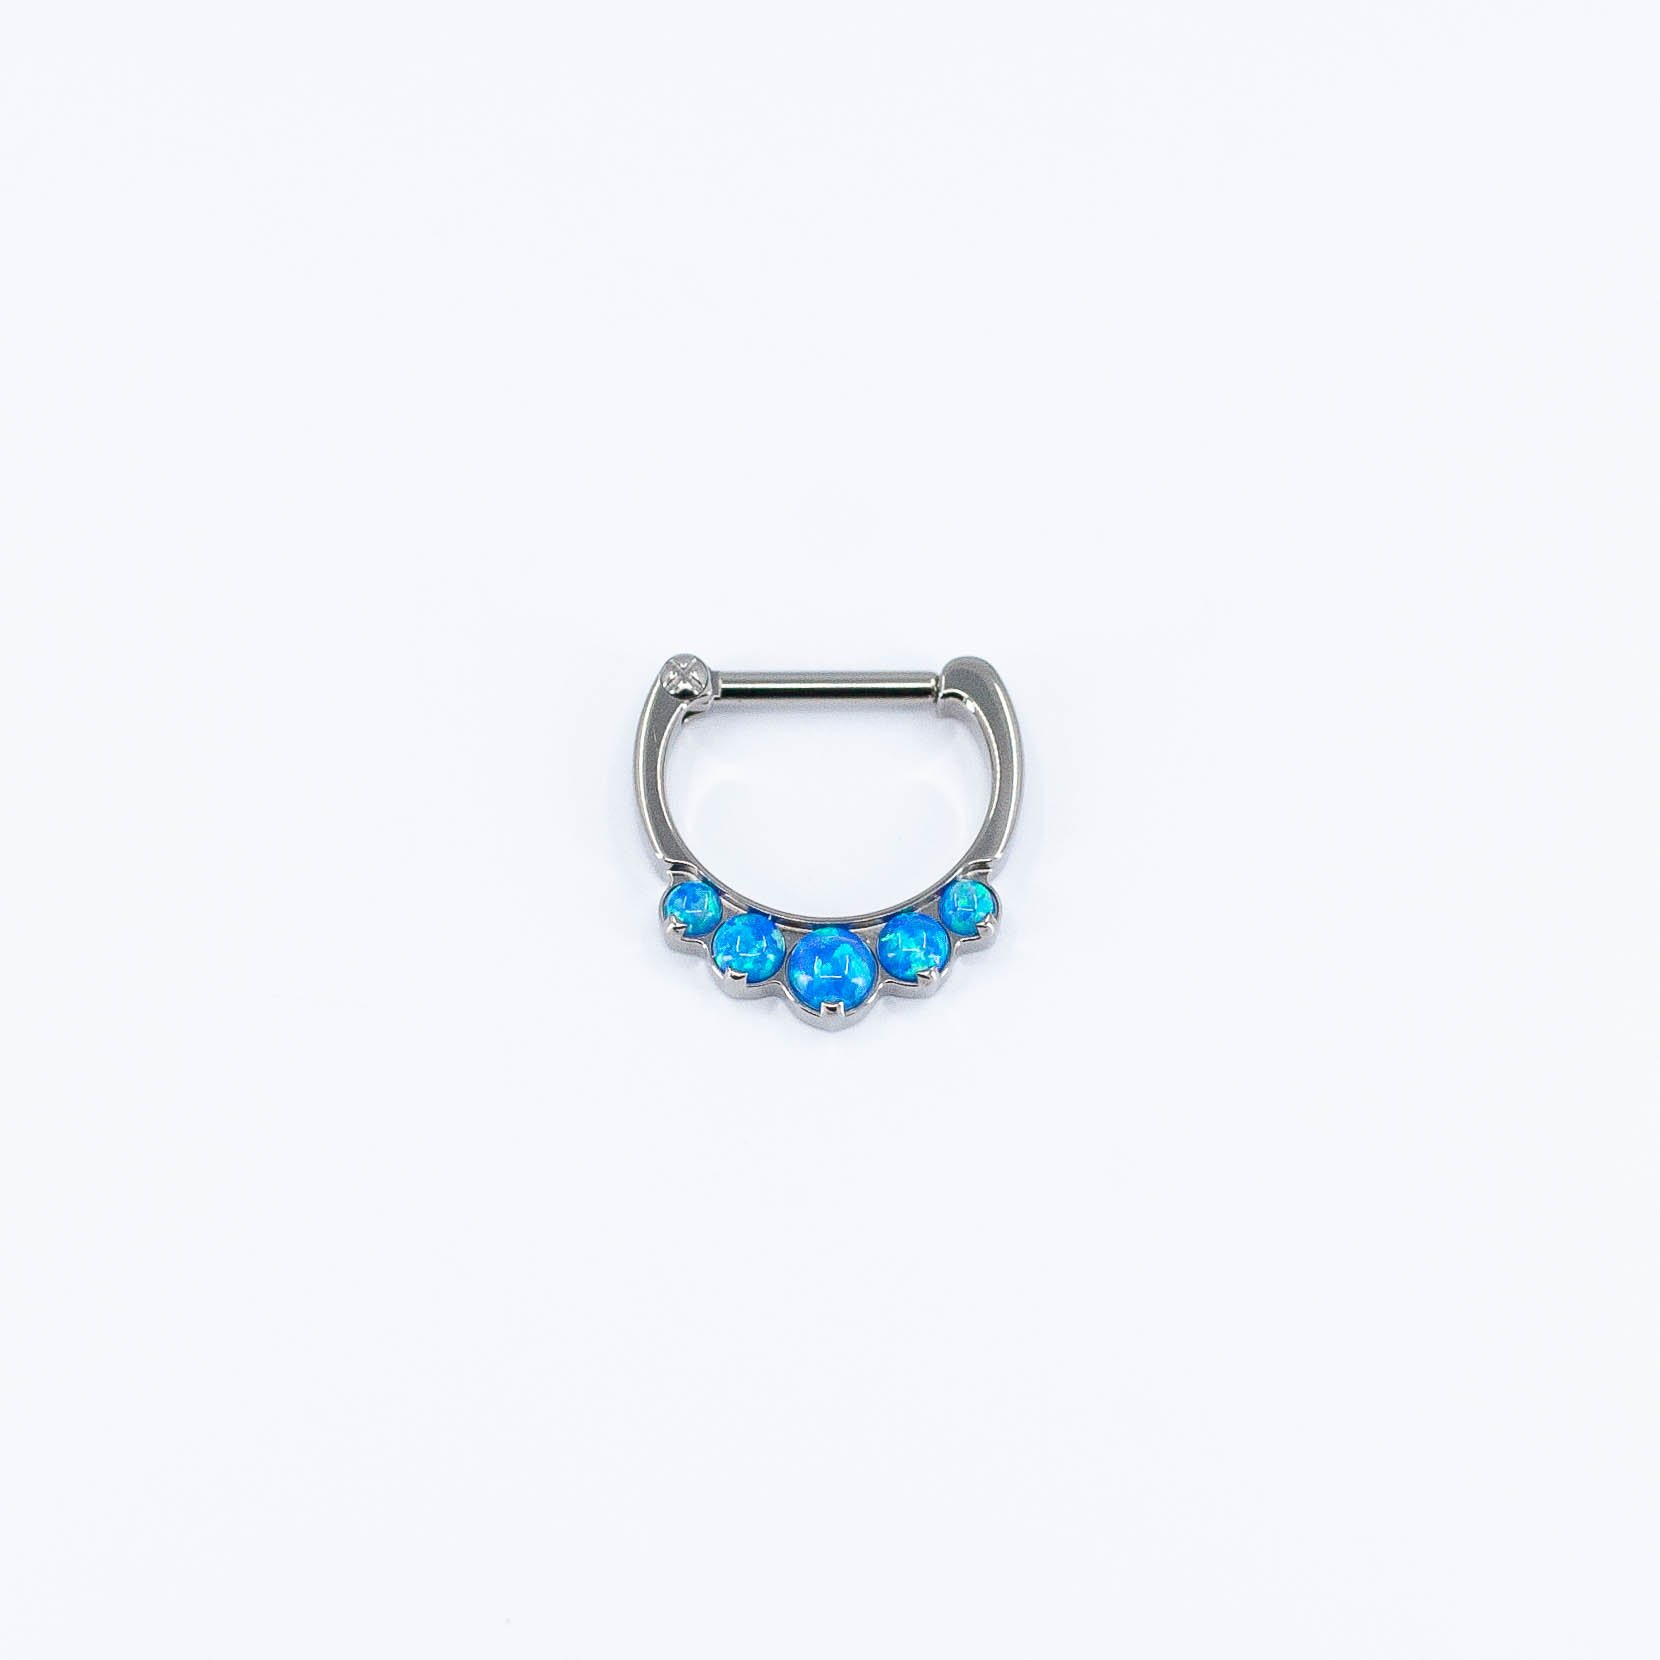
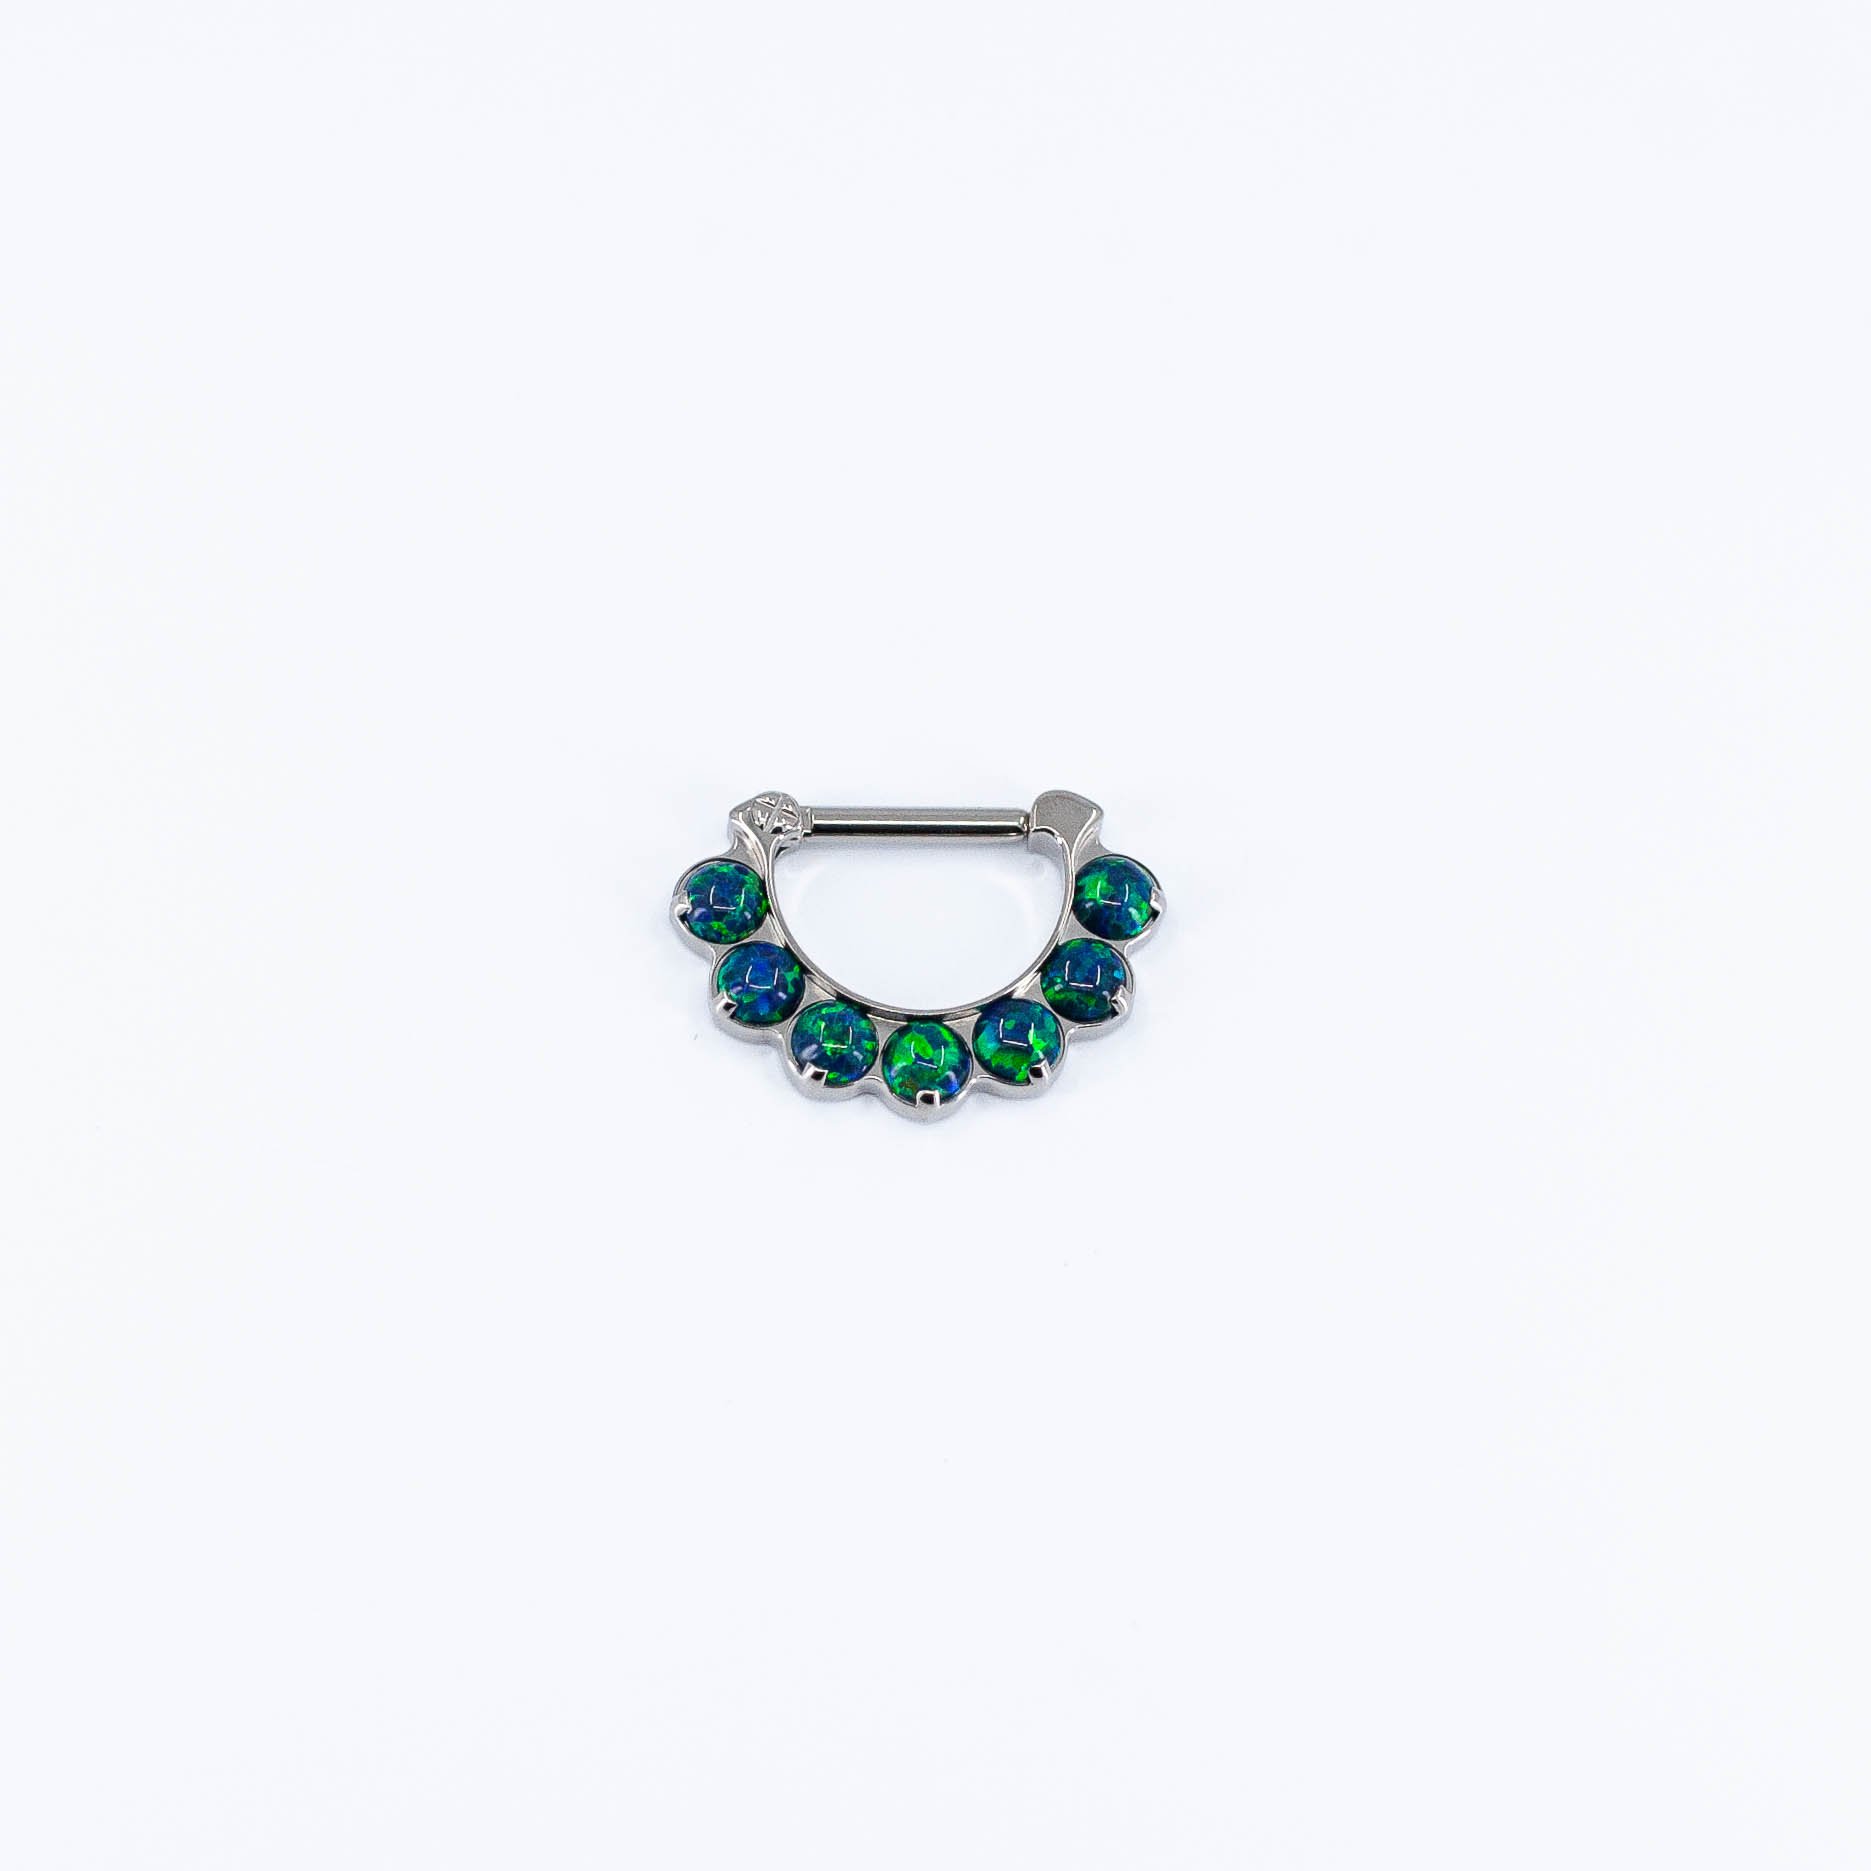
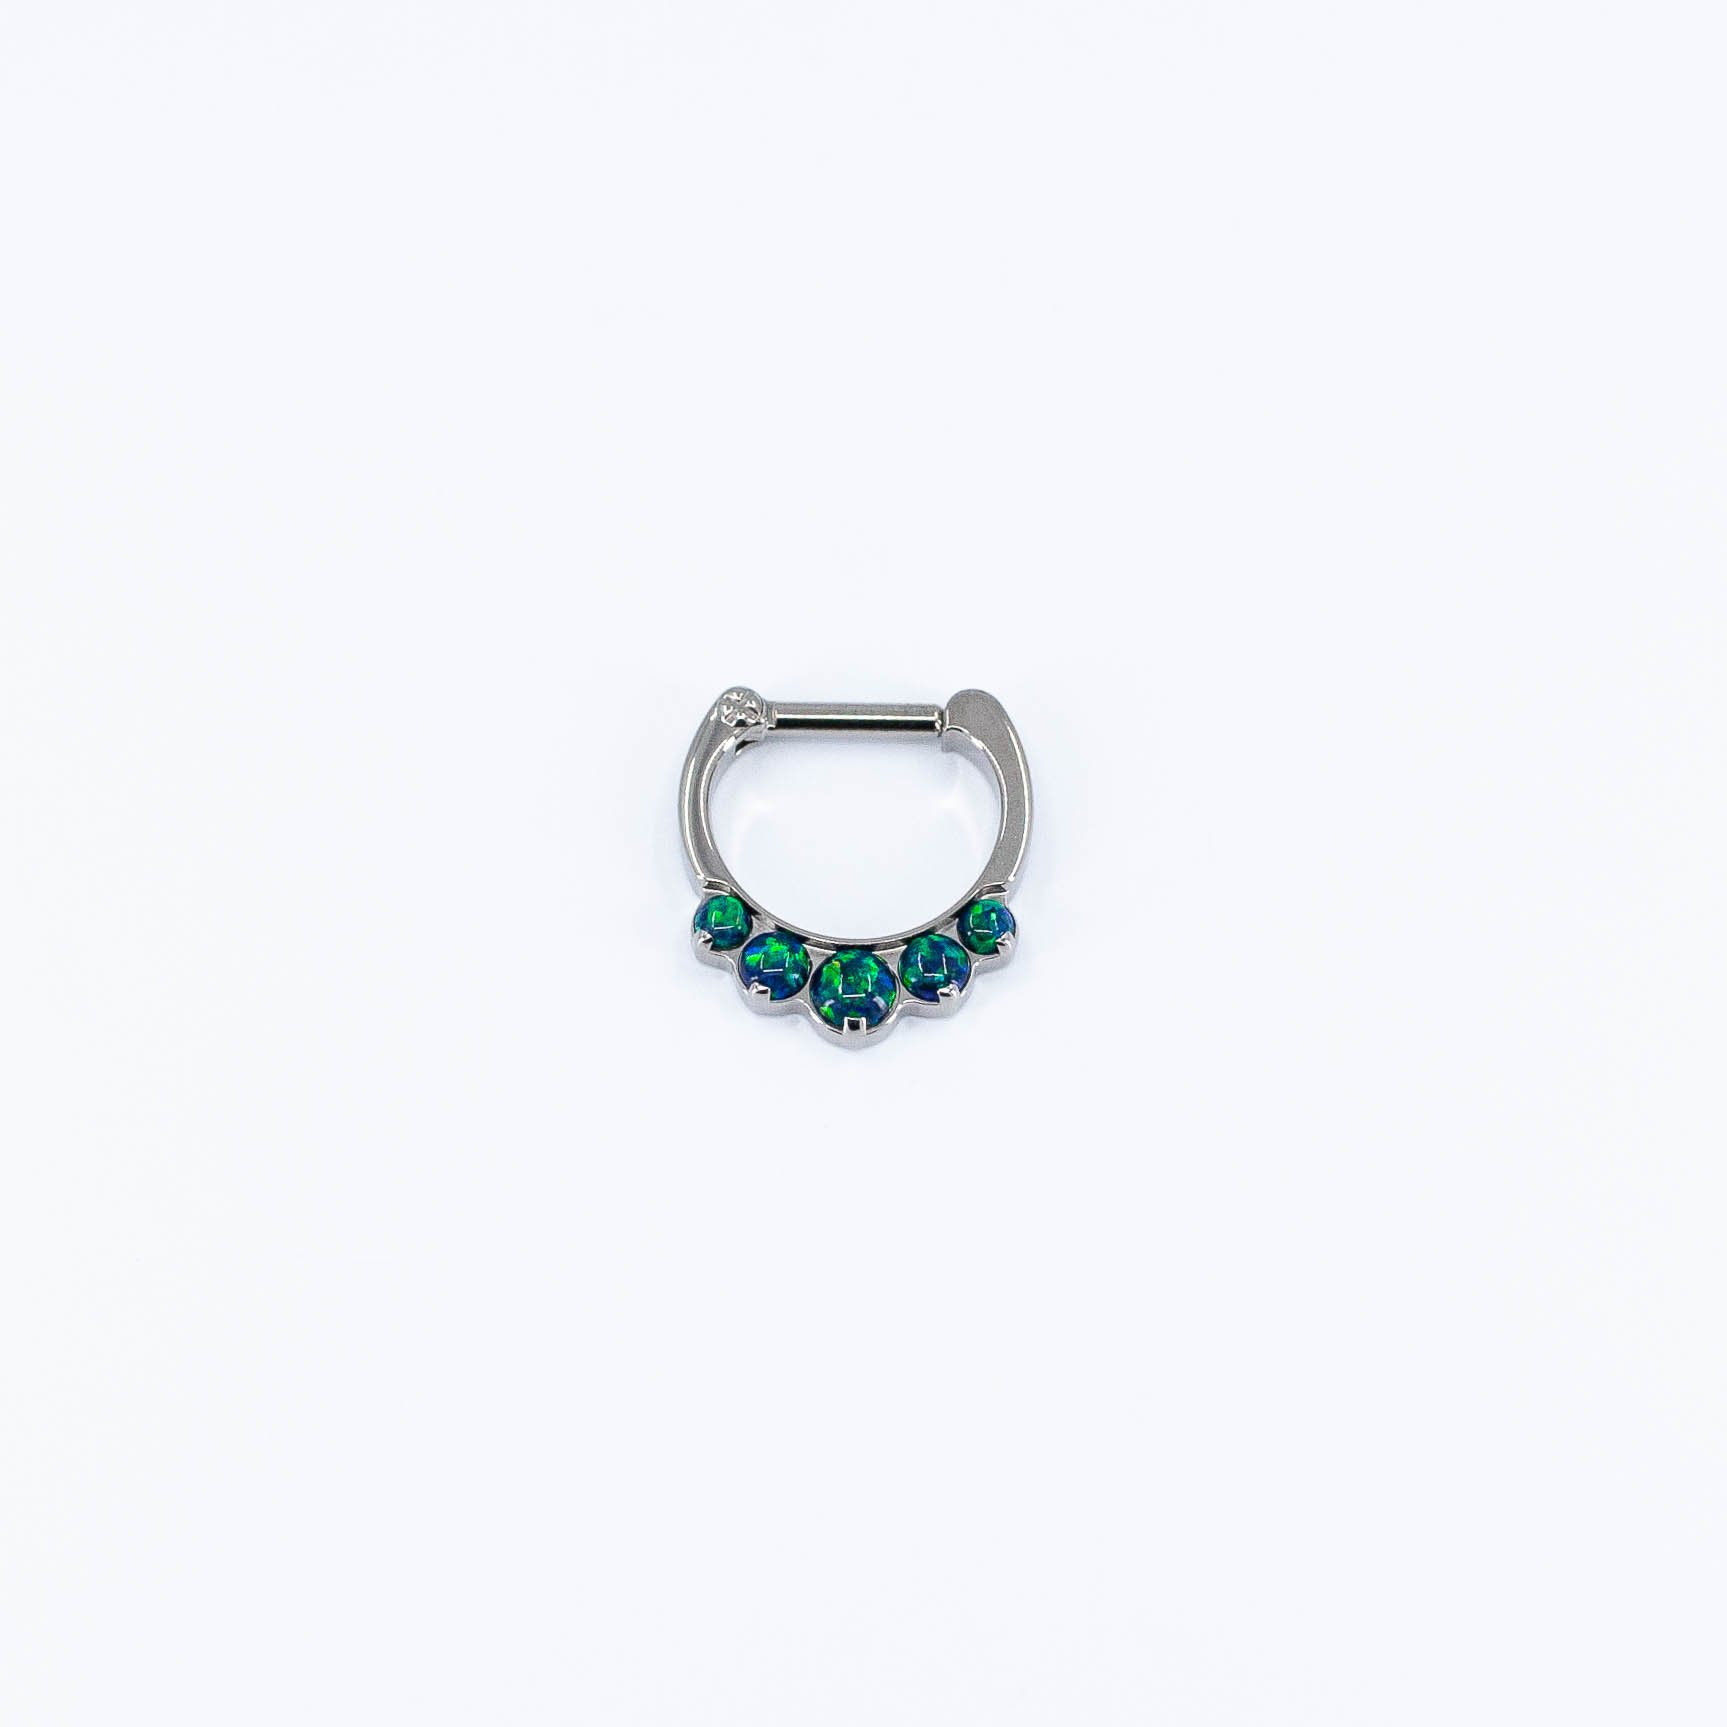
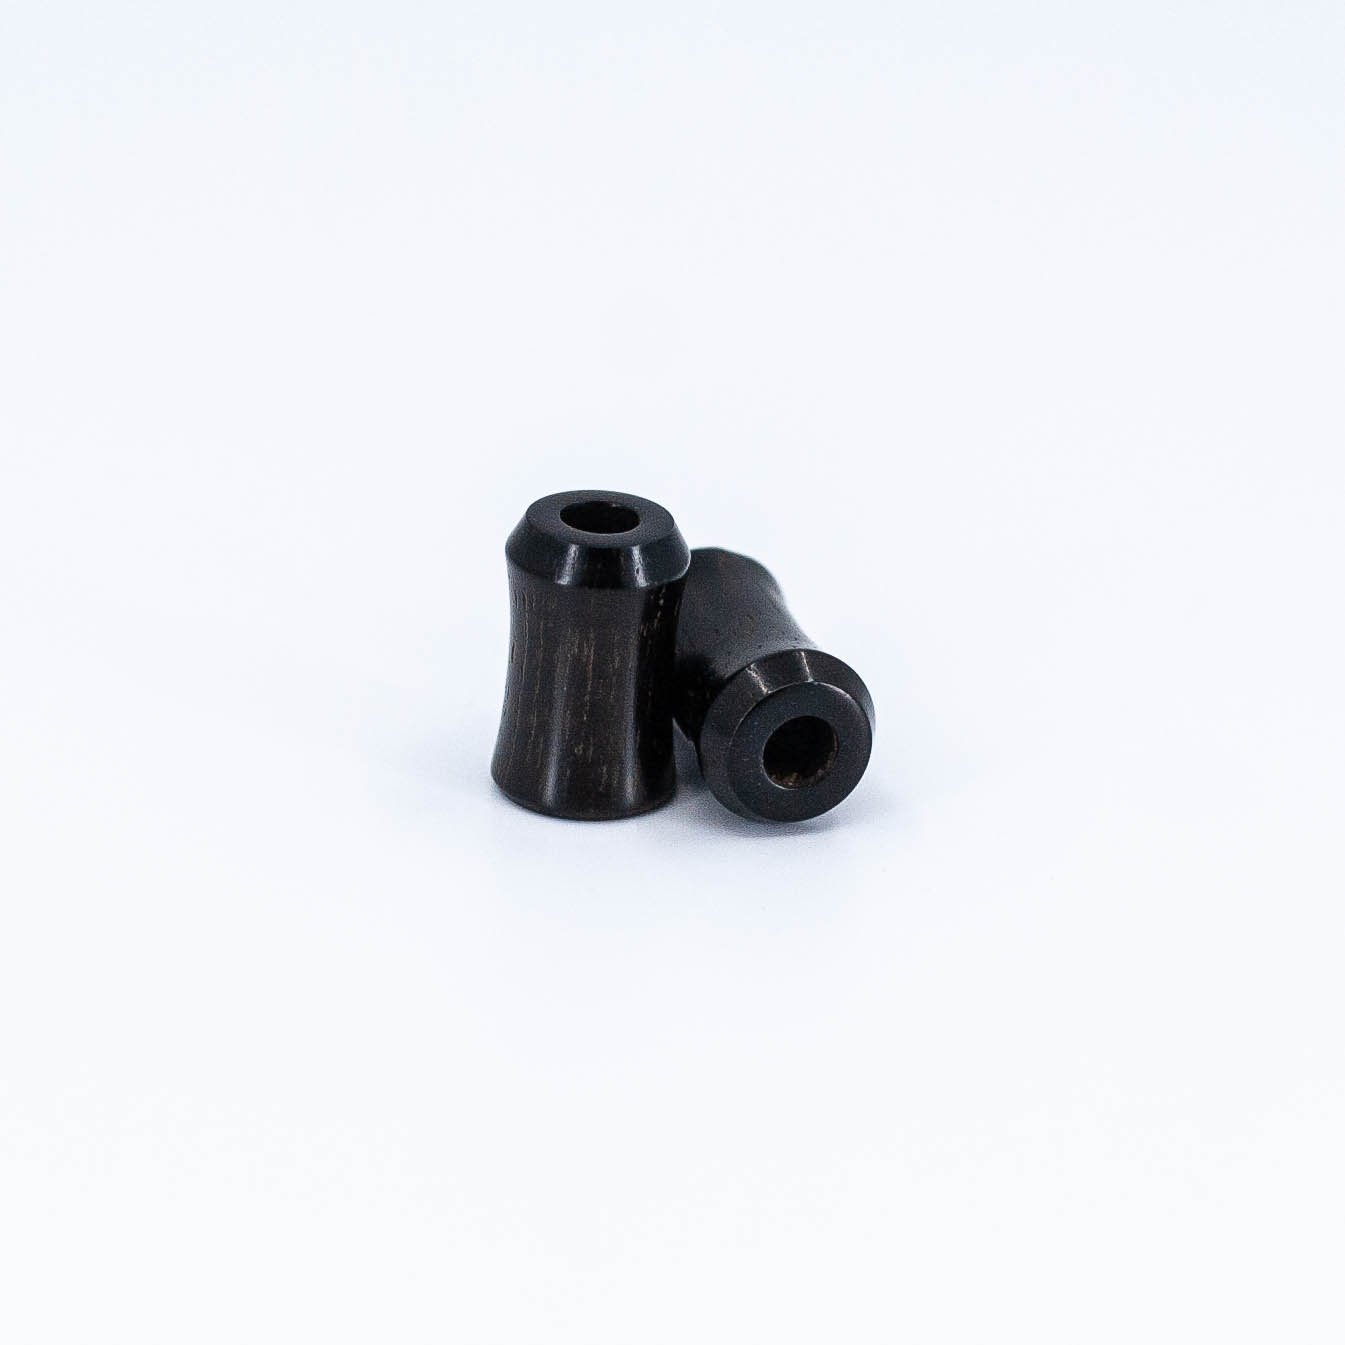
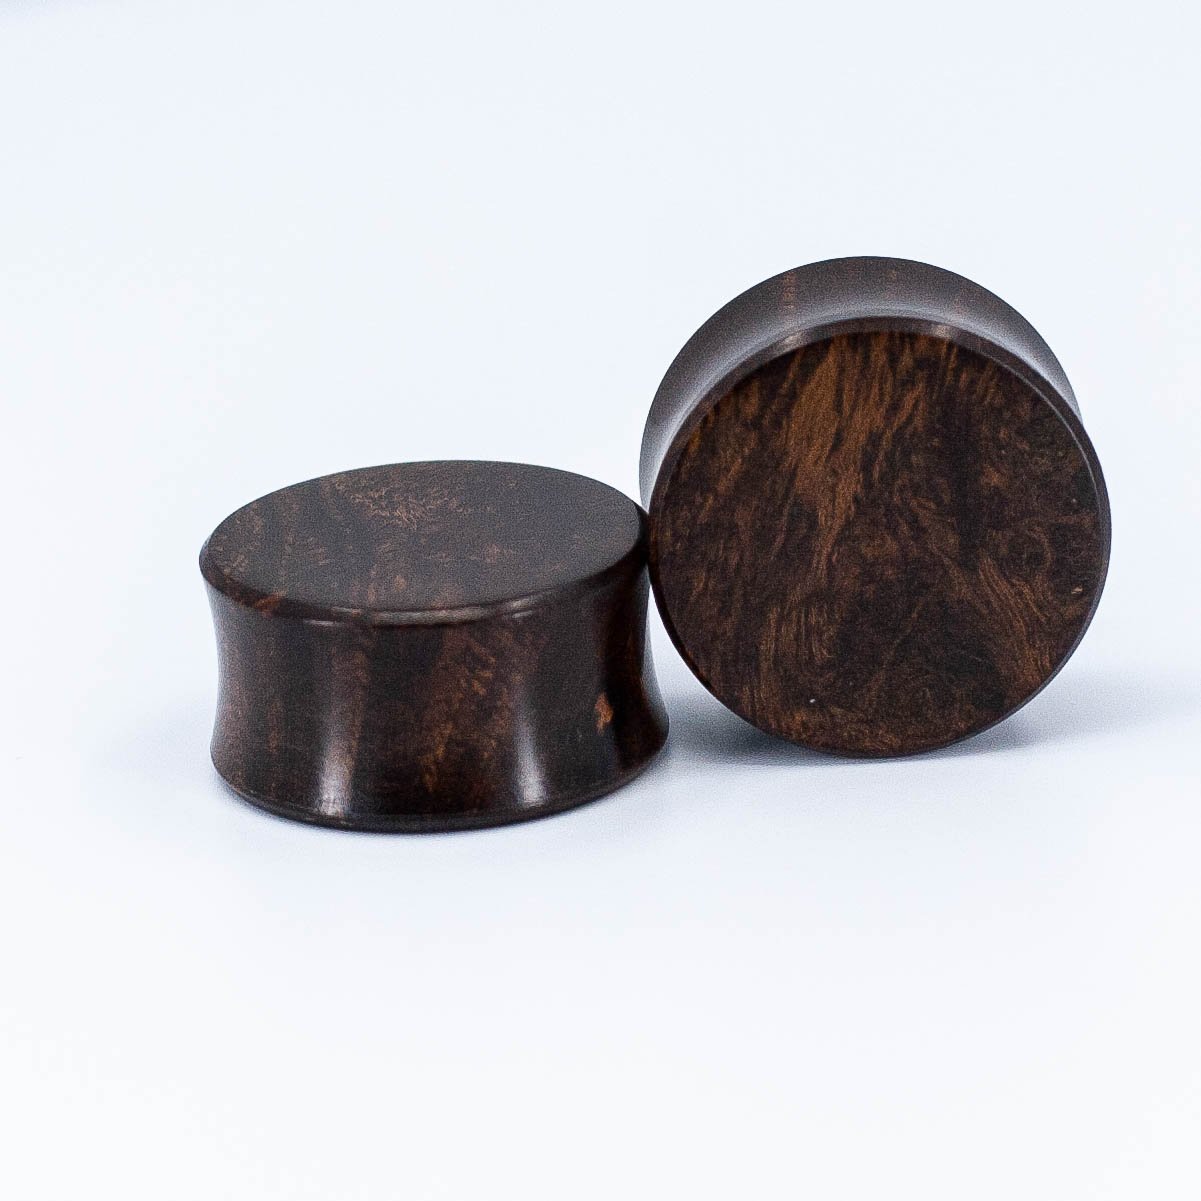
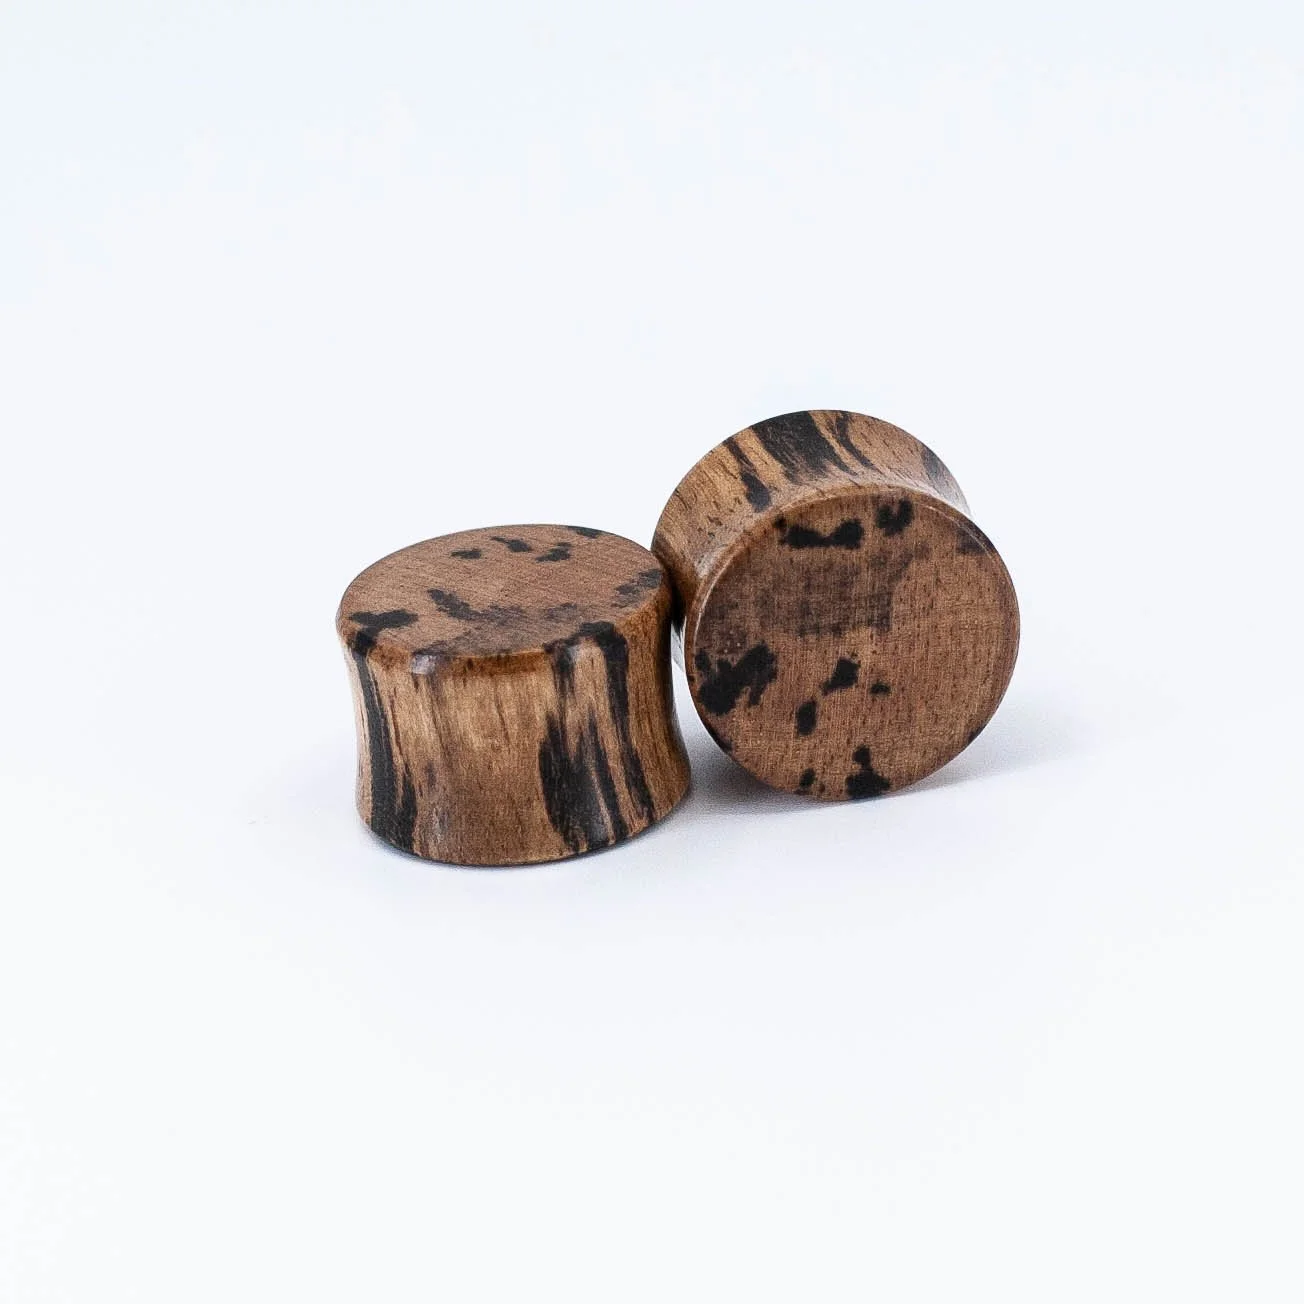
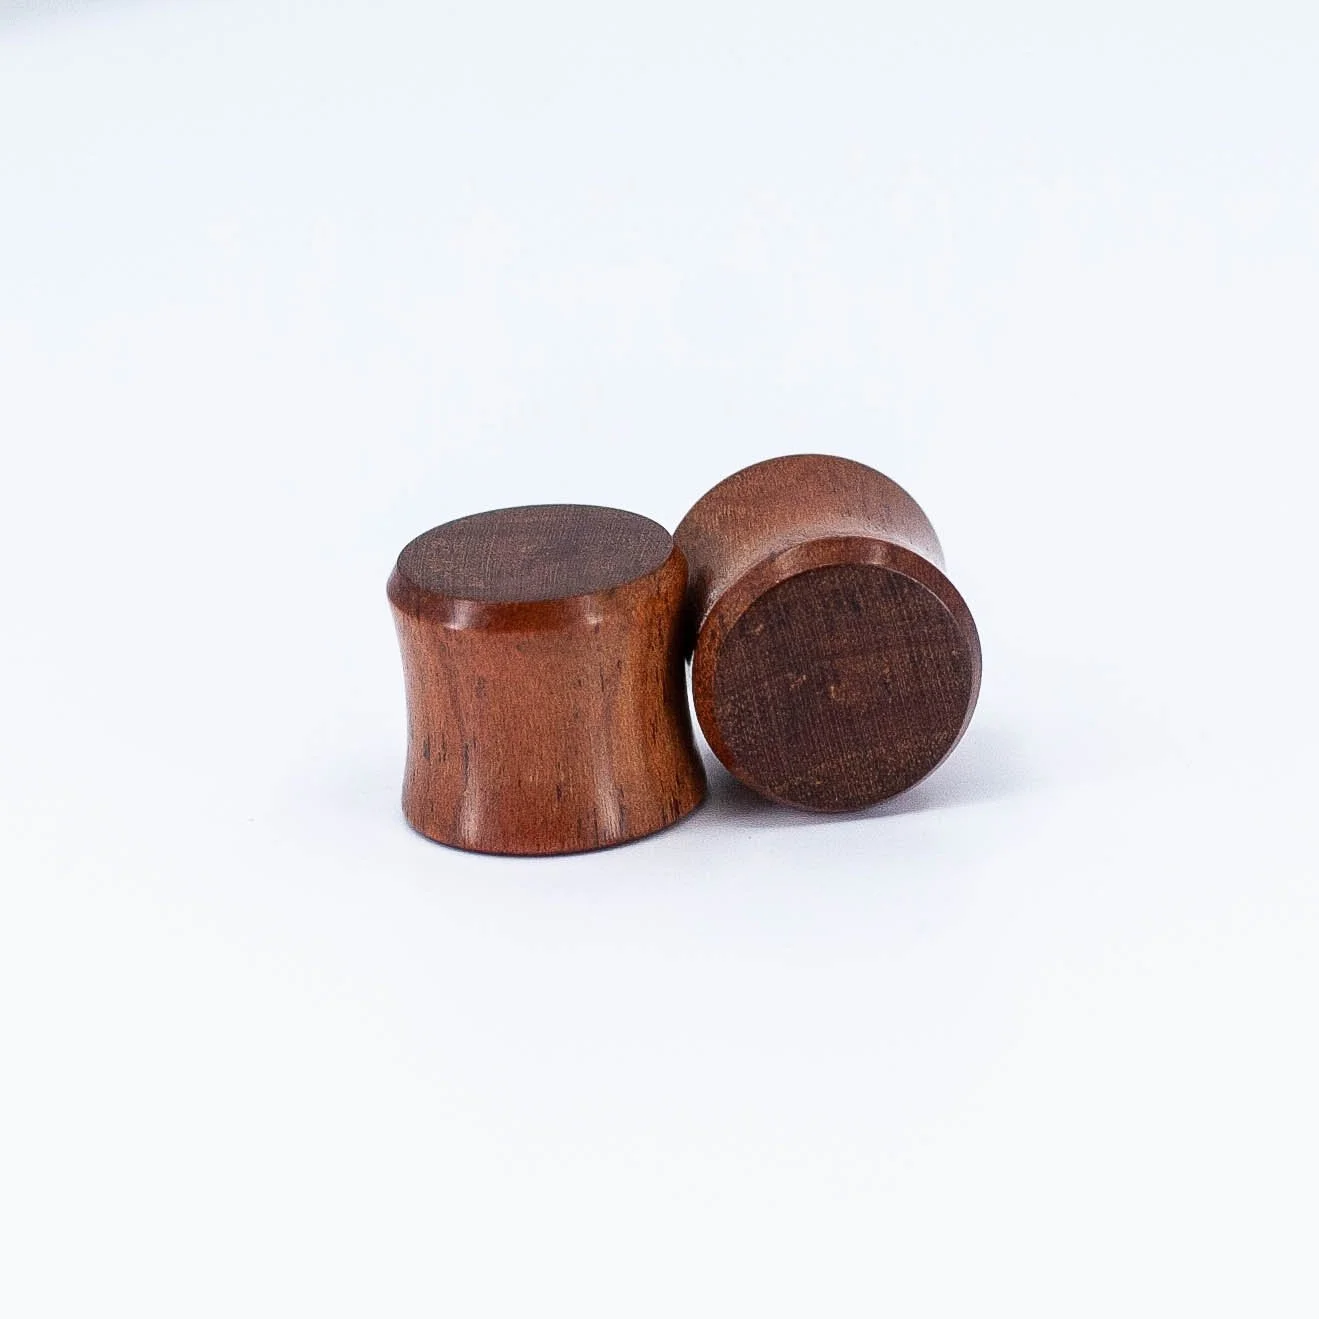
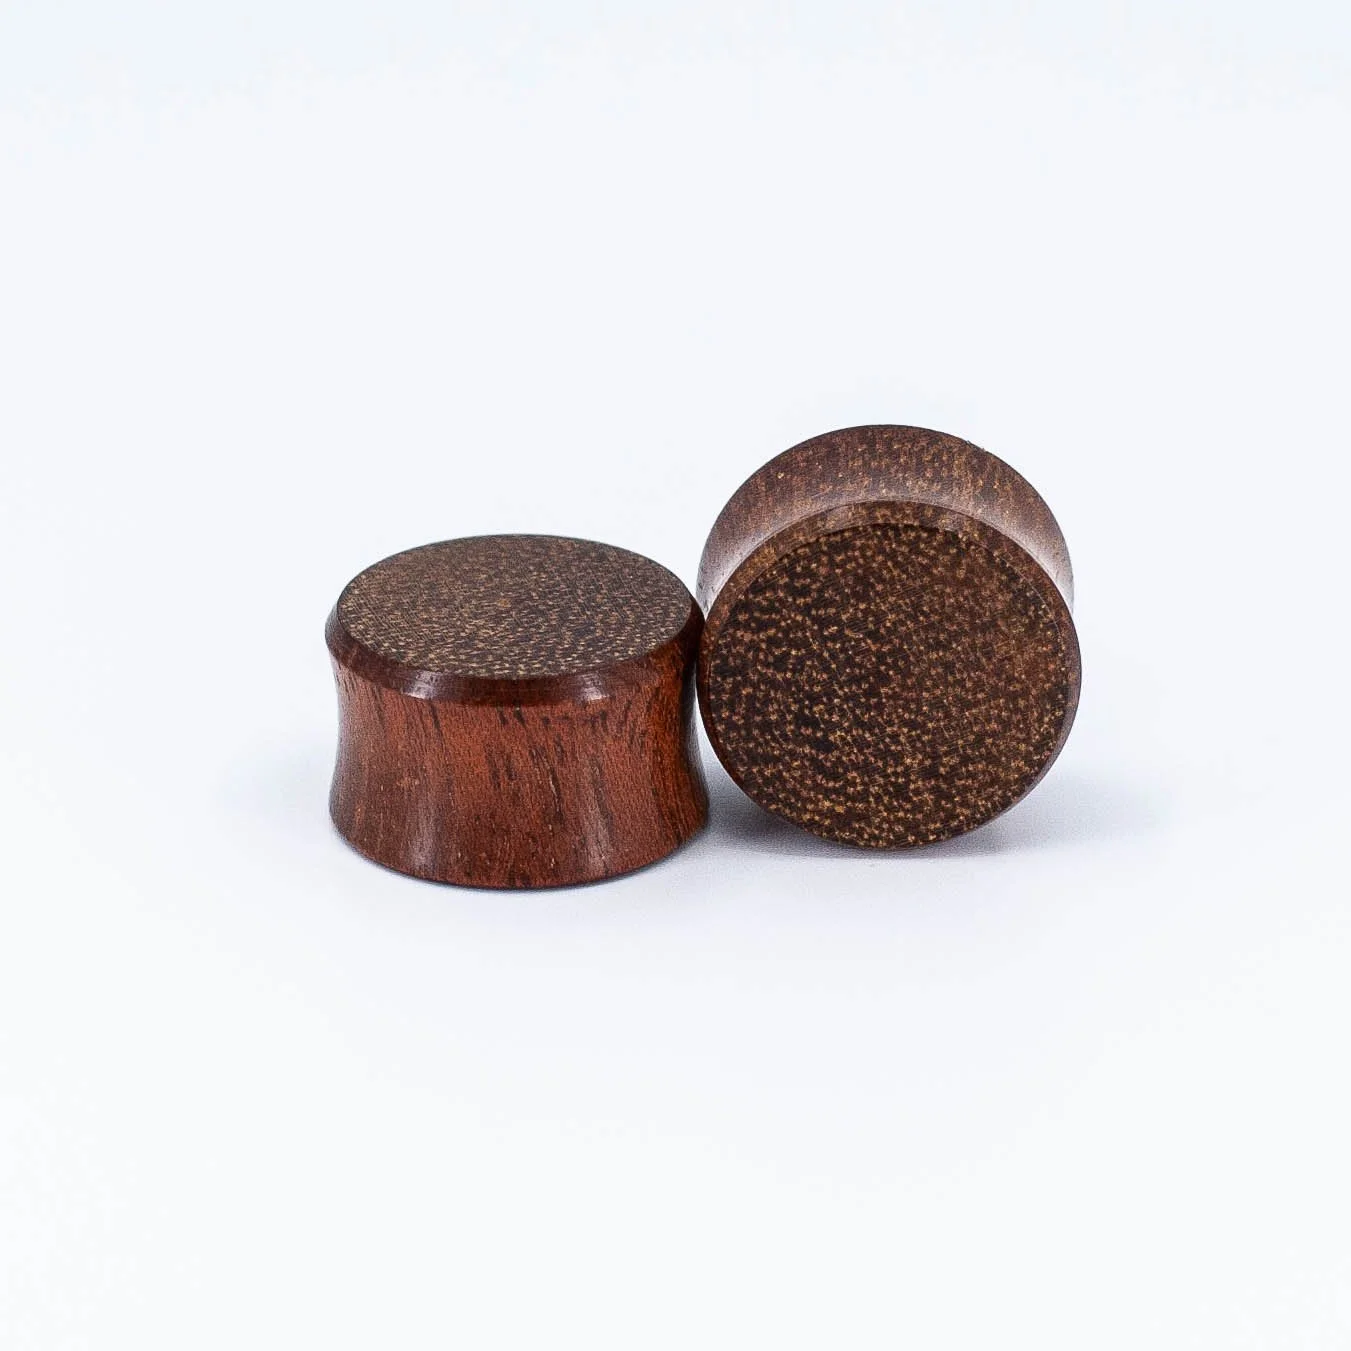
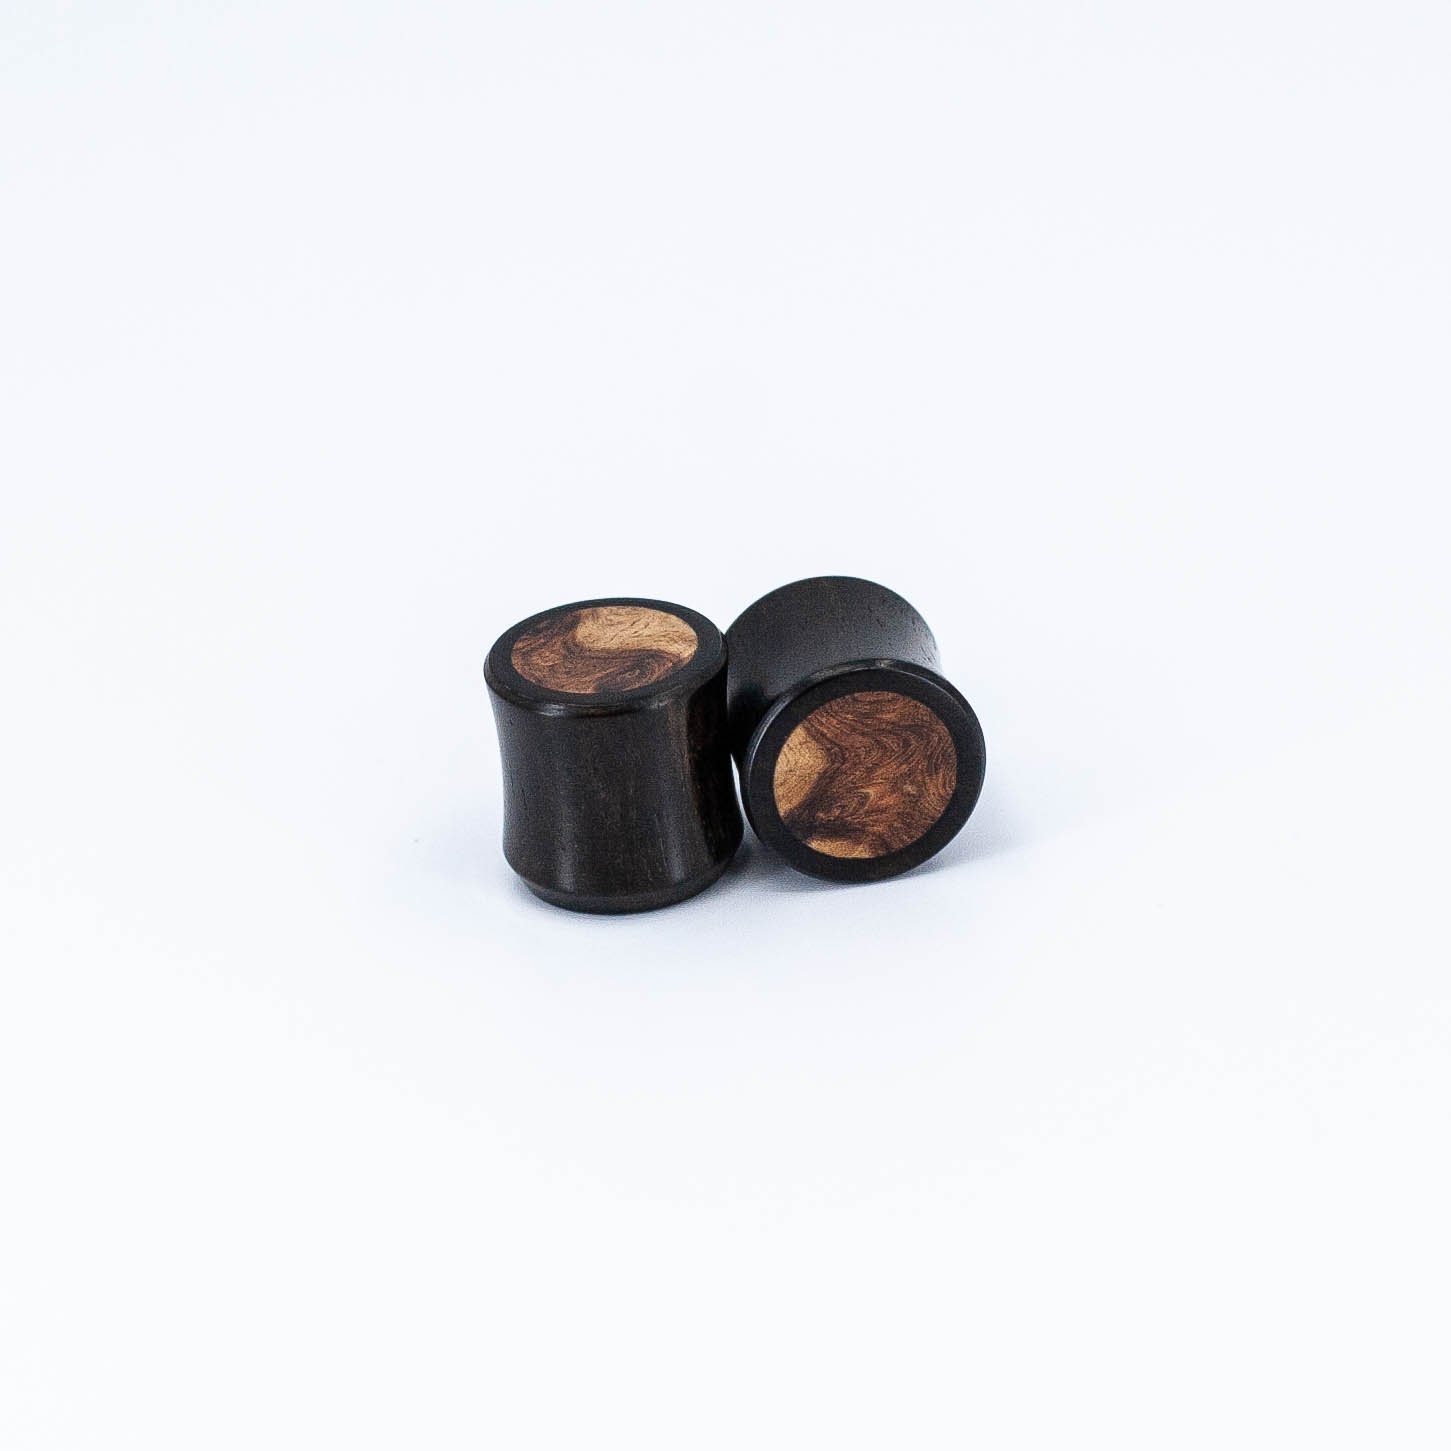
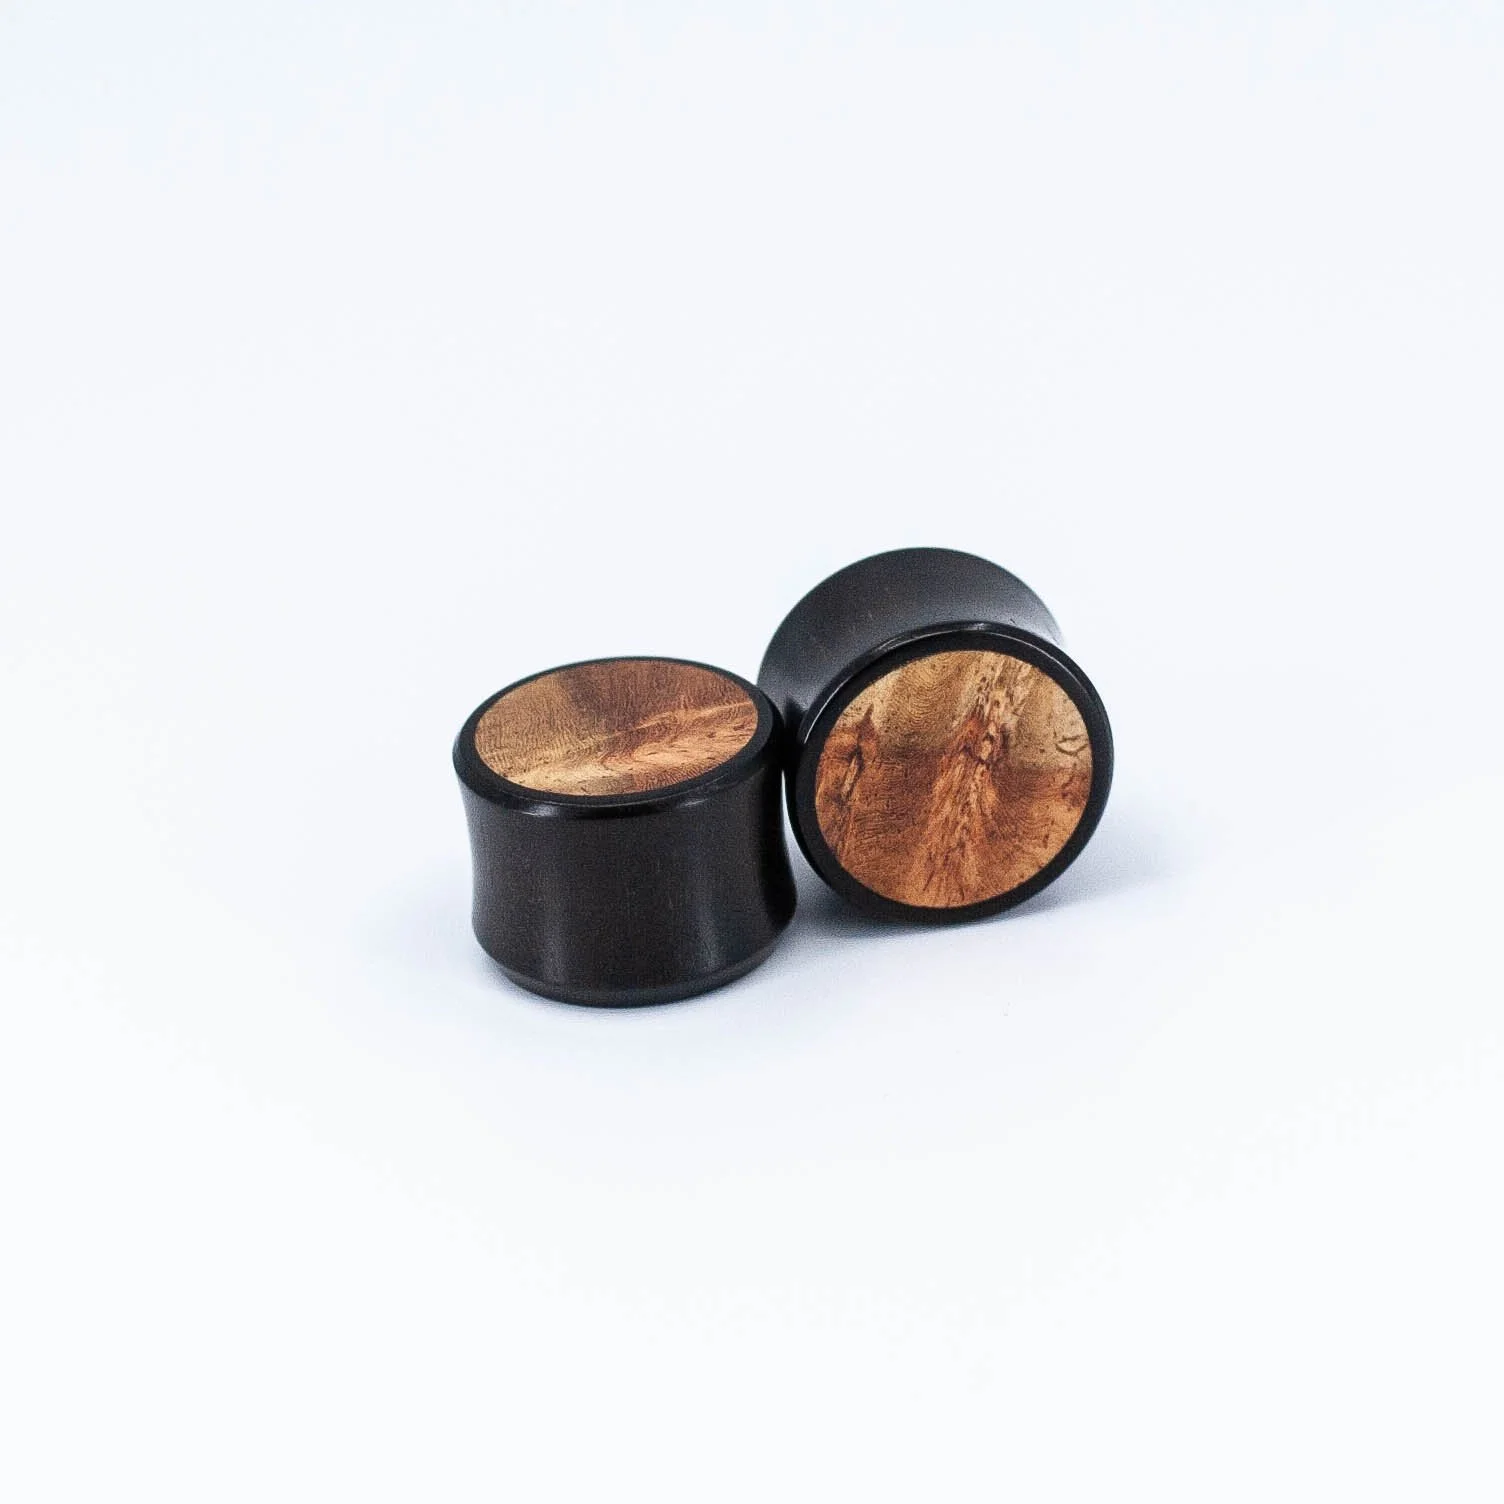
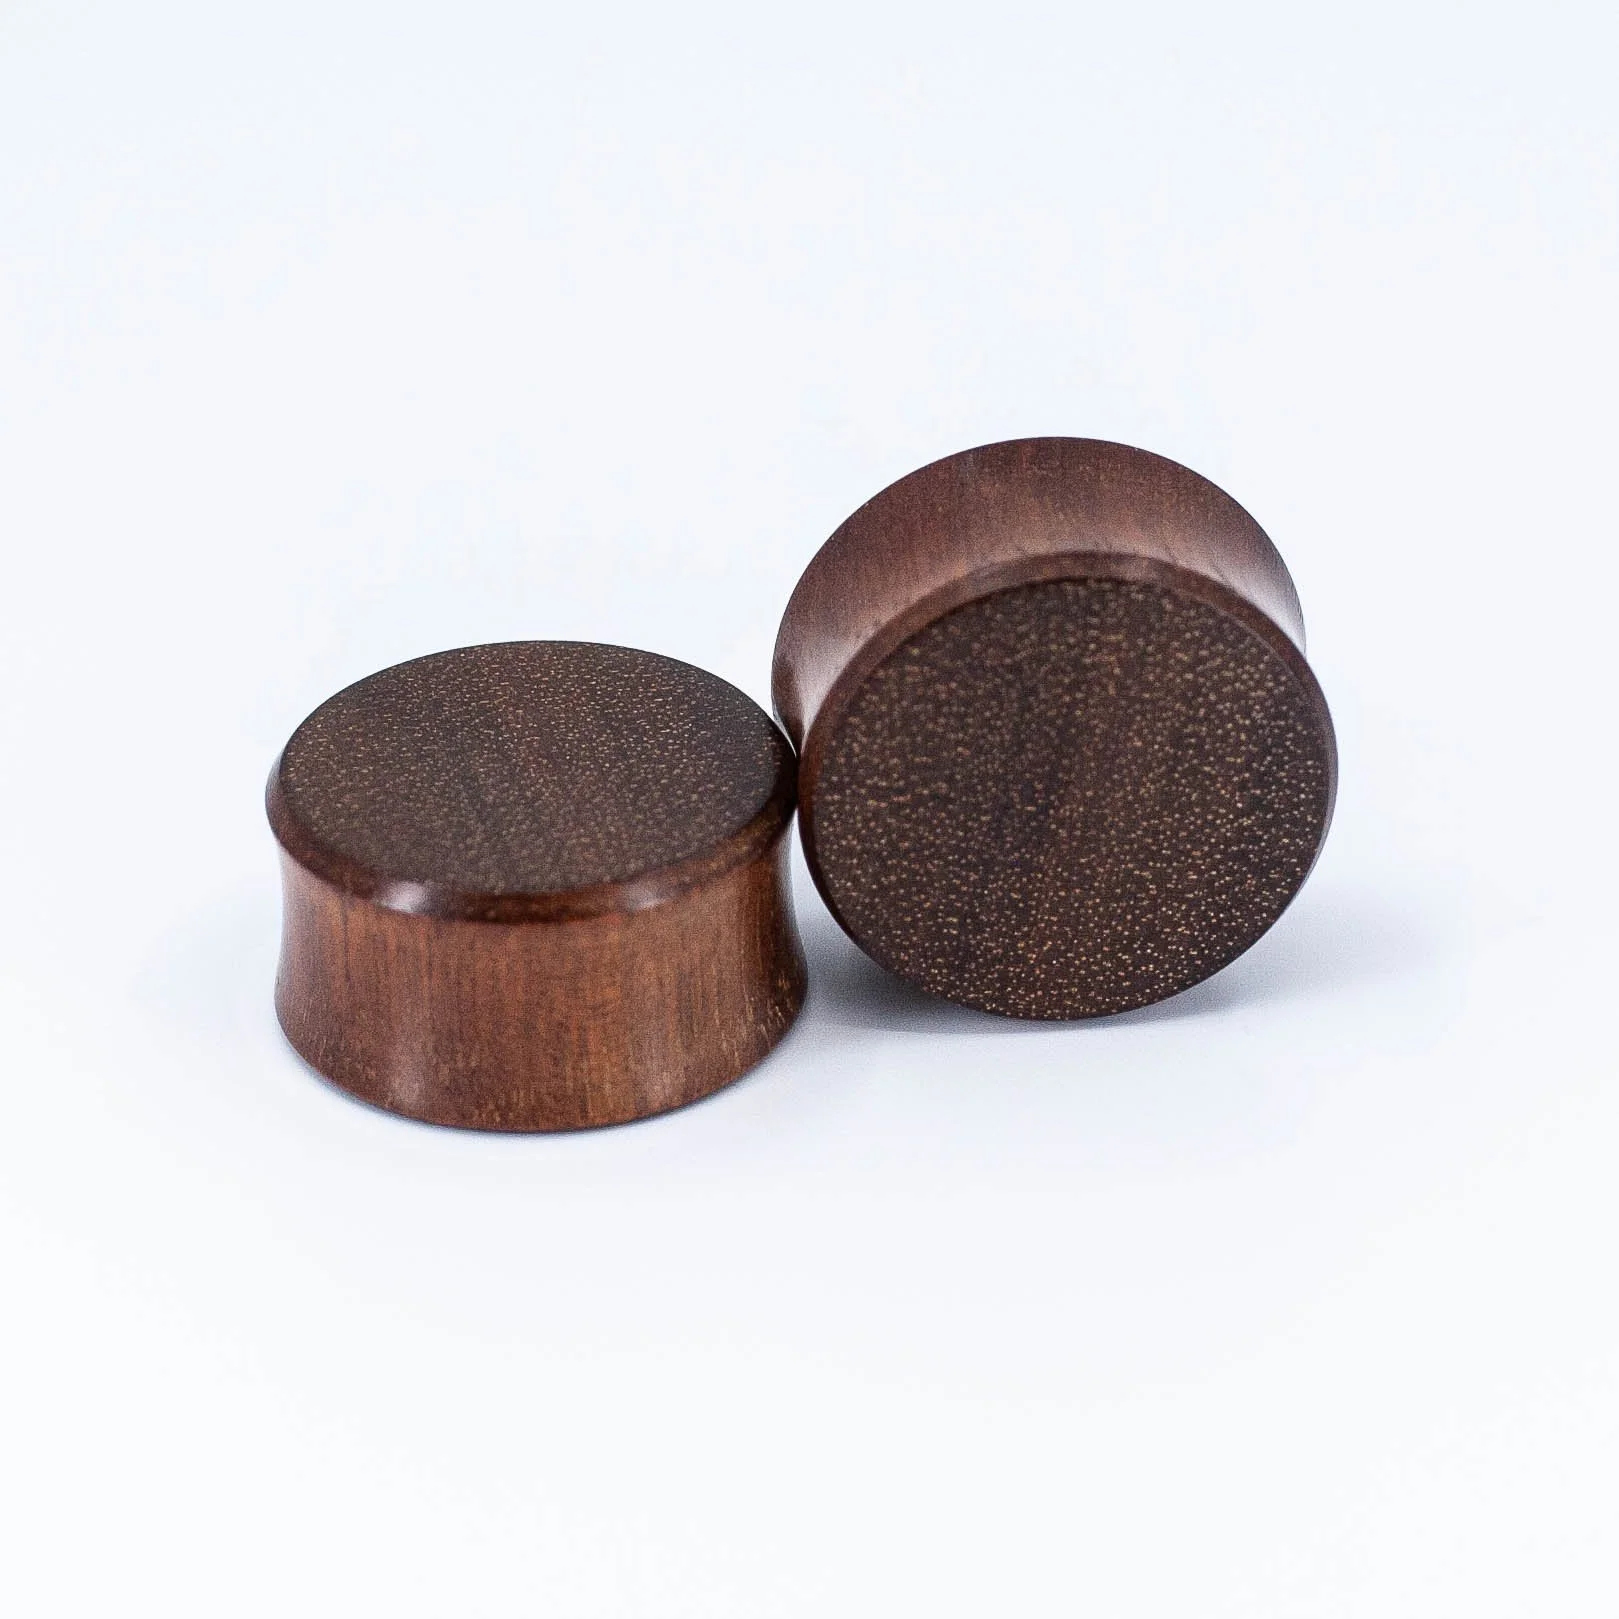
Skip to Content
MODERN RITUAL
Modern Ritual
Our Story
Our Staff
FAQs
General FAQs
Aftercare Guides
Jewelry Examples
Contact
Shop
0
0
MODERN RITUAL
Modern Ritual
Our Story
Our Staff
FAQs
General FAQs
Aftercare Guides
Jewelry Examples
Contact
Shop
0
0
Modern Ritual
Our Story
Our Staff
Folder: FAQs
Back
General FAQs
Aftercare Guides
Jewelry Examples
Contact
Shop

Shop

  • Plugs |
  • Clicker |
  • Chains |
  • Rings |
  • Ends |
  • Hangers & Weights |
  • Coils/Spreaders/Hooks |
  • Gift Certificates |
Odyssey Prium #2 - 16g/18g - White Opal - 9.5x3.5mm - Titanium - End - Threadless - Industrial Strength Odyssey Prium #2 - 16g/18g - White Opal - 9.5x3.5mm - Titanium - End - Threadless - Industrial Strength Ear Illustration featuring the Helix, Lobe, Forward Helix, Tragus, and Conch piercing areas highlighted in yellow.
Odyssey Prium #2 - 16g/18g - White Opal - 9.5x3.5mm - Titanium - End - Threadless - Industrial Strength
$115.00
Odyssey Prium #2 - 16g/18g - White CZ - 9.5x3.5mm - Titanium - End - Threadless - Industrial Strength Odyssey Prium #2 - 16g/18g - White CZ - 9.5x3.5mm - Titanium - End - Threadless - Industrial Strength Ear Illustration featuring the Helix, Lobe, Forward Helix, Tragus, and Conch piercing areas highlighted in yellow.
Odyssey Prium #2 - 16g/18g - White CZ - 9.5x3.5mm - Titanium - End - Threadless - Industrial Strength
$115.00
Odyssey Empress - 16g/18g - White CZ - 8.5x5mm - Titanium - End - Threadless - Industrial Strength Odyssey Empress - 16g/18g - White CZ - 8.5x5mm - Titanium - End - Threadless - Industrial Strength Ear Illustration featuring the Helix, Lobe, and Conch piercing areas highlighted in yellow. Nose Illustration featuring the Nostril piercing area highlighted in yellow.
Odyssey Empress - 16g/18g - White CZ - 8.5x5mm - Titanium - End - Threadless - Industrial Strength
$155.00
Prium - Sapphire - 14k Yellow Gold - 18g/16g/14g - 10.75x4mm - Threadless - End - Industrial Strength Prium - Sapphire - 14k Yellow Gold - 18g/16g/14g - 10.75x4mm - Threadless - End - Industrial Strength Ear Illustration featuring the Lobe, Conch, Helix, Forward Helix and Tragus piercing areas highlighted in yellow.
Prium - Sapphire - 14k Yellow Gold - 18g/16g/14g - 10.75x4mm - Threadless - End - Industrial Strength
$370.00
Marquise Fan #2 - White CZ - Titanium - 18g/16g - 5.5x3mm - 1.5mm - Threadless - End - Industrial Strength Marquise Fan #2 - White CZ - Titanium - 18g/16g - 5.5x3mm - 1.5mm - Threadless - End - Industrial Strength Ear Illustration that features the Lobe, Conch, Helix, Forward Helix, and Tragus piercing areas highlighted in yellow. Nose Illustration featuring the Nostril piercing area highlighted in yellow.
Marquise Fan #2 - White CZ - Titanium - 18g/16g - 5.5x3mm - 1.5mm - Threadless - End - Industrial Strength
$130.00
Daith Heart - 14k Rose Gold - 16g - 7/16" - End - Leroi Daith Heart - 14k Rose Gold - 16g - 7/16" - End - Leroi Ear Illustration featuring the Daith piercing area highlighted in yellow.
Daith Heart - 14k Rose Gold - 16g - 7/16" - End - Leroi
$300.00
Daith Heart - 14k Yellow Gold - 16g - 7/16" - End - Leroi Daith Heart - 14k Yellow Gold - 16g - 7/16" - End - Leroi Ear Illustration featuring the Daith piercing area highlighted in yellow.
Daith Heart - 14k Yellow Gold - 16g - 7/16" - End - Leroi
$300.00
Daith Heart - 14k Rose Gold - 16g - 3/8" - End - Leroi Daith Heart - 14k Rose Gold - 16g - 3/8" - End - Leroi Ear Illustration featuring the Daith piercing area highlighted in yellow.
Daith Heart - 14k Rose Gold - 16g - 3/8" - End - Leroi
$265.00
Daith Heart - 14k Yellow Gold - 16g - 3/8" - End - Leroi Daith Heart - 14k Yellow Gold - 16g - 3/8" - End - Leroi Ear Illustration featuring the Daith piercing area highlighted in yellow.
Daith Heart - 14k Yellow Gold - 16g - 3/8" - End - Leroi
$265.00
Circular Barbell w/Balls - 14k Yellow Gold - 16g - 3/8" - 1/8" - Threaded - Leroi Circular Barbell w/Balls - 14k Yellow Gold - 16g - 3/8" - 1/8" - Threaded - Leroi Ear Illustration featuring the Lobe and Daith piercing areas highlighted in yellow. Nose Illustration featuring the Septum piercing areas highlighted in yellow.
Circular Barbell w/Balls - 14k Yellow Gold - 16g - 3/8" - 1/8" - Threaded - Leroi
$350.00
Circular Barbell w/Balls - 14k Rose Gold - 16g - 3/8" - 1/8" - Threaded - Leroi Circular Barbell w/Balls - 14k Rose Gold - 16g - 3/8" - 1/8" - Threaded - Leroi Ear Illustration featuring the Lobe and Daith piercing areas highlighted in yellow. Nose Illustration featuring the Septum piercing areas highlighted in yellow.
Circular Barbell w/Balls - 14k Rose Gold - 16g - 3/8" - 1/8" - Threaded - Leroi
$350.00
Circular Barbell w/Balls - 14k Yellow Gold - 16g - 5/16" - 1/8" - Threaded - Leroi Circular Barbell w/Balls - 14k Yellow Gold - 16g - 5/16" - 1/8" - Threaded - Leroi Ear Illustration featuring the Lobe and Daith piercing areas highlighted in yellow. Nose Illustration featuring the Septum piercing areas highlighted in yellow.
Circular Barbell w/Balls - 14k Yellow Gold - 16g - 5/16" - 1/8" - Threaded - Leroi
$335.00
Circular Barbell w/Balls - 14k Rose Gold - 16g - 5/16" - 1/8" - Threaded - Leroi Circular Barbell w/Balls - 14k Rose Gold - 16g - 5/16" - 1/8" - Threaded - Leroi Ear Illustration featuring the Lobe and Daith piercing areas highlighted in yellow. Nose Illustration featuring the Septum piercing areas highlighted in yellow.
Circular Barbell w/Balls - 14k Rose Gold - 16g - 5/16" - 1/8" - Threaded - Leroi
$335.00
Curved Barbell w/Balls - 14k Rose Gold - 16g - 1/4" - 1/8" - Threaded - Leroi Curved Barbell w/Balls - 14k Rose Gold - 16g - 1/4" - 1/8" - Threaded - Leroi Ear Illustration featuring the Rook and Daith piercing areas highlighted in yellow.
Curved Barbell w/Balls - 14k Rose Gold - 16g - 1/4" - 1/8" - Threaded - Leroi
$270.00
Curved Barbell w/Balls - 14k Yellow Gold - 16g - 5/16" - 1/8" - Threaded - Leroi Curved Barbell w/Balls - 14k Yellow Gold - 16g - 5/16" - 1/8" - Threaded - Leroi Ear Illustration featuring the Rook and Daith piercing areas highlighted in yellow.
Curved Barbell w/Balls - 14k Yellow Gold - 16g - 5/16" - 1/8" - Threaded - Leroi
$280.00
Curved Barbell w/Balls - 14k Rose Gold - 16g - 5/16" - 1/8" - Threaded - Leroi Curved Barbell w/Balls - 14k Rose Gold - 16g - 5/16" - 1/8" - Threaded - Leroi Ear Illustration featuring the Rook and Daith piercing areas highlighted in yellow.
Curved Barbell w/Balls - 14k Rose Gold - 16g - 5/16" - 1/8" - Threaded - Leroi
$280.00
Lindsey - Genuine Tsavorite - 18k Yellow Gold - 18g/16g - 4.5x3mm - End - Threadless - Anatometal Lindsey - Genuine Tsavorite - 18k Yellow Gold - 18g/16g - 4.5x3mm - End - Threadless - Anatometal Ear Illustration featuring the Lobe, Forward Helix, Tragus, Conch, and Helix piercing areas highlighted in yellow. Nose Illustration featuring the Nostril piercing highlighted in yellow. Mouth Illustration featuring the Lip, Labret, and Philtrum piercing areas highlighted in yellow.
Lindsey - Genuine Tsavorite - 18k Yellow Gold - 18g/16g - 4.5x3mm - End - Threadless - Anatometal
$175.00
Zia - Black Onyx Cab - 18k Rose Gold - 18g/16g - 3mm - 2mm - End - Threadless - Anatometal Zia - Black Onyx Cab - 18k Rose Gold - 18g/16g - 3mm - 2mm - End - Threadless - Anatometal Ear Illustration featuring the Lobe, Forward Helix, Tragus, Conch, and Helix piercing areas highlighted in yellow. Nose Illustration featuring the Nostril piercing highlighted in yellow. Mouth Illustration featuring the Lip, Labret, and Philtrum piercing areas highlighted in yellow.
Zia - Black Onyx Cab - 18k Rose Gold - 18g/16g - 3mm - 2mm - End - Threadless - Anatometal
$105.00
Bezel Bullet - White Opal - 18k White Gold - 18g/16g - 5x3.5mm - 3.5x4mm - End - Threaded - Anatometal Bezel Bullet - White Opal - 18k White Gold - 18g/16g - 5x3.5mm - 3.5x4mm - End - Threaded - Anatometal Ear Illustration featuring the Lobe, Forward Helix, Tragus, Conch, Rook and Helix piercing areas highlighted in yellow. Nose Illustration featuring the Nostril piercing highlighted in yellow. Mouth Illustration featuring the Lip, Labret, Monroe and Philtrum piercing areas highlighted in yellow.
Bezel Bullet - White Opal - 18k White Gold - 18g/16g - 5x3.5mm - 3.5x4mm - End - Threaded - Anatometal
$115.00
Engaged Clicker - White CZ - Titanium - 16g - 3/8" - 2mm (2), 4x2.5mm - Clicker - Diablo Engaged Clicker - White CZ - Titanium - 16g - 3/8" - 2mm (2), 4x2.5mm - Clicker - Diablo Ear Illustration featuring the Helix, Daith, and Lobe piercing areas in yellow. Nose Illustration featuring the Septum piercing area highlighted in yellow.
Engaged Clicker - White CZ - Titanium - 16g - 3/8" - 2mm (2), 4x2.5mm - Clicker - Diablo
$80.00
Fixed Bead Ring - 14k White Gold - 7/16" - 16g - 1/8" - Ring - BVLA Fixed Bead Ring - 14k White Gold - 7/16" - 16g - 1/8" - Ring - BVLA Ear Illustration featuring the Lobe, Rook, Daith and Helix piercing areas highlighted in yellow. Nose Illustration featuring the Septum Piercing area highlighted in yellow.
Fixed Bead Ring - 14k White Gold - 7/16" - 16g - 1/8" - Ring - BVLA
$295.00
Fixed Bead Ring - 14k Rose Gold - 3/8" - 16g - 1/8" - Ring - BVLA Fixed Bead Ring - 14k Rose Gold - 3/8" - 16g - 1/8" - Ring - BVLA Ear Illustration featuring the Lobe, Rook, Daith and Helix piercing areas highlighted in yellow. Nose Illustration featuring the Septum Piercing area highlighted in yellow.
Fixed Bead Ring - 14k Rose Gold - 3/8" - 16g - 1/8" - Ring - BVLA
$280.00
Pac-Man Ghost - 18k Rose Gold - 18g/16g - 6x6mm - End - Threadless - Anatometal Pac-Man Ghost - 18k Rose Gold - 18g/16g - 6x6mm - End - Threadless - Anatometal Ear Illustration featuring the Lobe, Forward Helix, Tragus, Conch, and Helix piercing areas highlighted in yellow. Nose Illustration featuring the Nostril piercing highlighted in yellow. Mouth Illustration featuring the Philtrum, Labret, and Lip piercing areas highlighted in yellow.
Pac-Man Ghost - 18k Rose Gold - 18g/16g - 6x6mm - End - Threadless - Anatometal
$320.00
Pac-Man Ghost - 18k White Gold - 18g/16g - 6x6mm - End - Threadless - Anatometal Pac-Man Ghost - 18k White Gold - 18g/16g - 6x6mm - End - Threadless - Anatometal Ear Illustration featuring the Lobe, Forward Helix, Tragus, Conch, and Helix piercing areas highlighted in yellow. Nose Illustration featuring the Nostril piercing highlighted in yellow. Mouth Illustration featuring the Philtrum, Labret, and Lip piercing areas highlighted in yellow.
Pac-Man Ghost - 18k White Gold - 18g/16g - 6x6mm - End - Threadless - Anatometal
$320.00
Pema Seam Ring - Aurora Borealis CZ - 18k Yellow Gold - 3/8" - 16g - 2x3mm - Ring - Anatometal Pema Seam Ring - Aurora Borealis CZ - 18k Yellow Gold - 3/8" - 16g - 2x3mm - Ring - Anatometal Ear Illustration featuring the Daith and Helix piercing areas highlighted in yellow. Nose Illustration featuring the Septum piercing highlighted in yellow.
Pema Seam Ring - Aurora Borealis CZ - 18k Yellow Gold - 3/8" - 16g - 2x3mm - Ring - Anatometal
$330.00
Geo Triangle Clicker - 14k Yellow Gold - 16g - 5/16"x11/32" - End - Leroi Geo Triangle Clicker - 14k Yellow Gold - 16g - 5/16"x11/32" - End - Leroi Ear Illustration featuring the Lobe piercing areas highlighted in yellow. Nose Illustration featuring the Septum piercing highlighted in yellow.
Geo Triangle Clicker - 14k Yellow Gold - 16g - 5/16"x11/32" - End - Leroi
$530.00
Sold out
Geo Triangle Clicker - 14k Rose Gold - 16g - 5/16"x11/32" - End - Leroi Geo Triangle Clicker - 14k Rose Gold - 16g - 5/16"x11/32" - End - Leroi Ear Illustration featuring the Lobe piercing areas highlighted in yellow. Nose Illustration featuring the Septum piercing highlighted in yellow.
Geo Triangle Clicker - 14k Rose Gold - 16g - 5/16"x11/32" - End - Leroi
$530.00
Tapered Baguette - Frost Mint CZ - 18k Rose Gold - 18g/16g - 4.5x2.5mm - End - Threadless - Anatometa Tapered Baguette - Frost Mint CZ - 18k Rose Gold - 18g/16g - 4.5x2.5mm - End - Threadless - Anatometa Ear Illustration featuring the Lobe, Forward Helix, Tragus, Conch, and Helix piercing areas highlighted in yellow. Nose Illustration featuring the Nostril piercing highlighted in yellow. Mouth Illustration featuring the Lip, Labret, and Philtrum piercing areas highlighted in yellow.
Tapered Baguette - Frost Mint CZ - 18k Rose Gold - 18g/16g - 4.5x2.5mm - End - Threadless - Anatometa
$100.00
Sanchi 01 - Genuine Amethyst Cab, White CZ - 18k White Gold - 18g/16g - 7x10mm - 3mm, 2mm - End - Threadless - Anatometal Sanchi 01 - Genuine Amethyst Cab, White CZ - 18k White Gold - 18g/16g - 7x10mm - 3mm, 2mm - End - Threadless - Anatometal Ear Illustration featuring the Lobe, Forward Helix, Tragus, Conch, and Helix piercing areas highlighted in yellow. Nose Illustration featuring the Nostril piercing highlighted in yellow. Mouth Illustration featuring the Philtrum, Labret, and Lip piercing areas highlighted in yellow.
Sanchi 01 - Genuine Amethyst Cab, White CZ - 18k White Gold - 18g/16g - 7x10mm - 3mm, 2mm - End - Threadless - Anatometal
$365.00
Avery Seam Ring - White CZ - 18k White Gold - 3/8 - 16g - Ring - Anatometal Avery Seam Ring - White CZ - 18k White Gold - 3/8 - 16g - Ring - BVLA Ear Illustration featuring the Daith, Lobe and Helix piercing areas highlighted in yellow. Nose Illustration featuring the Septum piercing highlighted in yellow. Mouth Illustration featuring the Lip piercing area highlighted in yellow.
Avery Seam Ring - White CZ - 18k White Gold - 3/8 - 16g - Ring - Anatometal
$345.00
Marquise Bezel - White CZ - Titanium - 18g/16g - 4x2mm - End - Threadless - Anatometal Marquise Bezel - White CZ - Titanium - 18g/16g - 4x2mm - End - Threadless - Anatometal Ear Illustration featuring the Lobe, Forward Helix, Tragus, Conch, and Helix piercing areas highlighted in yellow. Nose Illustration featuring the Nostril piercing highlighted in yellow. Mouth Illustration featuring the Lip, Labret, and Philtrum piercing areas highlighted in yellow.
Marquise Bezel - White CZ - Titanium - 18g/16g - 4x2mm - End - Threadless - Anatometal
$40.00
Pac-Man Ghost - 18k Yellow Gold - 18g/16g - 6x6mm - End - Threadless - Anatometal Pac-Man Ghost - 18k Yellow Gold - 18g/16g - 6x6mm - End - Threadless - Anatometal Ear Illustration featuring the Lobe, Forward Helix, Tragus, Conch, and Helix piercing areas highlighted in yellow. Nose Illustration featuring the Nostril piercing highlighted in yellow. Mouth Illustration featuring the Philtrum, Labret, and Lip piercing areas highlighted in yellow.
Pac-Man Ghost - 18k Yellow Gold - 18g/16g - 6x6mm - End - Threadless - Anatometal
$360.00
Odyssey #5 - 16g - White CZ - 5/16"x3/8" - 2mm - Titanium - Clicker - Industrial Strength Odyssey #5 - 16g - White CZ - 5/16"x3/8" - 2mm - Titanium - Clicker - Industrial Strength Nose Illustration featuring the Septum piercing area highlighted in yellow.
Odyssey #5 - 16g - White CZ - 5/16"x3/8" - 2mm - Titanium - Clicker - Industrial Strength
$225.00
Panaraya Marquise Alternating - Garnet AA, Smoky Quartz - 14k Rose Gold - 16g - 12.5x6mm - 4x2mm - End - Threaded - BVLA Panaraya Marquise Alternating - Garnet AA, Smoky Quartz - 14k Rose Gold - 16g - 12.5x6mm - 4x2mm - End - Threaded - BVLA Ear Illustration featuring the Lobe, Conch, and Helix piercing areas highlighted in yellow.
Panaraya Marquise Alternating - Garnet AA, Smoky Quartz - 14k Rose Gold - 16g - 12.5x6mm - 4x2mm - End - Threaded - BVLA
$800.00
Sold out
Sarai Marquise - Honey Topaz, Morganite - 14k Rose Gold - 16g - 12x8mm -Threaded - BVLA Sarai Marquise - Honey Topaz, Morganite - 14k Rose Gold - 16g - 12x8mm -Threaded - BVLA Ear Illustration featuring the Lobe, Conch, and Helix piercing sites highlighted in yellow.
Sarai Marquise - Honey Topaz, Morganite - 14k Rose Gold - 16g - 12x8mm -Threaded - BVLA
$920.00
Mini Eloise w/Beaded Accents - Chrysoprase Cab - 14k Rose Gold - 16g - 6.5x4mm - 3x1.5mm - End - Threaded - BVLA Mini Eloise w/Beaded Accents - Chrysoprase Cab - 14k Rose Gold - 16g - 6.5x4mm - 3x1.5mm - End - Threaded - BVLA Ear Illustration featuring the Lobe, Tragus, Conch, Forward Helix, Anti-Tragus, and Helix piercing areas highlighted in yellow. Nose Illustration featuring the Nostril piercing highlighted in yellow. Mouth Illustration featuring the Philtrum, Monroe, Lip, and Labret piercing areas highlighted in yellow.
Mini Eloise w/Beaded Accents - Chrysoprase Cab - 14k Rose Gold - 16g - 6.5x4mm - 3x1.5mm - End - Threaded - BVLA
$420.00
Elaine - White Sapphire, VS Diamond, Rose Cut Oregon Sunstone - 14k Rose Gold - 16g - 10mm -Threaded - BVLA Elaine - White Sapphire, VS Diamond, Rose Cut Oregon Sunstone - 14k Rose Gold - 16g - 10mm -Threaded - BVLA Ear Illustration featuring the Helix, Conch, and Lobe piercing areas highlighted in yellow.
Elaine - White Sapphire, VS Diamond, Rose Cut Oregon Sunstone - 14k Rose Gold - 16g - 10mm -Threaded - BVLA
$1,750.00
The Rose 13 Gem Cluster - Champagne CZ, Faceted Oregon Sunstone - 14k Rose Gold - 16g - 5mm - 1mm - 2.5mm - End - Threaded - BVLA The Rose 13 Gem Cluster - Champagne CZ, Faceted Oregon Sunstone - 14k Rose Gold - 16g - 5mm - 1mm - 2.5mm - End - Threaded - BVLA Ear Illustration featuring the Lobe, Conch, Forward Helix, Tragus, Anti-Tragus, and Helix piercing areas highlighted in yellow. Nose Illustration featuring the Nostril piercing areas highlighted in yellow. Mouth Illustration featuring the Philtrum, Monroe, Lip, and Labret piercing areas highlighted in yellow.
The Rose 13 Gem Cluster - Champagne CZ, Faceted Oregon Sunstone - 14k Rose Gold - 16g - 5mm - 1mm - 2.5mm - End - Threaded - BVLA
$525.00
Panaraya Marquise - Rose Cut Labradorite - 14k White Gold - 16g - 12.5x6mm - 4x2mm - End - Threaded - BVLA Panaraya Marquise - Rose Cut Labradorite - 14k White Gold - 16g - 12.5x6mm - 4x2mm - End - Threaded - BVLA Ear Illustration featuring the Lobe, Conch, and Helix piercing areas highlighted in yellow.
Panaraya Marquise - Rose Cut Labradorite - 14k White Gold - 16g - 12.5x6mm - 4x2mm - End - Threaded - BVLA
$1,000.00
Mini Eloise w/Beaded Accents - Amethyst AA - 14k White Gold - 16g - 6.5x4mm - 3x1.5mm - End - Threaded - BVLA Mini Eloise w/Beaded Accents - Amethyst AA - 14k White Gold - 16g - 6.5x4mm - 3x1.5mm - End - Threaded - BVLA Ear Illustration featuring the Lobe, Tragus, Conch, Forward Helix, Anti-Tragus, and Helix piercing areas highlighted in yellow. Nose Illustration featuring the Nostril piercing highlighted in yellow. Mouth Illustration featuring the Philtrum, Monroe, Lip, and Labret piercing areas highlighted in yellow.
Mini Eloise w/Beaded Accents - Amethyst AA - 14k White Gold - 16g - 6.5x4mm - 3x1.5mm - End - Threaded - BVLA
$400.00
Elaine - White CZ, Rainbow Moonstone - 14k White Gold - 16g - 10mm -Threaded - BVLA Elaine - White CZ, Rainbow Moonstone - 14k White Gold - 16g - 10mm -Threaded - BVLA Ear Illustration featuring the Helix, Conch, and Lobe piercing areas highlighted in yellow.
Elaine - White CZ, Rainbow Moonstone - 14k White Gold - 16g - 10mm -Threaded - BVLA
$1,020.00
The Rose 13 Gem Cluster - Swiss Blue Topaz & Mercury Mist Topaz - 14k White Gold - 16g - 5mm - 2.5mm - End - Threaded - BVLA The Rose 13 Gem Cluster - Swiss Blue Topaz & Mercury Mist Topaz - 14k White Gold - 16g - 5mm - 2.5mm - End - Threaded - BVLA Ear Illustration featuring the Lobe, Conch, Tragus, Forward Helix, Anti-Tragus, and Helix piercing areas highlighted in yellow. Nose Illustration featuring in the Nostril area highlighted in yellow. Mouth Illustration featuring the Philtrum, Monroe, Lip, and Labret areas highlighted in yellow.
The Rose 13 Gem Cluster - Swiss Blue Topaz & Mercury Mist Topaz - 14k White Gold - 16g - 5mm - 2.5mm - End - Threaded - BVLA
$610.00
Mini Eloise w/Beaded Accents - Black CZ - 14k Yellow Gold - 16g - 6.5x4mm - 3x1.5mm - End - Threaded - BVLA Mini Eloise w/Beaded Accents - Black CZ - 14k Yellow Gold - 16g - 6.5x4mm - 3x1.5mm - End - Threaded - BVLA Ear Illustration featuring the Lobe, Tragus, Conch, Forward Helix, Anti-Tragus, and Helix piercing areas highlighted in yellow. Nose Illustration featuring the Nostril piercing highlighted in yellow. Mouth Illustration featuring the Philtrum, Monroe, Lip, and Labret piercing areas highlighted in yellow.
Mini Eloise w/Beaded Accents - Black CZ - 14k Yellow Gold - 16g - 6.5x4mm - 3x1.5mm - End - Threaded - BVLA
$325.00
Sarai Marquise - White CZ & Mercury Mist Topaz - 14k Yellow Gold - 16g - 12x8mm -Threaded - BVLA Sarai Marquise - White CZ & Mercury Mist Topaz - 14k Yellow Gold - 16g - 12x8mm -Threaded - BVLA Ear Illustration featuring the Lobe, Conch, and Helix piercing sites highlighted in yellow.
Sarai Marquise - White CZ & Mercury Mist Topaz - 14k Yellow Gold - 16g - 12x8mm -Threaded - BVLA
$700.00
The Rose 13 Gem Cluster - Marcasite - 14k Yellow Gold - 16g - 5mm - 2.5mm - End - Threaded - BVLA The Rose 13 Gem Cluster - Marcasite - 14k Yellow Gold - 16g - 5mm - 2.5mm - End - Threaded - BVLA Ear Illustration featuring the Lobe, Conch, Tragus, Forward Helix, Anti-Tragus, and Helix piercing areas highlighted in yellow. Mouth Illustration featuring the Philtrum, Monroe, Lip, and Labret areas highlighted in yellow. Nose Illustration featuring in the Nostril area highlighted in yellow.
The Rose 13 Gem Cluster - Marcasite - 14k Yellow Gold - 16g - 5mm - 2.5mm - End - Threaded - BVLA
$590.00
The Rose 13 Gem Cluster - Champagne Sapphire, Faceted Oregon Sunstone - 14k Yellow Gold - 16g - 10mm - 5mm - 1.5mm - End - Threaded - BVLA The Rose 13 Gem Cluster - Champagne Sapphire, Faceted Oregon Sunstone - 14k Yellow Gold - 16g - 10mm - 5mm - 1.5mm - End - Threaded - BVLA Ear Illustration featuring the Lobe, Conch, and Helix piercing areas highlighted in yellow.
The Rose 13 Gem Cluster - Champagne Sapphire, Faceted Oregon Sunstone - 14k Yellow Gold - 16g - 10mm - 5mm - 1.5mm - End - Threaded - BVLA
$1,020.00
Panaraya Marquise - Champagne CZ - 14k Yellow Gold - 16g - 12.5x6mm - 4x2mm - End - Threaded - BVLA Panaraya Marquise - Champagne CZ - 14k Yellow Gold - 16g - 12.5x6mm - 4x2mm - End - Threaded - BVLA Ear Illustration featuring the Lobe, Conch, and Helix piercing areas highlighted in yellow.
Panaraya Marquise - Champagne CZ - 14k Yellow Gold - 16g - 12.5x6mm - 4x2mm - End - Threaded - BVLA
$670.00
Sarai Marquise - Amethyst AA & White Opal AAA - 14k White Gold - 16g - 12x8mm -Threaded - BVLA Sarai Marquise - Amethyst AA & White Opal AAA - 14k White Gold - 16g - 12x8mm -Threaded - BVLA Ear Illustration featuring the Lobe, Conch, and Helix piercing sites highlighted in yellow.
Sarai Marquise - Amethyst AA & White Opal AAA - 14k White Gold - 16g - 12x8mm -Threaded - BVLA
$900.00
3 Gem Fanfare Right - Amber Yellow CZ - 18k Rose Gold - 18g/16g - 6x3.5mm - End - Threadless - Anatometal 3 Gem Fanfare Right - Amber Yellow CZ - 18k Rose Gold - 18g/16g - 6x3.5mm - End - Threadless - Anatometal Ear Illustration featuring the Lobe, Forward Helix, Tragus, Conch, and Helix piercing areas highlighted in yellow. Nose Illustration featuring the Nostril piercing highlighted in yellow. Mouth Illustration featuring the Lip, Labret, and Philtrum piercing areas highlighted in yellow.
3 Gem Fanfare Right - Amber Yellow CZ - 18k Rose Gold - 18g/16g - 6x3.5mm - End - Threadless - Anatometal
$165.00
3 Gem Fanfare Right - Aurora Borealis CZ - 18k Rose Gold - 18g/16g - 6x3.5mm - End - Threadless - Anatometal 3 Gem Fanfare Right - Aurora Borealis CZ - 18k Rose Gold - 18g/16g - 6x3.5mm - End - Threadless - Anatometal Ear Illustration featuring the Lobe, Forward Helix, Tragus, Conch, and Helix piercing areas highlighted in yellow. Nose Illustration featuring the Nostril piercing highlighted in yellow. Mouth Illustration featuring the Lip, Labret, and Philtrum piercing areas highlighted in yellow.
3 Gem Fanfare Right - Aurora Borealis CZ - 18k Rose Gold - 18g/16g - 6x3.5mm - End - Threadless - Anatometal
$165.00
3 Gem Fanfare Left - Aurora Borealis CZ - 18k Rose Gold - 18g/16g - 6x3.5mm - End - Threadless - Anatometal 3 Gem Fanfare Left - Aurora Borealis CZ - 18k Rose Gold - 18g/16g - 6x3.5mm - End - Threadless - Anatometal Ear Illustration featuring the Lobe, Forward Helix, Tragus, Conch, and Helix piercing areas highlighted in yellow. Nose Illustration featuring the Nostril piercing highlighted in yellow. Mouth Illustration featuring the Lip, Labret, and Philtrum piercing areas highlighted in yellow.
3 Gem Fanfare Left - Aurora Borealis CZ - 18k Rose Gold - 18g/16g - 6x3.5mm - End - Threadless - Anatometal
$165.00
3 Gem Fanfare Left - Aurora Borealis CZ - 18k White Gold - 18g/16g - 6x3.5mm - End - Threadless - Anatometal 3 Gem Fanfare Left - Aurora Borealis CZ - 18k White Gold - 18g/16g - 6x3.5mm - End - Threadless - Anatometal Ear Illustration featuring the Lobe, Forward Helix, Tragus, Conch, and Helix piercing areas highlighted in yellow. Nose Illustration featuring the Nostril piercing highlighted in yellow. Mouth Illustration featuring the Lip, Labret, and Philtrum piercing areas highlighted in yellow.
3 Gem Fanfare Left - Aurora Borealis CZ - 18k White Gold - 18g/16g - 6x3.5mm - End - Threadless - Anatometal
$165.00
3 Gem Fanfare Right - Arctic Blue CZ - 18k White Gold - 18g/16g - 6x3.5mm - End - Threadless - Anatometal 3 Gem Fanfare Right - Arctic Blue CZ - 18k White Gold - 18g/16g - 6x3.5mm - End - Threadless - Anatometal Ear Illustration featuring the Lobe, Forward Helix, Tragus, Conch, and Helix piercing areas highlighted in yellow. Nose Illustration featuring the Nostril piercing highlighted in yellow. Mouth Illustration featuring the Lip, Labret, and Philtrum piercing areas highlighted in yellow.
3 Gem Fanfare Right - Arctic Blue CZ - 18k White Gold - 18g/16g - 6x3.5mm - End - Threadless - Anatometal
$165.00
3 Gem Fanfare Left - Arctic Blue CZ - 18k White Gold - 18g/16g - 6x3.5mm - End - Threadless - Anatometal 3 Gem Fanfare Left - Arctic Blue CZ - 18k White Gold - 18g/16g - 6x3.5mm - End - Threadless - Anatometal Ear Illustration featuring the Lobe, Forward Helix, Tragus, Conch, and Helix piercing areas highlighted in yellow. Nose Illustration featuring the Nostril piercing highlighted in yellow. Mouth Illustration featuring the Lip, Labret, and Philtrum piercing areas highlighted in yellow.
3 Gem Fanfare Left - Arctic Blue CZ - 18k White Gold - 18g/16g - 6x3.5mm - End - Threadless - Anatometal
$165.00
3 Gem Fanfare Right - Brown CZ - 18k Yellow Gold - 18g/16g - 6x3.5mm - End - Threadless - Anatometal 3 Gem Fanfare Right - Brown CZ - 18k Yellow Gold - 18g/16g - 6x3.5mm - End - Threadless - Anatometal Ear Illustration featuring the Lobe, Forward Helix, Tragus, Conch, and Helix piercing areas highlighted in yellow. Nose Illustration featuring the Nostril piercing highlighted in yellow. Mouth Illustration featuring the Lip, Labret, and Philtrum piercing areas highlighted in yellow.
3 Gem Fanfare Right - Brown CZ - 18k Yellow Gold - 18g/16g - 6x3.5mm - End - Threadless - Anatometal
$165.00
3 Gem Fanfare Left - Brown CZ - 18k Yellow Gold - 18g/16g - 6x3.5mm - End - Threadless - Anatometal 3 Gem Fanfare Left - Brown CZ - 18k Yellow Gold - 18g/16g - 6x3.5mm - End - Threadless - Anatometal Ear Illustration featuring the Lobe, Forward Helix, Tragus, Conch, and Helix piercing areas highlighted in yellow. Nose Illustration featuring the Nostril piercing highlighted in yellow. Mouth Illustration featuring the Lip, Labret, and Philtrum piercing areas highlighted in yellow.
3 Gem Fanfare Left - Brown CZ - 18k Yellow Gold - 18g/16g - 6x3.5mm - End - Threadless - Anatometal
$165.00
Zia - Aurora Borealis CZ - 18k Rose Gold - 18g/16g - 3mm - 2mm - End - Threadless - Anatometal Zia - Aurora Borealis CZ - 18k Rose Gold - 18g/16g - 3mm - 2mm - End - Threadless - Anatometal Ear Illustration featuring the Lobe, Forward Helix, Tragus, Conch, and Helix piercing areas highlighted in yellow. Mouth Illustration featuring the Lip, Labret, and Philtrum piercing areas highlighted in yellow. Nose Illustration featuring the Nostril piercing highlighted in yellow.
Zia - Aurora Borealis CZ - 18k Rose Gold - 18g/16g - 3mm - 2mm - End - Threadless - Anatometal
$85.00
Zia - Black CZ - 18k Rose Gold - 18g/16g - 3mm - 2mm - End - Threadless - Anatometal Zia - Black CZ - 18k Rose Gold - 18g/16g - 3mm - 2mm - End - Threadless - Anatometal Ear Illustration featuring the Lobe, Forward Helix, Tragus, Conch, and Helix piercing areas highlighted in yellow. Nose Illustration featuring the Nostril piercing highlighted in yellow. Mouth Illustration featuring the Lip, Labret, and Philtrum piercing areas highlighted in yellow.
Zia - Black CZ - 18k Rose Gold - 18g/16g - 3mm - 2mm - End - Threadless - Anatometal
$85.00
Zia - Smoke CZ - 18k White Gold - 18g/16g - 3mm - 2mm - End - Threadless - Anatometal Zia - Smoke CZ - 18k White Gold - 18g/16g - 3mm - 2mm - End - Threadless - Anatometal Ear Illustration featuring the Lobe, Forward Helix, Tragus, Conch, and Helix piercing areas highlighted in yellow. Nose Illustration featuring the Nostril piercing highlighted in yellow. Mouth Illustration featuring the Lip, Labret, and Philtrum piercing areas highlighted in yellow.
Zia - Smoke CZ - 18k White Gold - 18g/16g - 3mm - 2mm - End - Threadless - Anatometal
$85.00
Zia - Champagne CZ - 18k White Gold - 18g/16g - 3mm - 2mm - End - Threadless - Anatometal Zia - Champagne CZ - 18k White Gold - 18g/16g - 3mm - 2mm - End - Threadless - Anatometal Ear Illustration featuring the Lobe, Forward Helix, Tragus, Conch, and Helix piercing areas highlighted in yellow. Nose Illustration featuring the Nostril piercing highlighted in yellow. Mouth Illustration featuring the Lip, Labret, and Philtrum piercing areas highlighted in yellow.
Zia - Champagne CZ - 18k White Gold - 18g/16g - 3mm - 2mm - End - Threadless - Anatometal
$85.00
Zia - Pistachio CZ - 18k Rose Gold - 18g/16g - 3mm - 2mm - End - Threadless - Anatometal Zia - Pistachio CZ - 18k Rose Gold - 18g/16g - 3mm - 2mm - End - Threadless - Anatometal Ear Illustration featuring the Lobe, Forward Helix, Tragus, Conch, and Helix piercing areas highlighted in yellow. Nose Illustration featuring the Nostril piercing highlighted in yellow. Mouth Illustration featuring the Lip, Labret, and Philtrum piercing areas highlighted in yellow.
Zia - Pistachio CZ - 18k Rose Gold - 18g/16g - 3mm - 2mm - End - Threadless - Anatometal
$85.00
Zia - Red CZ - 18k Rose Gold - 18g/16g - 3mm - 2mm - End - Threadless - Anatometal Zia - Red CZ - 18k Rose Gold - 18g/16g - 3mm - 2mm - End - Threadless - Anatometal Ear Illustration featuring the Lobe, Forward Helix, Tragus, Conch, and Helix piercing areas highlighted in yellow. Nose Illustration featuring the Nostril piercing highlighted in yellow. Mouth Illustration featuring the Lip, Labret, and Philtrum piercing areas highlighted in yellow.
Zia - Red CZ - 18k Rose Gold - 18g/16g - 3mm - 2mm - End - Threadless - Anatometal
$85.00
Zia - Black CZ - 18k White Gold - 18g/16g - 3mm - 2mm - End - Threadless - Anatometal Zia - Black CZ - 18k White Gold - 18g/16g - 3mm - 2mm - End - Threadless - Anatometal Ear Illustration featuring the Lobe, Forward Helix, Tragus, Conch, and Helix piercing areas highlighted in yellow. Nose Illustration featuring the Nostril piercing highlighted in yellow. Mouth Illustration featuring the Lip, Labret, and Philtrum piercing areas highlighted in yellow.
Zia - Black CZ - 18k White Gold - 18g/16g - 3mm - 2mm - End - Threadless - Anatometal
$85.00
Zia - Amethyst - 18k White Gold - 18g/16g - 3mm - 2mm - End - Threadless - Anatometal Zia - Amethyst - 18k White Gold - 18g/16g - 3mm - 2mm - End - Threadless - Anatometal Ear Illustration featuring the Lobe, Forward Helix, Tragus, Conch, and Helix piercing areas highlighted in yellow. Nose Illustration featuring the Nostril piercing highlighted in yellow. Mouth Illustration featuring the Lip, Labret, and Philtrum piercing areas highlighted in yellow.
Zia - Amethyst - 18k White Gold - 18g/16g - 3mm - 2mm - End - Threadless - Anatometal
$85.00
Zia - Sapphire - 18k Yellow Gold - 18g/16g - 3mm - 2mm - End - Threadless - Anatometal Zia - Sapphire - 18k Yellow Gold - 18g/16g - 3mm - 2mm - End - Threadless - Anatometal Ear Illustration featuring the Lobe, Forward Helix, Tragus, Conch, and Helix piercing areas highlighted in yellow. Nose Illustration featuring the Nostril piercing highlighted in yellow. Mouth Illustration featuring the Lip, Labret, and Philtrum piercing areas highlighted in yellow.
Zia - Sapphire - 18k Yellow Gold - 18g/16g - 3mm - 2mm - End - Threadless - Anatometal
$85.00
Zia - Primrose CZ - 18k Rose Gold - 18g/16g - 3mm - 2mm - End - Threadless - Anatometal Zia - Primrose CZ - 18k Rose Gold - 18g/16g - 3mm - 2mm - End - Threadless - Anatometal Ear Illustration featuring the Lobe, Forward Helix, Tragus, Conch, and Helix piercing areas highlighted in yellow. Nose Illustration featuring the Nostril piercing highlighted in yellow. Mouth Illustration featuring the Lip, Labret, and Philtrum piercing areas highlighted in yellow.
Zia - Primrose CZ - 18k Rose Gold - 18g/16g - 3mm - 2mm - End - Threadless - Anatometal
$85.00
Zia - Aurora Borealis CZ - 18k White Gold - 18g/16g - 3mm - 2mm - End - Threadless - Anatometal Zia - Aurora Borealis CZ - 18k White Gold - 18g/16g - 3mm - 2mm - End - Threadless - Anatometal Ear Illustration featuring the Lobe, Forward Helix, Tragus, Conch, and Helix piercing areas highlighted in yellow. Nose Illustration featuring the Nostril piercing highlighted in yellow. Mouth Illustration featuring the Lip, Labret, and Philtrum piercing areas highlighted in yellow.
Zia - Aurora Borealis CZ - 18k White Gold - 18g/16g - 3mm - 2mm - End - Threadless - Anatometal
$85.00
Zia - Brown CZ - 18k Yellow Gold - 18g/16g - 3mm - 2mm - End - Threadless - Anatometal Zia - Brown CZ - 18k Yellow Gold - 18g/16g - 3mm - 2mm - End - Threadless - Anatometal Ear Illustration featuring the Lobe, Forward Helix, Tragus, Conch, and Helix piercing areas highlighted in yellow. Nose Illustration featuring the Nostril piercing highlighted in yellow. Mouth Illustration featuring the Lip, Labret, and Philtrum piercing areas highlighted in yellow.
Zia - Brown CZ - 18k Yellow Gold - 18g/16g - 3mm - 2mm - End - Threadless - Anatometal
$85.00
Zia - Emerald - 18k Yellow Gold - 18g/16g - 3mm - 2mm - End - Threadless - Anatometal Zia - Emerald - 18k Yellow Gold - 18g/16g - 3mm - 2mm - End - Threadless - Anatometal Ear Illustration featuring the Lobe, Forward Helix, Tragus, Conch, and Helix piercing areas highlighted in yellow. Nose Illustration featuring the Nostril piercing highlighted in yellow. Mouth Illustration featuring the Lip, Labret, and Philtrum piercing areas highlighted in yellow.
Zia - Emerald - 18k Yellow Gold - 18g/16g - 3mm - 2mm - End - Threadless - Anatometal
$85.00
Zia - Black CZ - 18k Yellow Gold - 18g/16g - 3mm - 2mm - End - Threadless - Anatometal Zia - Black CZ - 18k Yellow Gold - 18g/16g - 3mm - 2mm - End - Threadless - Anatometal Ear Illustration featuring the Lobe, Forward Helix, Tragus, Conch, and Helix piercing areas highlighted in yellow. Nose Illustration featuring the Nostril piercing highlighted in yellow. Mouth Illustration featuring the Lip, Labret, and Philtrum piercing areas highlighted in yellow.
Zia - Black CZ - 18k Yellow Gold - 18g/16g - 3mm - 2mm - End - Threadless - Anatometal
$85.00
Icon - Aurora Borealis, Mint Green - 18k White Gold - 18g/16g - 5x2mm - End - Threadless - Anatometal Icon - Aurora Borealis, Mint Green - 18k White Gold - 18g/16g - 5x2mm - End - Threadless - Anatometal Ear Illustration featuring the Lobe, Forward Helix, Tragus, Conch, and Helix piercing areas highlighted in yellow. Nose Illustration featuring the Nostril piercing highlighted in yellow. Mouth Illustration featuring the Lip, Labret, and Philtrum piercing areas highlighted in yellow.
Icon - Aurora Borealis, Mint Green - 18k White Gold - 18g/16g - 5x2mm - End - Threadless - Anatometal
$130.00
Sold out
Marquise Prong - Pistachio CZ - 18k Rose Gold - 18g/16g - 2x4mm - End - Threadless - Anatometal Marquise Prong - Pistachio CZ - 18k Rose Gold - 18g/16g - 2x4mm - End - Threadless - Anatometal Ear Illustration featuring the Lobe, Forward Helix, Tragus, Conch, and Helix piercing areas highlighted in yellow. Nose Illustration featuring the Nostril piercing highlighted in yellow. Mouth Illustration featuring the Lip, Labret, and Philtrum piercing areas highlighted in yellow.
Marquise Prong - Pistachio CZ - 18k Rose Gold - 18g/16g - 2x4mm - End - Threadless - Anatometal
$85.00
Sonoma Pear - Tangerine - 18k White Gold - 18g/16g - 4x4.5mm - 3x2mm - End - Threadless - Anatometal Sonoma Pear - Tangerine - 18k White Gold - 18g/16g - 4x4.5mm - 3x2mm - End - Threadless - Anatometal Ear Illustration featuring the Lobe, Forward Helix, Tragus, Conch, and Helix piercing areas highlighted in yellow. Nose Illustration featuring the Nostril piercing highlighted in yellow. Mouth Illustration featuring the Lip, Labret, and Philtrum piercing areas highlighted in yellow.
Sonoma Pear - Tangerine - 18k White Gold - 18g/16g - 4x4.5mm - 3x2mm - End - Threadless - Anatometal
$145.00
Sold out
Cat Moon - 18k Rose Gold - 18g/16g - 9x5mm - End - Threadless - Anatometal Cat Moon - 18k Rose Gold - 18g/16g - 9x5mm - End - Threadless - Anatometal Ear Illustration featuring the Lobe, Conch, and Helix piercing areas highlighted in yellow.
Cat Moon - 18k Rose Gold - 18g/16g - 9x5mm - End - Threadless - Anatometal
$135.00
3 Gem Mini Marquise Fan - Sapphire - 18k Yellow Gold - 18g/16g - 6x4mm - End - Threadless - Anatometal 3 Gem Mini Marquise Fan - Sapphire - 18k Yellow Gold - 18g/16g - 6x4mm - End - Threadless - Anatometal Ear Illustration featuring the Lobe, Forward Helix, Tragus, Conch, and Helix piercing areas highlighted in yellow. Nose Illustration featuring the Nostril piercing highlighted in yellow. Mouth Illustration featuring the Lip, Labret, and Philtrum piercing areas highlighted in yellow.
3 Gem Mini Marquise Fan - Sapphire - 18k Yellow Gold - 18g/16g - 6x4mm - End - Threadless - Anatometal
$150.00
Marquise Bezel - White CZ - 18k Rose Gold - 18g/16g - 4.5x2.5mm - End - Threadless - Anatometal Marquise Bezel - White CZ - 18k Rose Gold - 18g/16g - 4.5x2.5mm - End - Threadless - Anatometal Ear Illustration featuring the Lobe, Forward Helix, Tragus, Conch, and Helix piercing areas highlighted in yellow. Nose Illustration featuring the Nostril piercing highlighted in yellow. Mouth Illustration featuring the Lip, Labret, and Philtrum piercing areas highlighted in yellow.
Marquise Bezel - White CZ - 18k Rose Gold - 18g/16g - 4.5x2.5mm - End - Threadless - Anatometal
$90.00
Marquise Bezel - White CZ - 18k Yellow Gold - 18g/16g - 4.5x2.5mm - End - Threadless - Anatometal Marquise Bezel - White CZ - 18k Yellow Gold - 18g/16g - 4.5x2.5mm - End - Threadless - Anatometal Ear Illustration featuring the Lobe, Forward Helix, Tragus, Conch, and Helix piercing areas highlighted in yellow. Nose Illustration featuring the Nostril piercing highlighted in yellow. Mouth Illustration featuring the Lip, Labret, and Philtrum piercing areas highlighted in yellow.
Marquise Bezel - White CZ - 18k Yellow Gold - 18g/16g - 4.5x2.5mm - End - Threadless - Anatometal
$90.00
Adina - White CZ - 18k White Gold - 18g/16g - 7mm - 3x1.5mm - End - Threadless - Anatometal Adina - White CZ - 18k White Gold - 18g/16g - 7mm - 3x1.5mm - End - Threadless - Anatometal Ear Illustration featuring the Lobe, Forward Helix, Tragus, Conch, and Helix piercing areas highlighted in yellow. Nose Illustration featuring the Nostril piercing highlighted in yellow. Mouth Illustration featuring the Lip, Labret, Monroe and Philtrum piercing areas highlighted in yellow.
Adina - White CZ - 18k White Gold - 18g/16g - 7mm - 3x1.5mm - End - Threadless - Anatometal
$315.00
2 Gem Navel Curve - 12g - Aqua CZ - 3/8" - 6mm, 4mm - Titanium - Navel - Industrial Strength 2 Gem Navel Curve - 12g - Aqua CZ - 3/8" - 6mm, 4mm - Titanium - Navel - Industrial Strength
2 Gem Navel Curve - 12g - Aqua CZ - 3/8" - 6mm, 4mm - Titanium - Navel - Industrial Strength
$90.00
Sold out
2 Gem Navel Curve - 12g - Purple Opal - 3/8" - 6mm, 4mm - Titanium - Navel - Industrial Strength 2 Gem Navel Curve - 12g - Purple Opal - 3/8" - 6mm, 4mm - Titanium - Navel - Industrial Strength
2 Gem Navel Curve - 12g - Purple Opal - 3/8" - 6mm, 4mm - Titanium - Navel - Industrial Strength
$90.00
2 Gem Navel Curve - 12g - Black CZ - 3/8" - 6mm, 4mm - Titanium - Bezel - Navel - Industrial Strength 2 Gem Navel Curve - 12g - Black CZ - 3/8" - 6mm, 4mm - Titanium - Bezel - Navel - Industrial Strength
2 Gem Navel Curve - 12g - Black CZ - 3/8" - 6mm, 4mm - Titanium - Bezel - Navel - Industrial Strength
$90.00
2 Gem Navel Curve - 12g - Black Opal - 3/8" - 6mm, 4mm - Titanium - Navel - Industrial Strength 2 Gem Navel Curve - 12g - Black Opal - 3/8" - 6mm, 4mm - Titanium - Navel - Industrial Strength
2 Gem Navel Curve - 12g - Black Opal - 3/8" - 6mm, 4mm - Titanium - Navel - Industrial Strength
$90.00
2 Gem Navel Curve - 12g - Black CZ - 3/8" - 6mm, 4mm - Titanium - Prong - Navel - Industrial Strength 2 Gem Navel Curve - 12g - Black CZ - 3/8" - 6mm, 4mm - Titanium - Prong - Navel - Industrial Strength
2 Gem Navel Curve - 12g - Black CZ - 3/8" - 6mm, 4mm - Titanium - Prong - Navel - Industrial Strength
$90.00
2 Gem Navel Curve - 12g - Garnet - 3/8" - 6mm, 4mm - Titanium - Navel - Industrial Strength 2 Gem Navel Curve - 12g - Garnet - 3/8" - 6mm, 4mm - Titanium - Navel - Industrial Strength
2 Gem Navel Curve - 12g - Garnet - 3/8" - 6mm, 4mm - Titanium - Navel - Industrial Strength
$90.00
2 Gem Navel Curve - 12g - Kiwi Opal - 3/8" - 6mm, 4mm - Titanium - Navel - Industrial Strength 2 Gem Navel Curve - 12g - Kiwi Opal - 3/8" - 6mm, 4mm - Titanium - Navel - Industrial Strength
2 Gem Navel Curve - 12g - Kiwi Opal - 3/8" - 6mm, 4mm - Titanium - Navel - Industrial Strength
$90.00
Sold out
2 Gem Navel Curve - 12g - Azure Opal - 3/8" - 6mm, 4mm - Titanium - Navel - Industrial Strength 2 Gem Navel Curve - 12g - Azure Opal - 3/8" - 6mm, 4mm - Titanium - Navel - Industrial Strength
2 Gem Navel Curve - 12g - Azure Opal - 3/8" - 6mm, 4mm - Titanium - Navel - Industrial Strength
$90.00
2 Gem Navel Curve - 12g - Mint CZ - 3/8" - 6mm, 4mm - Titanium - Navel - Industrial Strength 2 Gem Navel Curve - 12g - Mint CZ - 3/8" - 6mm, 4mm - Titanium - Navel - Industrial Strength
2 Gem Navel Curve - 12g - Mint CZ - 3/8" - 6mm, 4mm - Titanium - Navel - Industrial Strength
$90.00
2 Gem Navel Curve - 12g - Pink CZ - 3/8" - 6mm, 4mm - Titanium - Navel - Industrial Strength 2 Gem Navel Curve - 12g - Pink CZ - 3/8" - 6mm, 4mm - Titanium - Navel - Industrial Strength
2 Gem Navel Curve - 12g - Pink CZ - 3/8" - 6mm, 4mm - Titanium - Navel - Industrial Strength
$90.00
2 Gem Navel Curve - 12g - Turquoise - 3/8" - 6mm, 4mm - Titanium - Navel - Industrial Strength 2 Gem Navel Curve - 12g - Turquoise - 3/8" - 6mm, 4mm - Titanium - Navel - Industrial Strength
2 Gem Navel Curve - 12g - Turquoise - 3/8" - 6mm, 4mm - Titanium - Navel - Industrial Strength
$90.00
2 Gem Navel Curve - 12g - Teal Opal - 3/8" - 6mm, 4mm - Titanium - Navel - Industrial Strength 2 Gem Navel Curve - 12g - Teal Opal - 3/8" - 6mm, 4mm - Titanium - Navel - Industrial Strength
2 Gem Navel Curve - 12g - Teal Opal - 3/8" - 6mm, 4mm - Titanium - Navel - Industrial Strength
$90.00
2 Gem Navel Curve - 12g - Pacific Opals - 3/8" - 6mm, 4mm - Titanium - Navel - Industrial Strength 2 Gem Navel Curve - 12g - Pacific Opals - 3/8" - 6mm, 4mm - Titanium - Navel - Industrial Strength
2 Gem Navel Curve - 12g - Pacific Opals - 3/8" - 6mm, 4mm - Titanium - Navel - Industrial Strength
$90.00
2 Gem Navel Curve - 12g - Amethyst - 3/8" - 6mm, 4mm - Titanium - Navel - Industrial Strength 2 Gem Navel Curve - 12g - Amethyst - 3/8" - 6mm, 4mm - Titanium - Navel - Industrial Strength
2 Gem Navel Curve - 12g - Amethyst - 3/8" - 6mm, 4mm - Titanium - Navel - Industrial Strength
$90.00
2 Gem Navel Curve - 12g - Arctic - 3/8" - 6mm, 4mm - Titanium - Navel - Industrial Strength 2 Gem Navel Curve - 12g - Arctic - 3/8" - 6mm, 4mm - Titanium - Navel - Industrial Strength
2 Gem Navel Curve - 12g - Arctic - 3/8" - 6mm, 4mm - Titanium - Navel - Industrial Strength
$90.00
2 Gem Navel Curve - 12g - Citrine - 3/8" - 6mm, 4mm - Titanium - Navel - Industrial Strength
$90.00
2 Gem Navel Curve - 12g - Emerald - 3/8" - 6mm, 4mm - Titanium - Navel - Industrial Strength 2 Gem Navel Curve - 12g - Emerald - 3/8" - 6mm, 4mm - Titanium - Navel - Industrial Strength
2 Gem Navel Curve - 12g - Emerald - 3/8" - 6mm, 4mm - Titanium - Navel - Industrial Strength
$90.00
2 Gem Navel Curve - 12g - Sapphire - 3/8" - 6mm, 4mm - Titanium - Navel - Industrial Strength 2 Gem Navel Curve - 12g - Sapphire - 3/8" - 6mm, 4mm - Titanium - Navel - Industrial Strength
2 Gem Navel Curve - 12g - Sapphire - 3/8" - 6mm, 4mm - Titanium - Navel - Industrial Strength
$90.00
2 Gem Navel Curve - 12g - White Opal - 3/8" - 6mm, 4mm - Titanium - Navel - Industrial Strength 2 Gem Navel Curve - 12g - White Opal - 3/8" - 6mm, 4mm - Titanium - Navel - Industrial Strength
2 Gem Navel Curve - 12g - White Opal - 3/8" - 6mm, 4mm - Titanium - Navel - Industrial Strength
$90.00
2 Gem Navel Curve - 12g - White CZ - 3/8" - 6mm, 4mm - Titanium - Navel - Industrial Strength 2 Gem Navel Curve - 12g - White CZ - 3/8" - 6mm, 4mm - Titanium - Navel - Industrial Strength
2 Gem Navel Curve - 12g - White CZ - 3/8" - 6mm, 4mm - Titanium - Navel - Industrial Strength
$90.00
2 Gem Navel Curve - 12g - White Opal - 7/16" - 6mm, 4mm - Titanium - Navel - Industrial Strength 2 Gem Navel Curve - 12g - White Opal - 7/16" - 6mm, 4mm - Titanium - Navel - Industrial Strength
2 Gem Navel Curve - 12g - White Opal - 7/16" - 6mm, 4mm - Titanium - Navel - Industrial Strength
$90.00
2 Gem Navel Curve - 12g - White CZ - 1/2" - 6mm, 4mm - Titanium - Navel - Industrial Strength 2 Gem Navel Curve - 12g - White CZ - 1/2" - 6mm, 4mm - Titanium - Navel - Industrial Strength
2 Gem Navel Curve - 12g - White CZ - 1/2" - 6mm, 4mm - Titanium - Navel - Industrial Strength
$90.00
2 Gem Navel Curve - 12g - White CZ - 7/16" - 6mm, 4mm - Titanium - Navel - Industrial Strength 2 Gem Navel Curve - 12g - White CZ - 7/16" - 6mm, 4mm - Titanium - Navel - Industrial Strength
2 Gem Navel Curve - 12g - White CZ - 7/16" - 6mm, 4mm - Titanium - Navel - Industrial Strength
$90.00
7 Gem Septum Clicker - 12g - Red CZ, Orange CZ, Sunrise Yellow CZ, Green CZ, Sapphire Blue CZ, Paradise Shine CZ, Fancy Purple CZ - 1/4"x5/16" - 2mm, 3mm - Titanium - Clicker - Industrial Strength 7 Gem Septum Clicker - 12g - Red CZ, Orange CZ, Sunrise Yellow CZ, Green CZ, Sapphire Blue CZ, Paradise Shine CZ, Fancy Purple CZ - 1/4"x5/16" - 2mm, 3mm - Titanium - Clicker - Industrial Strength Nose Illustration featuring the Septum piercing area highlighted in yellow.
7 Gem Septum Clicker - 12g - Red CZ, Orange CZ, Sunrise Yellow CZ, Green CZ, Sapphire Blue CZ, Paradise Shine CZ, Fancy Purple CZ - 1/4"x5/16" - 2mm, 3mm - Titanium - Clicker - Industrial Strength
$215.00
Septum Clicker #7 - 16g - Opal - 1/4"x5/16"- 2mm - Titanium - Clicker - Industrial Strength Septum Clicker #7 - 16g - Opal - 1/4"x5/16"- 2mm - Titanium - Clicker - Industrial Strength Nose Illustration featuring the Septum piercing area highlighted in yellow.
Septum Clicker #7 - 16g - Opal - 1/4"x5/16"- 2mm - Titanium - Clicker - Industrial Strength
$215.00
Sold out
Odyssey  #8 - 16g - Lime Yellow Opal - 1/4"x5/16"- 2mm, 2.5mm, 3mm - Titanium - Clicker - Industrial Strength Odyssey  #8 - 16g - Lime Yellow Opal - 1/4"x5/16"- 2mm, 2.5mm, 3mm - Titanium - Clicker - Industrial Strength Nose Illustration featuring the Septum piercing area highlighted in yellow.
Odyssey #8 - 16g - Lime Yellow Opal - 1/4"x5/16"- 2mm, 2.5mm, 3mm - Titanium - Clicker - Industrial Strength
$215.00
Odyssey  Helios #17 - 16g - White CZ - 5/16"x3/8" - 2/3/2/3/2/3/2 - Titanium - Clicker - Industrial Strength Odyssey  Helios #17 - 16g - White CZ - 5/16"x3/*" - 2/3/2/3/2/3/2 - Titanium - Clicker - Industrial Strength Nose Illustration featuring the Septum piercing area highlighted in yellow.
Odyssey Helios #17 - 16g - White CZ - 5/16"x3/8" - 2/3/2/3/2/3/2 - Titanium - Clicker - Industrial Strength
$215.00
5 Gem Clicker - 14g - Pink CZ, Mint Green CZ, Fancy Purple CZ - 1/4"x5/16" - 2mm, 2.5mm, 3mm - Titanium - Clicker - Industrial Strength 5 Gem Clicker - 14g - Pink CZ, Mint Green CZ, Fancy Purple CZ - 1/4"x5/16" - 2mm, 2.5mm, 3mm - Titanium - Clicker - Industrial Strength Nose Illustration featuring the Septum piercing area highlighted in yellow.
5 Gem Clicker - 14g - Pink CZ, Mint Green CZ, Fancy Purple CZ - 1/4"x5/16" - 2mm, 2.5mm, 3mm - Titanium - Clicker - Industrial Strength
$190.00
Odyssey  #10 - 16g - White CZ - 5/16"x5/16"- 3mm - Titanium - Clicker - Industrial Strength Odyssey  #10 - 16g - White CZ - 5/16"x5/16"- 3mm - Titanium - Clicker - Industrial Strength Nose Illustration featuring the Septum piercing area highlighted in yellow.
Odyssey #10 - 16g - White CZ - 5/16"x5/16"- 3mm - Titanium - Clicker - Industrial Strength
$215.00
Odyssey  #15 - 16g - White CZ - 1/4"x5/16"- 2mm - Titanium - Clicker - Industrial Strength Odyssey  #15 - 16g - White CZ - 1/4"x5/16"- 2mm - Titanium - Clicker - Industrial Strength Nose Illustration featuring the Septum piercing area highlighted in yellow.
Odyssey #15 - 16g - White CZ - 1/4"x5/16"- 2mm - Titanium - Clicker - Industrial Strength
$225.00
Odyssey  Dione - 14g - White CZ, Yellow CZ - 5/16"x3/8" - 2mm, 1mm - Titanium - Clicker - Industrial Strength Odyssey  Dione - 14g - White CZ, Yellow CZ - 5/16"x3/8" - 2mm, 1mm - Titanium - Clicker - Industrial Strength Nose Illustration featuring the Septum piercing area highlighted in yellow.
Odyssey Dione - 14g - White CZ, Yellow CZ - 5/16"x3/8" - 2mm, 1mm - Titanium - Clicker - Industrial Strength
$285.00
Odyssey  Helios #17 - 16g - White CZ - 1/4"x5/16"- 2/3/2/3/2/3/2 - Titanium - Clicker - Industrial Strength Odyssey  Helios #17 - 16g - White CZ - 1/4"x5/16"- 2/3/2/3/2/3/2 - Titanium - Clicker - Industrial Strength Nose Illustration featuring the Septum piercing area highlighted in yellow.
Odyssey Helios #17 - 16g - White CZ - 1/4"x5/16"- 2/3/2/3/2/3/2 - Titanium - Clicker - Industrial Strength
$225.00
Odyssey  #10 - 16g - White CZ - 1/4"x5/16"- 3mm - Titanium - Clicker - Industrial Strength Nose Illustration featuring the Septum piercing area highlighted in yellow.
Odyssey #10 - 16g - White CZ - 1/4"x5/16"- 3mm - Titanium - Clicker - Industrial Strength
$215.00
Sold out
Odyssey  #6 - 16g - White CZ - 5/16"x5/16"- 2/2.5/3/2.5/2 - Titanium - Clicker - Industrial Strength Odyssey  #6 - 16g - White CZ - 5/16"x5/16"- 2/2.5/3/2.5/2 - Titanium - Clicker - Industrial Strength Nose Illustration featuring the Septum piercing area highlighted in yellow.
Odyssey #6 - 16g - White CZ - 5/16"x5/16"- 2/2.5/3/2.5/2 - Titanium - Clicker - Industrial Strength
$215.00
Odyssey  #6 - 16g - White CZ - 1/4"x5/16"- 2/2.5/3/2.5/2 - Titanium - Clicker - Industrial Strength Odyssey  #6 - 16g - White CZ - 1/4"x5/16"- 2/2.5/3/2.5/2 - Titanium - Clicker - Industrial Strength Nose Illustration featuring the Septum piercing area highlighted in yellow.
Odyssey #6 - 16g - White CZ - 1/4"x5/16"- 2/2.5/3/2.5/2 - Titanium - Clicker - Industrial Strength
$215.00
Hammered Disk - 18k White Gold - 18g/16g - 3mm - End - Threadless - Anatometal Hammered Disk - 18k White Gold - 18g/16g - 3mm - End - Threadless - Anatometal Ear Illustration featuring the Lobe, Forward Helix, Tragus, Conch, Rook and Helix piercing areas highlighted in yellow. Nose Illustration featuring the Nostril piercing highlighted in yellow. Mouth Illustration featuring the Lip, Labret, Monroe and Philtrum piercing areas highlighted in yellow.
Hammered Disk - 18k White Gold - 18g/16g - 3mm - End - Threadless - Anatometal
$115.00
Bastina Seam Ring - 18k Yellow Gold - 16g - 3/8" - Ring - Anatometal Bastina Seam Ring - 18k Yellow Gold - 16g - 3/8" - Ring - Anatometal Ear Illustration featuring the Lobe, Daith, and Helix piercing areas highlighted in yellow. Nose Illustration featuring the Septum piercing area highlighted in yellow. Mouth Illustration featuring the Lip piercing areas highlighted in yellow.
Bastina Seam Ring - 18k Yellow Gold - 16g - 3/8" - Ring - Anatometal
$360.00
Harper Seam Ring - 18k Yellow Gold - 16g - 3/8" - Ring - Anatometal Harper Seam Ring - 18k Yellow Gold - 16g - 3/8" - Ring - Anatometal Ear Illustration featuring the Lobe, Daith, and Helix piercing areas highlighted in yellow. Nose Illustration featuring the Septum piercing area highlighted in yellow. Mouth Illustration featuring the Lip piercing areas highlighted in yellow.
Harper Seam Ring - 18k Yellow Gold - 16g - 3/8" - Ring - Anatometal
$395.00
Harper Seam Ring - 18k Rose Gold - 16g - 3/8" - Ring - Anatometal Harper Seam Ring - 18k Rose Gold - 16g - 3/8" - Ring - Anatometal Ear Illustration featuring the Lobe, Daith, and Helix piercing areas highlighted in yellow. Nose Illustration featuring the Septum piercing area highlighted in yellow. Mouth Illustration featuring the Lip piercing areas highlighted in yellow.
Harper Seam Ring - 18k Rose Gold - 16g - 3/8" - Ring - Anatometal
$375.00
Elijah - White CZ - 18k White Gold - 18g/16g - 6.5mm - 3.5mm - End - Threadless - Anatometal Elijah - White CZ - 18k White Gold - 18g/16g - 6.5mm - 3.5mm - End - Threadless - Anatometal Ear Illustration featuring the Lobe, Forward Helix, Tragus, Conch, and Helix piercing areas highlighted in yellow. Nose Illustration featuring the Nostril piercing highlighted in yellow. Mouth Illustration featuring the Lip, Labret, Monroe and Philtrum piercing areas highlighted in yellow.
Elijah - White CZ - 18k White Gold - 18g/16g - 6.5mm - 3.5mm - End - Threadless - Anatometal
$360.00
Marquise Bezel - White CZ - 18k White Gold - 18g/16g - 4.5x2.5mm - End - Threadless - Anatometal Marquise Bezel - White CZ - 18k White Gold - 18g/16g - 4.5x2.5mm - End - Threadless - Anatometal Ear Illustration featuring the Lobe, Forward Helix, Tragus, Conch, and Helix piercing areas highlighted in yellow. Nose Illustration featuring the Nostril piercing highlighted in yellow. Mouth Illustration featuring the Lip, Labret, and Philtrum piercing areas highlighted in yellow.
Marquise Bezel - White CZ - 18k White Gold - 18g/16g - 4.5x2.5mm - End - Threadless - Anatometal
$90.00
Adina - White CZ - 18k Rose Gold - 18g/16g - 7mm - 3x1.5mm - End - Threadless - Anatometal Adina - White CZ - 18k Rose Gold - 18g/16g - 7mm - 3x1.5mm - End - Threadless - Anatometal Ear Illustration featuring the Lobe, Forward Helix, Tragus, Conch, and Helix piercing areas highlighted in yellow. Nose Illustration featuring the Nostril piercing highlighted in yellow. Mouth Illustration featuring the Lip, Labret, Monroe and Philtrum piercing areas highlighted in yellow.
Adina - White CZ - 18k Rose Gold - 18g/16g - 7mm - 3x1.5mm - End - Threadless - Anatometal
$315.00
Adina - White CZ - 18k Yellow Gold - 18g/16g - 7mm - 3x1.5mm - End - Threadless - Anatometal Adina - White CZ - 18k Yellow Gold - 18g/16g - 7mm - 3x1.5mm - End - Threadless - Anatometal Ear Illustration featuring the Lobe, Forward Helix, Tragus, Conch, and Helix piercing areas highlighted in yellow. Nose Illustration featuring the Nostril piercing highlighted in yellow. Mouth Illustration featuring the Lip, Labret, Monroe and Philtrum piercing areas highlighted in yellow.
Adina - White CZ - 18k Yellow Gold - 18g/16g - 7mm - 3x1.5mm - End - Threadless - Anatometal
$315.00
Sold out
Vampire Bat - 18k Rose Gold - 18g/16g - 13.5x5.5mm - End - Threadless - Anatometal Vampire Bat - 18k Rose Gold - 18g/16g - 13.5x5.5mm - End - Threadless - Anatometal Ear Illustration featuring the Lobe, Conch, and Helix piercing areas highlighted in yellow.
Vampire Bat - 18k Rose Gold - 18g/16g - 13.5x5.5mm - End - Threadless - Anatometal
$130.00
Vampire Bat - 18k White Gold - 18g/16g - 13.5x5.5mm - End - Threadless - Anatometal Vampire Bat - 18k White Gold - 18g/16g - 13.5x5.5mm - End - Threadless - Anatometal Ear Illustration featuring the Lobe, Conch, and Helix piercing areas highlighted in yellow.
Vampire Bat - 18k White Gold - 18g/16g - 13.5x5.5mm - End - Threadless - Anatometal
$130.00
Vampire Bat - 18k Yellow Gold - 18g/16g - 13.5x5.5mm - End - Threadless - Anatometal Vampire Bat - 18k Yellow Gold - 18g/16g - 13.5x5.5mm - End - Threadless - Anatometal Ear Illustration featuring the Lobe, Conch, and Helix piercing areas highlighted in yellow.
Vampire Bat - 18k Yellow Gold - 18g/16g - 13.5x5.5mm - End - Threadless - Anatometal
$130.00
Pumpkin 3 - 18k Rose Gold - 18g/16g - 7x6.5mm - End - Threadless - Anatometal Pumpkin 3 - 18k Rose Gold - 18g/16g - 7x6.5mm - End - Threadless - Anatometal Ear Illustration featuring the Lobe, Forward Helix, Tragus, Conch, and Helix piercing areas highlighted in yellow. Nose Illustration featuring the Nostril piercing highlighted in yellow. Mouth Illustration featuring the Lip, Labret, Monroe and Philtrum piercing areas highlighted in yellow.
Pumpkin 3 - 18k Rose Gold - 18g/16g - 7x6.5mm - End - Threadless - Anatometal
$275.00
Pumpkin 3 - 18k White Gold - 18g/16g - 7x6.5mm - End - Threadless - Anatometal Pumpkin 3 - 18k White Gold - 18g/16g - 7x6.5mm - End - Threadless - Anatometal Ear Illustration featuring the Lobe, Forward Helix, Tragus, Conch, and Helix piercing areas highlighted in yellow. Nose Illustration featuring the Nostril piercing highlighted in yellow. Mouth Illustration featuring the Lip, Labretm, Monroe and Philtrum piercing areas highlighted in yellow.
Pumpkin 3 - 18k White Gold - 18g/16g - 7x6.5mm - End - Threadless - Anatometal
$275.00
Pumpkin 3 - 18k Yellow Gold - 18g/16g - 7x6.5mm - End - Threadless - Anatometal Pumpkin 3 - 18k Yellow Gold - 18g/16g - 7x6.5mm - End - Threadless - Anatometal Ear Illustration featuring the Lobe, Forward Helix, Tragus, Conch, and Helix piercing areas highlighted in yellow. Nose Illustration featuring the Nostril piercing highlighted in yellow. Mouth Illustration featuring the Lip, Labretm, Monroe and Philtrum piercing areas highlighted in yellow.
Pumpkin 3 - 18k Yellow Gold - 18g/16g - 7x6.5mm - End - Threadless - Anatometal
$275.00
Pumpkin 1 - 18k Rose Gold - 18g/16g - 7x6mm - End - Threadless - Anatometal Pumpkin 1 - 18k Rose Gold - 18g/16g - 7x6mm - End - Threadless - Anatometal Ear Illustration featuring the Lobe, Forward Helix, Tragus, Conch, and Helix piercing areas highlighted in yellow. Nose Illustration featuring the Nostril piercing highlighted in yellow. Mouth Illustration featuring the Lip, Labretm, Monroe and Philtrum piercing areas highlighted in yellow.
Pumpkin 1 - 18k Rose Gold - 18g/16g - 7x6mm - End - Threadless - Anatometal
$275.00
Pumpkin 1 - 18k White Gold - 18g/16g - 7x6mm - End - Threadless - Anatometal Pumpkin 1 - 18k White Gold - 18g/16g - 7x6mm - End - Threadless - Anatometal Ear Illustration featuring the Lobe, Forward Helix, Tragus, Conch, and Helix piercing areas highlighted in yellow. Nose Illustration featuring the Nostril piercing highlighted in yellow. Mouth Illustration featuring the Lip, Labretm, Monroe and Philtrum piercing areas highlighted in yellow.
Pumpkin 1 - 18k White Gold - 18g/16g - 7x6mm - End - Threadless - Anatometal
$275.00
Pumpkin 1 - 18k Yellow Gold - 18g/16g - 7x6mm - End - Threadless - Anatometal Pumpkin 1 - 18k Yellow Gold - 18g/16g - 7x6mm - End - Threadless - Anatometal Ear Illustration featuring the Lobe, Forward Helix, Tragus, Conch, and Helix piercing areas highlighted in yellow. Nose Illustration featuring the Nostril piercing highlighted in yellow. Mouth Illustration featuring the Lip, Labretm, Monroe and Philtrum piercing areas highlighted in yellow.
Pumpkin 1 - 18k Yellow Gold - 18g/16g - 7x6mm - End - Threadless - Anatometal
$275.00
Odyssey Aphrodite - 16g - Dusty Morganite, Black Opal - 5/16"x5/16" - 2mm, 1.5mm - Titanium - Clicker - Industrial Strength Odyssey Aphrodite - 16g - Dusty Morganite, Black Opal - 5/16"x5/16" - 2mm, 1.5mm - Titanium - Clicker - Industrial Strength Nose Illustration featuring the Septum piercing area highlighted in yellow.
Odyssey Aphrodite - 16g - Dusty Morganite, Black Opal - 5/16"x5/16" - 2mm, 1.5mm - Titanium - Clicker - Industrial Strength
$335.00
Odyssey Aphrodite - 16g - London Blue, Salmon Pink, Purple Opal - 5/16"x5/16" - 2mm, 1.5mm - Titanium - Clicker - Industrial Strength Odyssey Aphrodite - 16g - London Blue, Salmon Pink, Purple Opal - 5/16"x5/16" - 2mm, 1.5mm - Titanium - Clicker - Industrial Strength Nose Illustration featuring the Septum piercing area highlighted in yellow.
Odyssey Aphrodite - 16g - London Blue, Salmon Pink, Purple Opal - 5/16"x5/16" - 2mm, 1.5mm - Titanium - Clicker - Industrial Strength
$335.00
Odyssey Aphrodite - 16g - White CZ, White Opal - 1/4"x5/16" - 2mm, 1.5mm - Titanium - Clicker - Industrial Strength Odyssey Aphrodite - 16g - White CZ, White Opal - 1/4"x5/16" - 2mm, 1.5mm - Titanium - Clicker - Industrial Strength Nose Illustration featuring the Septum piercing area highlighted in yellow.
Odyssey Aphrodite - 16g - White CZ, White Opal - 1/4"x5/16" - 2mm, 1.5mm - Titanium - Clicker - Industrial Strength
$335.00
Odyssey Aphrodite - 16g - Aurora Borealis, White Opal - 1/4"x1/4" - 2mm, 1.5mm - Titanium - Clicker - Industrial Strength Odyssey Aphrodite - 16g - Aurora Borealis, White Opal - 1/4"x1/4" - 2mm, 1.5mm - Titanium - Clicker - Industrial Strength Nose Illustration featuring the Septum piercing area highlighted in yellow.
Odyssey Aphrodite - 16g - Aurora Borealis, White Opal - 1/4"x1/4" - 2mm, 1.5mm - Titanium - Clicker - Industrial Strength
$335.00
Odyssey  #12 - 16g - White Opal - 5/16"x3/8" - 3mm - Titanium - Clicker - Industrial Strength Odyssey  #12 - 16g - White Opal - 5/16"x3/8" - 3mm - Titanium - Clicker - Industrial Strength Nose Illustration featuring the Septum piercing area highlighted in yellow.
Odyssey #12 - 16g - White Opal - 5/16"x3/8" - 3mm - Titanium - Clicker - Industrial Strength
$215.00
Odyssey  #8  2/2.5/3/2.5/2 - 16g - White Opal - 1/4"x5/16"- Titanium - Clicker - Industrial Strength Odyssey  #8  2/2.5/3/2.5/2 - 16g - White Opal - 1/4"x5/16"- Titanium - Clicker - Industrial Strength Nose Illustration featuring the Septum piercing area highlighted in yellow.
Odyssey #8 2/2.5/3/2.5/2 - 16g - White Opal - 1/4"x5/16"- Titanium - Clicker - Industrial Strength
$225.00
Odyssey  #8  2/2.5/3/2.5/2 - 16g - White Opal - 5/16"x3/8"- Titanium - Clicker - Industrial Strength Odyssey  #8  2/2.5/3/2.5/2 - 16g - White Opal - 5/16"x3/8"- Titanium - Clicker - Industrial Strength Nose Illustration featuring the Septum piercing area highlighted in yellow.
Odyssey #8 2/2.5/3/2.5/2 - 16g - White Opal - 5/16"x3/8"- Titanium - Clicker - Industrial Strength
$215.00
Odyssey  #8  2/2.5/3/2.5/2 - 16g - White Opal - 5/16"x5/16"- Titanium - Clicker - Industrial Strength Odyssey  #8  2/2.5/3/2.5/2 - 16g - White Opal - 5/16"x5/16"- Titanium - Clicker - Industrial Strength Nose Illustration featuring the Septum piercing area highlighted in yellow.
Odyssey #8 2/2.5/3/2.5/2 - 16g - White Opal - 5/16"x5/16"- Titanium - Clicker - Industrial Strength
$215.00
Odyssey  #12 - 16g - White Opal - 5/16"x5/16" - 3mm - Titanium - Clicker - Industrial Strength Odyssey  #12 - 16g - White Opal - 5/16"x5/16" - 3mm - Titanium - Clicker - Industrial Strength Nose Illustration featuring the Septum piercing area highlighted in yellow.
Odyssey #12 - 16g - White Opal - 5/16"x5/16" - 3mm - Titanium - Clicker - Industrial Strength
$225.00
Odyssey  #12 - 16g - White Opal - 1/4"x5/16" - 3mm - Titanium - Clicker - Industrial Strength Odyssey  #12 - 16g - White Opal - 1/4"x5/16" - 3mm - Titanium - Clicker - Industrial Strength Nose Illustration featuring the Septum piercing area highlighted in yellow.
Odyssey #12 - 16g - White Opal - 1/4"x5/16" - 3mm - Titanium - Clicker - Industrial Strength
$215.00
Odyssey  #7 - 16g - White Opal - 5/16"x5/16" - 2mm - Titanium - Clicker - Industrial Strength Odyssey  #7 - 16g - White Opal - 5/16"x5/16" - 2mm - Titanium - Clicker - Industrial Strength Nose Illustration featuring the Septum piercing area highlighted in yellow.
Odyssey #7 - 16g - White Opal - 5/16"x5/16" - 2mm - Titanium - Clicker - Industrial Strength
$215.00
Odyssey  #8  2/2.5/3/2.5/2 - 16g - Sky Blue Opal - 5/16"x5/16"- Titanium - Clicker - Industrial Strength Odyssey  #8  2/2.5/3/2.5/2 - 16g - Sky Blue Opal - 5/16"x5/16"- Titanium - Clicker - Industrial Strength Nose Illustration featuring the Septum piercing area highlighted in yellow.
Odyssey #8 2/2.5/3/2.5/2 - 16g - Sky Blue Opal - 5/16"x5/16"- Titanium - Clicker - Industrial Strength
$215.00
Odyssey  #12 - 16g - Sky Blue Opal - 5/16"x5/16" - 3mm - Titanium - Clicker - Industrial Strength Odyssey  #12 - 16g - Sky Blue Opal - 5/16"x5/16" - 3mm - Titanium - Clicker - Industrial Strength Nose Illustration featuring the Septum piercing area highlighted in yellow.
Odyssey #12 - 16g - Sky Blue Opal - 5/16"x5/16" - 3mm - Titanium - Clicker - Industrial Strength
$215.00
Odyssey  #8  2/2.5/3/2.5/2 - 16g - Sky Blue Opal - 1/4"x5/16"- Titanium - Clicker - Industrial Strength Odyssey  #8  2/2.5/3/2.5/2 - 16g - Sky Blue Opal - 1/4"x5/16"- Titanium - Clicker - Industrial Strength Nose Illustration featuring the Septum piercing area highlighted in yellow.
Odyssey #8 2/2.5/3/2.5/2 - 16g - Sky Blue Opal - 1/4"x5/16"- Titanium - Clicker - Industrial Strength
$215.00
Odyssey  #7 - 16g - Sky Blue Opal - 1/4"x5/16" - 2mm - Titanium - Clicker - Industrial Strength Odyssey  #7 - 16g - Sky Blue Opal - 1/4"x5/16" - 2mm - Titanium - Clicker - Industrial Strength Nose Illustration featuring the Septum piercing area highlighted in yellow.
Odyssey #7 - 16g - Sky Blue Opal - 1/4"x5/16" - 2mm - Titanium - Clicker - Industrial Strength
$215.00
Odyssey  #12 - 16g - Capri Blue - 5/16"x1/4" - 3mm - Titanium - Clicker - Industrial Strength Odyssey  #12 - 16g - Capri Blue - 5/16"x1/4" - 3mm - Titanium - Clicker - Industrial Strength Nose Illustration featuring the Septum piercing area highlighted in yellow.
Odyssey #12 - 16g - Capri Blue - 5/16"x1/4" - 3mm - Titanium - Clicker - Industrial Strength
$225.00
Odyssey  #7 - 16g - Capri Blue - 1/4"x5/16" - 2mm - Titanium - Clicker - Industrial Strength Odyssey  #7 - 16g - Capri Blue - 1/4"x5/16" - 2mm - Titanium - Clicker - Industrial Strength Nose Illustration featuring the Septum piercing area highlighted in yellow.
Odyssey #7 - 16g - Capri Blue - 1/4"x5/16" - 2mm - Titanium - Clicker - Industrial Strength
$225.00
Odyssey  #12 - 16g - Capri Blue - 1/4"x5/16" - 3mm - Titanium - Clicker - Industrial Strength Odyssey  #12 - 16g - Capri Blue - 1/4"x5/16" - 3mm - Titanium - Clicker - Industrial Strength Nose Illustration featuring the Septum piercing area highlighted in yellow.
Odyssey #12 - 16g - Capri Blue - 1/4"x5/16" - 3mm - Titanium - Clicker - Industrial Strength
$225.00
Odyssey  #7 - 16g - Capri Blue - 5/16"x5/16" - 2mm - Titanium - Clicker - Industrial Strength Odyssey  #7 - 16g - Capri Blue - 5/16"x5/16" - 2mm - Titanium - Clicker - Industrial Strength Nose Illustration featuring the Septum piercing area highlighted in yellow.
Odyssey #7 - 16g - Capri Blue - 5/16"x5/16" - 2mm - Titanium - Clicker - Industrial Strength
$225.00
Odyssey  #8  2/2.5/3/2.5/2 - 16g - Capri Blue - 5/16"x5/16"- Titanium - Clicker - Industrial Strength Odyssey  #8  2/2.5/3/2.5/2 - 16g - Capri Blue - 5/16"x5/16"- Titanium - Clicker - Industrial Strength Nose Illustration featuring the Septum piercing area highlighted in yellow.
Odyssey #8 2/2.5/3/2.5/2 - 16g - Capri Blue - 5/16"x5/16"- Titanium - Clicker - Industrial Strength
$215.00
Odyssey  #7 - 16g - Black Opal - 5/16"x5/16" - 2mm - Titanium - Clicker - Industrial Strength Odyssey  #7 - 16g - Black Opal - 5/16"x5/16" - 2mm - Titanium - Clicker - Industrial Strength Nose Illustration featuring the Septum piercing area highlighted in yellow.
Odyssey #7 - 16g - Black Opal - 5/16"x5/16" - 2mm - Titanium - Clicker - Industrial Strength
$215.00
Odyssey  #12 - 16g - Black Opal - 5/16"x1/4" - 3mm - Titanium - Clicker - Industrial Strength Odyssey  #12 - 16g - Black Opal - 5/16"x1/4" - 3mm - Titanium - Clicker - Industrial Strength Nose Illustration featuring the Septum piercing area highlighted in yellow.
Odyssey #12 - 16g - Black Opal - 5/16"x1/4" - 3mm - Titanium - Clicker - Industrial Strength
$215.00
Odyssey  #8  2/2.5/3/2.5/2 - 16g - Black Opal - 1/4"x5/16"- Titanium - Clicker - Industrial Strength Odyssey  #8  2/2.5/3/2.5/2 - 16g - Black Opal - 1/4"x5/16"- Titanium - Clicker - Industrial Strength Nose Illustration featuring the Septum piercing area highlighted in yellow.
Odyssey #8 2/2.5/3/2.5/2 - 16g - Black Opal - 1/4"x5/16"- Titanium - Clicker - Industrial Strength
$225.00
Odessy Helios #17 Septum Clicker 2/3/2/3/2/3/2 - 16g - Red CZ, Orange CZ, Sunrise Yellow CZ, Green CZ, Sapphire Blue CZ, Paradise Shine CZ, Fancy Purple CZ - 5/16"x5/16"- Titanium - Industrial Strengt Odessy Helios #17 Septum Clicker 2/3/2/3/2/3/2 - 16g - Red CZ, Orange CZ, Sunrise Yellow CZ, Green CZ, Sapphire Blue CZ, Paradise Shine CZ, Fancy Purple CZ - 5/16"x5/16"- Titanium - Industrial Strengt Nose Illustration featuring the Septum piercing area highlighted in yellow.
Odessy Helios #17 Septum Clicker 2/3/2/3/2/3/2 - 16g - Red CZ, Orange CZ, Sunrise Yellow CZ, Green CZ, Sapphire Blue CZ, Paradise Shine CZ, Fancy Purple CZ - 5/16"x5/16"- Titanium - Industrial Strengt
$225.00
Odessy Helios #17 Septum Clicker 2/3/2/3/2/3/2 - 16g - Red CZ, Orange CZ, Sunrise Yellow CZ, Green CZ, Sapphire Blue CZ, Paradise Shine CZ, Fancy Purple CZ - 1/4"x3/8"- Titanium - Industrial Strength Odessy Helios #17 Septum Clicker 2/3/2/3/2/3/2 - 16g - Red CZ, Orange CZ, Sunrise Yellow CZ, Green CZ, Sapphire Blue CZ, Paradise Shine CZ, Fancy Purple CZ - 1/4"x3/8"- Titanium - Industrial Strength Nose Illustration featuring the Septum piercing area highlighted in yellow.
Odessy Helios #17 Septum Clicker 2/3/2/3/2/3/2 - 16g - Red CZ, Orange CZ, Sunrise Yellow CZ, Green CZ, Sapphire Blue CZ, Paradise Shine CZ, Fancy Purple CZ - 1/4"x3/8"- Titanium - Industrial Strength
$225.00
Odessy Helios #17 Septum Clicker 2/3/2/3/2/3/2 - 16g - Red CZ, Orange CZ, Sunrise Yellow CZ, Green CZ, Sapphire Blue CZ, Paradise Shine CZ, Fancy Purple CZ - 1/4"x5/16"- Titanium - Industrial Strength Odessy Helios #17 Septum Clicker 2/3/2/3/2/3/2 - 16g - Red CZ, Orange CZ, Sunrise Yellow CZ, Green CZ, Sapphire Blue CZ, Paradise Shine CZ, Fancy Purple CZ - 1/4"x5/16"- Titanium - Industrial Strength Nose Illustration featuring the Septum piercing area highlighted in yellow.
Odessy Helios #17 Septum Clicker 2/3/2/3/2/3/2 - 16g - Red CZ, Orange CZ, Sunrise Yellow CZ, Green CZ, Sapphire Blue CZ, Paradise Shine CZ, Fancy Purple CZ - 1/4"x5/16"- Titanium - Industrial Strength
$225.00
Black and White Ebony Eyelet Pair - Wood - 2g - Plug - Bishop Organics Black and White Ebony Eyelet Pair - Wood - 2g - Plug - Bishop Organics Ear Illustration featuring the Ear Lobe piercing area highlighted in yellow.
Black and White Ebony Eyelet Pair - Wood - 2g - Plug - Bishop Organics
$35.00
Ebony Eyelet Pair - Wood - 2g - Plug - Bishop Organics Ebony Eyelet Pair - Wood - 2g - Plug - Bishop Organics Ear Illustration featuring the Ear Lobe piercing area highlighted in yellow.
Ebony Eyelet Pair - Wood - 2g - Plug - Bishop Organics
$35.00
Ebony Plug Pair - Wood - 4g - Plug - Bishop Organics Ebony Plug Pair - Wood - 4g - Plug - Bishop Organics Ear Illustration featuring the Ear Lobe piercing area highlighted in yellow.
Ebony Plug Pair - Wood - 4g - Plug - Bishop Organics
$30.00
Ebony Plug Pair - Wood - 7/16" - Plug - Bishop Organics Ebony Plug Pair - Wood - 7/16" - Plug - Bishop Organics Ear Illustration featuring the Ear Lobe piercing area highlighted in yellow.
Ebony Plug Pair - Wood - 7/16" - Plug - Bishop Organics
$40.00
Ebony Plug Pair - Wood - 1/2" - Plug - Bishop Organics Ebony Plug Pair - Wood - 1/2" - Plug - Bishop Organics Ear Illustration featuring the Ear Lobe piercing area highlighted in yellow.
Ebony Plug Pair - Wood - 1/2" - Plug - Bishop Organics
$40.00
Ebony Plug Pair - Wood - 7/8" - Plug - Bishop Organics Ebony Plug Pair - Wood - 7/8" - Plug - Bishop Organics Ear Illustration featuring the Ear Lobe piercing area highlighted in yellow.
Ebony Plug Pair - Wood - 7/8" - Plug - Bishop Organics
$60.00
Desert Ironwood Plug Pair - Wood - 7/8" - Plug - Bishop Organics Desert Ironwood Plug Pair - Wood - 7/8" - Plug - Bishop Organics Ear Illustration featuring the Ear Lobe piercing area highlighted in yellow.
Desert Ironwood Plug Pair - Wood - 7/8" - Plug - Bishop Organics
$65.00
Dot Ebony Plug Pair - Wood - 1/2" - Plug - Bishop Organics Dot Ebony Plug Pair - Wood - 1/2" - Plug - Bishop Organics Ear Illustration featuring the Ear Lobe piercing area highlighted in yellow.
Dot Ebony Plug Pair - Wood - 1/2" - Plug - Bishop Organics
$45.00
Dot Ebony Plug Pair - Wood - 5/8" - Plug - Bishop Organics Dot Ebony Plug Pair - Wood - 5/8" - Plug - Bishop Organics Ear Illustration featuring the Ear Lobe piercing area highlighted in yellow.
Dot Ebony Plug Pair - Wood - 5/8" - Plug - Bishop Organics
$55.00
Dot Ebony Plug Pair - Wood - 3/4" - Plug - Bishop Organics Dot Ebony Plug Pair - Wood - 3/4" - Plug - Bishop Organics Ear Illustration featuring the Ear Lobe piercing area highlighted in yellow.
Dot Ebony Plug Pair - Wood - 3/4" - Plug - Bishop Organics
$65.00
Ivory Plug Pair - Wood - 2G - Plug - Bishop Organics Ivory Plug Pair - Wood - 2G - Plug - Bishop Organics Ear Illustration featuring the Ear Lobe piercing area highlighted in yellow.
Ivory Plug Pair - Wood - 2G - Plug - Bishop Organics
$35.00
Ivory Plug Pair - Wood - 0G - Plug - Bishop Organics Ivory Plug Pair - Wood - 0G - Plug - Bishop Organics Ear Illustration featuring the Ear Lobe piercing area highlighted in yellow.
Ivory Plug Pair - Wood - 0G - Plug - Bishop Organics
$35.00
Ivory Plug Pair - Wood - 7/16" - Plug - Bishop Organics Ivory Plug Pair - Wood - 7/16" - Plug - Bishop Organics Ear Illustration featuring the Ear Lobe piercing area highlighted in yellow.
Ivory Plug Pair - Wood - 7/16" - Plug - Bishop Organics
$40.00
Ivory Plug Pair - Wood - 1/2" - Plug - Bishop Organics Ivory Plug Pair - Wood - 1/2" - Plug - Bishop Organics Ear Illustration featuring the Ear Lobe piercing area highlighted in yellow.
Ivory Plug Pair - Wood - 1/2" - Plug - Bishop Organics
$45.00
Ivory Plug Pair - Wood - 9/16" - Plug - Bishop Organics Ivory Plug Pair - Wood - 9/16" - Plug - Bishop Organics Ear Illustration featuring the Ear Lobe piercing area highlighted in yellow.
Ivory Plug Pair - Wood - 9/16" - Plug - Bishop Organics
$45.00
Ivory Plug Pair - Wood - 5/8" - Plug - Bishop Organics Ivory Plug Pair - Wood - 5/8" - Plug - Bishop Organics Ear Illustration featuring the Ear Lobe piercing area highlighted in yellow.
Ivory Plug Pair - Wood - 5/8" - Plug - Bishop Organics
$50.00
Ivory Plug Pair - Wood - 3/4" - Plug - Bishop Organics Ivory Plug Pair - Wood - 3/4" - Plug - Bishop Organics Ear Illustration featuring the Ear Lobe piercing area highlighted in yellow.
Ivory Plug Pair - Wood - 3/4" - Plug - Bishop Organics
$60.00
Ivory Plug Pair - Wood - 7/8" - Plug - Bishop Organics Ivory Plug Pair - Wood - 7/8" - Plug - Bishop Organics Ear Illustration featuring the Ear Lobe piercing area highlighted in yellow.
Ivory Plug Pair - Wood - 7/8" - Plug - Bishop Organics
$65.00
Black and White Ebony Plug Pair - Wood - 4G - Plug - Bishop Organics Black and White Ebony Plug Pair - Wood - 4G - Plug - Bishop Organics Ear Illustration featuring the Ear Lobe piercing area highlighted in yellow.
Black and White Ebony Plug Pair - Wood - 4G - Plug - Bishop Organics
$35.00
Black and White Ebony Plug Pair - Wood - 9/16" - Plug - Bishop Organics Black and White Ebony Plug Pair - Wood - 9/16" - Plug - Bishop Organics Ear Illustration featuring the Ear Lobe piercing area highlighted in yellow.
Black and White Ebony Plug Pair - Wood - 9/16" - Plug - Bishop Organics
$45.00
Black and White Ebony Plug Pair - Wood - 7/8" - Plug - Bishop Organics Black and White Ebony Plug Pair - Wood - 7/8" - Plug - Bishop Organics Ear Illustration featuring the Ear Lobe piercing area highlighted in yellow.
Black and White Ebony Plug Pair - Wood - 7/8" - Plug - Bishop Organics
$65.00
Bloodwood Plug Pair - Wood - 4G - Plug - Bishop Organics Bloodwood Plug Pair - Wood - 4G - Plug - Bishop Organics Ear Illustration featuring the Ear Lobe piercing area highlighted in yellow.
Bloodwood Plug Pair - Wood - 4G - Plug - Bishop Organics
$30.00
Bloodwood Plug Pair - Wood - 2G - Plug - Bishop Organics Bloodwood Plug Pair - Wood - 2G - Plug - Bishop Organics Ear Illustration featuring the Ear Lobe piercing area highlighted in yellow.
Bloodwood Plug Pair - Wood - 2G - Plug - Bishop Organics
$30.00
Bloodwood Plug Pair - Wood - 0G - Plug - Bishop Organics Bloodwood Plug Pair - Wood - 0G - Plug - Bishop Organics Ear Illustration featuring the Ear Lobe piercing area highlighted in yellow.
Bloodwood Plug Pair - Wood - 0G - Plug - Bishop Organics
$30.00
Bloodwood Plug Pair - Wood - 1/2" - Plug - Bishop Organics Bloodwood Plug Pair - Wood - 1/2" - Plug - Bishop Organics Ear Illustration featuring the Ear Lobe piercing area highlighted in yellow.
Bloodwood Plug Pair - Wood - 1/2" - Plug - Bishop Organics
$40.00
Bloodwood Plug Pair - Wood - 5/8" - Plug - Bishop Organics Bloodwood Plug Pair - Wood - 5/8" - Plug - Bishop Organics Ear Illustration featuring the Ear Lobe piercing area highlighted in yellow.
Bloodwood Plug Pair - Wood - 5/8" - Plug - Bishop Organics
$45.00
Bloodwood Plug Pair - Wood - 3/4" - Plug - Bishop Organics Bloodwood Plug Pair - Wood - 3/4" - Plug - Bishop Organics Ear Illustration featuring the Ear Lobe piercing area highlighted in yellow.
Bloodwood Plug Pair - Wood - 3/4" - Plug - Bishop Organics
$55.00
Bloodwood Plug Pair - Wood - 7/8" - Plug - Bishop Organics Bloodwood Plug Pair - Wood - 7/8" - Plug - Bishop Organics Ear Illustration featuring the Ear Lobe piercing area highlighted in yellow.
Bloodwood Plug Pair - Wood - 7/8" - Plug - Bishop Organics
$60.00
Ebony Ambonya Burl Inlay Plug Pair - Wood - 7/16" - Plug - Bishop Organics Ebony Ambonya Burl Inlay Plug Pair - Wood - 7/16" - Plug - Bishop Organics Ear Illustration featuring the Ear Lobe piercing area highlighted in yellow.
Ebony Ambonya Burl Inlay Plug Pair - Wood - 7/16" - Plug - Bishop Organics
$75.00
Ebony Ambonya Burl Inlay Plug Pair - Wood - 9/16" - Plug - Bishop Organics Ebony Ambonya Burl Inlay Plug Pair - Wood - 9/16" - Plug - Bishop Organics Ear Illustration featuring the Ear Lobe piercing area highlighted in yellow.
Ebony Ambonya Burl Inlay Plug Pair - Wood - 9/16" - Plug - Bishop Organics
$80.00
Ebony Ambonya Burl Inlay Plug Pair - Wood - 5/8" - Plug - Bishop Organics Ebony Ambonya Burl Inlay Plug Pair - Wood - 5/8" - Plug - Bishop Organics Ear Illustration featuring the Ear Lobe piercing area highlighted in yellow.
Ebony Ambonya Burl Inlay Plug Pair - Wood - 5/8" - Plug - Bishop Organics
$80.00
Ebony Ambonya Burl Inlay Plug Pair - Wood - 3/4" - Plug - Bishop Organics Ebony Ambonya Burl Inlay Plug Pair - Wood - 3/4" - Plug - Bishop Organics Ear Illustration featuring the Ear Lobe piercing area highlighted in yellow.
Ebony Ambonya Burl Inlay Plug Pair - Wood - 3/4" - Plug - Bishop Organics
$90.00
Ebony w/Black and White Inlay Plug Pair - Wood - 7/16" - Plug - Bishop Organics Ebony w/Black and White Inlay Plug Pair - Wood - 7/16" - Plug - Bishop Organics Ear Illustration featuring the Ear Lobe piercing area highlighted in yellow.
Ebony w/Black and White Inlay Plug Pair - Wood - 7/16" - Plug - Bishop Organics
$70.00
Ebony w/Black and White Inlay Plug Pair - Wood - 1/2" - Plug - Bishop Organics Ebony w/Black and White Inlay Plug Pair - Wood - 1/2" - Plug - Bishop Organics Ear Illustration featuring the Ear Lobe piercing area highlighted in yellow.
Ebony w/Black and White Inlay Plug Pair - Wood - 1/2" - Plug - Bishop Organics
$70.00
Ebony w/Black and White Inlay Plug Pair - Wood - 9/16" - Plug - Bishop Organics Ebony w/Black and White Inlay Plug Pair - Wood - 9/16" - Plug - Bishop Organics Ear Illustration featuring the Ear Lobe piercing area highlighted in yellow.
Ebony w/Black and White Inlay Plug Pair - Wood - 9/16" - Plug - Bishop Organics
$75.00
Ebony w/Black and White Inlay Plug Pair - Wood - 7/8" - Plug - Bishop Organics Ebony w/Black and White Inlay Plug Pair - Wood - 7/8" - Plug - Bishop Organics Ear Illustration featuring the Ear Lobe piercing area highlighted in yellow.
Ebony w/Black and White Inlay Plug Pair - Wood - 7/8" - Plug - Bishop Organics
$90.00
Dot Ebony Plug Pair - Wood - 1" - Plug - Bishop Organics Dot Ebony Plug Pair - Wood - 1" - Plug - Bishop Organics Ear Illustration featuring the Ear Lobe piercing area highlighted in yellow.
Dot Ebony Plug Pair - Wood - 1" - Plug - Bishop Organics
$90.00
Ivory Plug Pair - Wood - 1" - Plug - Bishop Organics Ivory Plug Pair - Wood - 1" - Plug - Bishop Organics Ear Illustration featuring the Ear Lobe piercing area highlighted in yellow.
Ivory Plug Pair - Wood - 1" - Plug - Bishop Organics
$75.00
Black and White Ebony Plug Pair - Wood - 1" - Plug - Bishop Organics Black and White Ebony Plug Pair - Wood - 1" - Plug - Bishop Organics Ear Illustration featuring the Ear Lobe piercing area highlighted in yellow.
Black and White Ebony Plug Pair - Wood - 1" - Plug - Bishop Organics
$75.00
Ebony w/Black and White Inlay Plug Pair - Wood - 1" - Plug - Bishop Organics Ebony w/Black and White Inlay Plug Pair - Wood - 1" - Plug - Bishop Organics Ear Illustration featuring the Ear Lobe piercing area highlighted in yellow.
Ebony w/Black and White Inlay Plug Pair - Wood - 1" - Plug - Bishop Organics
$100.00
Bloodwood Plug Pair - Wood - 1" - Plug - Bishop Organics Bloodwood Plug Pair - Wood - 1" - Plug - Bishop Organics Ear Illustration featuring the Ear Lobe piercing area highlighted in yellow.
Bloodwood Plug Pair - Wood - 1" - Plug - Bishop Organics
$70.00
Ebony Ambonya Burl Inlay Plug Pair - Wood - 1" - Plug - Bishop Organics Ebony Ambonya Burl Inlay Plug Pair - Wood - 1" - Plug - Bishop Organics Ear Illustration featuring the Ear Lobe piercing area highlighted in yellow.
Ebony Ambonya Burl Inlay Plug Pair - Wood - 1" - Plug - Bishop Organics
$105.00
Martele Plug Pair Smoke - Glass - 1/2" - Plug - Gorilla Glass Martele Plug Pair Smoke - Glass - 1/2" - Plug - Gorilla Glass Ear Illustration featuring the Ear Lobe piercing area highlighted in yellow.
Martele Plug Pair Smoke - Glass - 1/2" - Plug - Gorilla Glass
$75.00
Lifesaver Plug Pair - Glass - 5/8" - Plug - Gorilla Glass Lifesaver Plug Pair - Glass - 5/8" - Plug - Gorilla Glass Ear Illustration featuring the Ear Lobe piercing area highlighted in yellow.
Lifesaver Plug Pair - Glass - 5/8" - Plug - Gorilla Glass
$60.00
Previous
Next

Modern Ritual Piercing

326 Cleveland Ave NW
Canton, OH 44702
Call or Text: (330) 413-2942

Terms & Conditions Privacy Policy

Open Daily 12pm-7pm