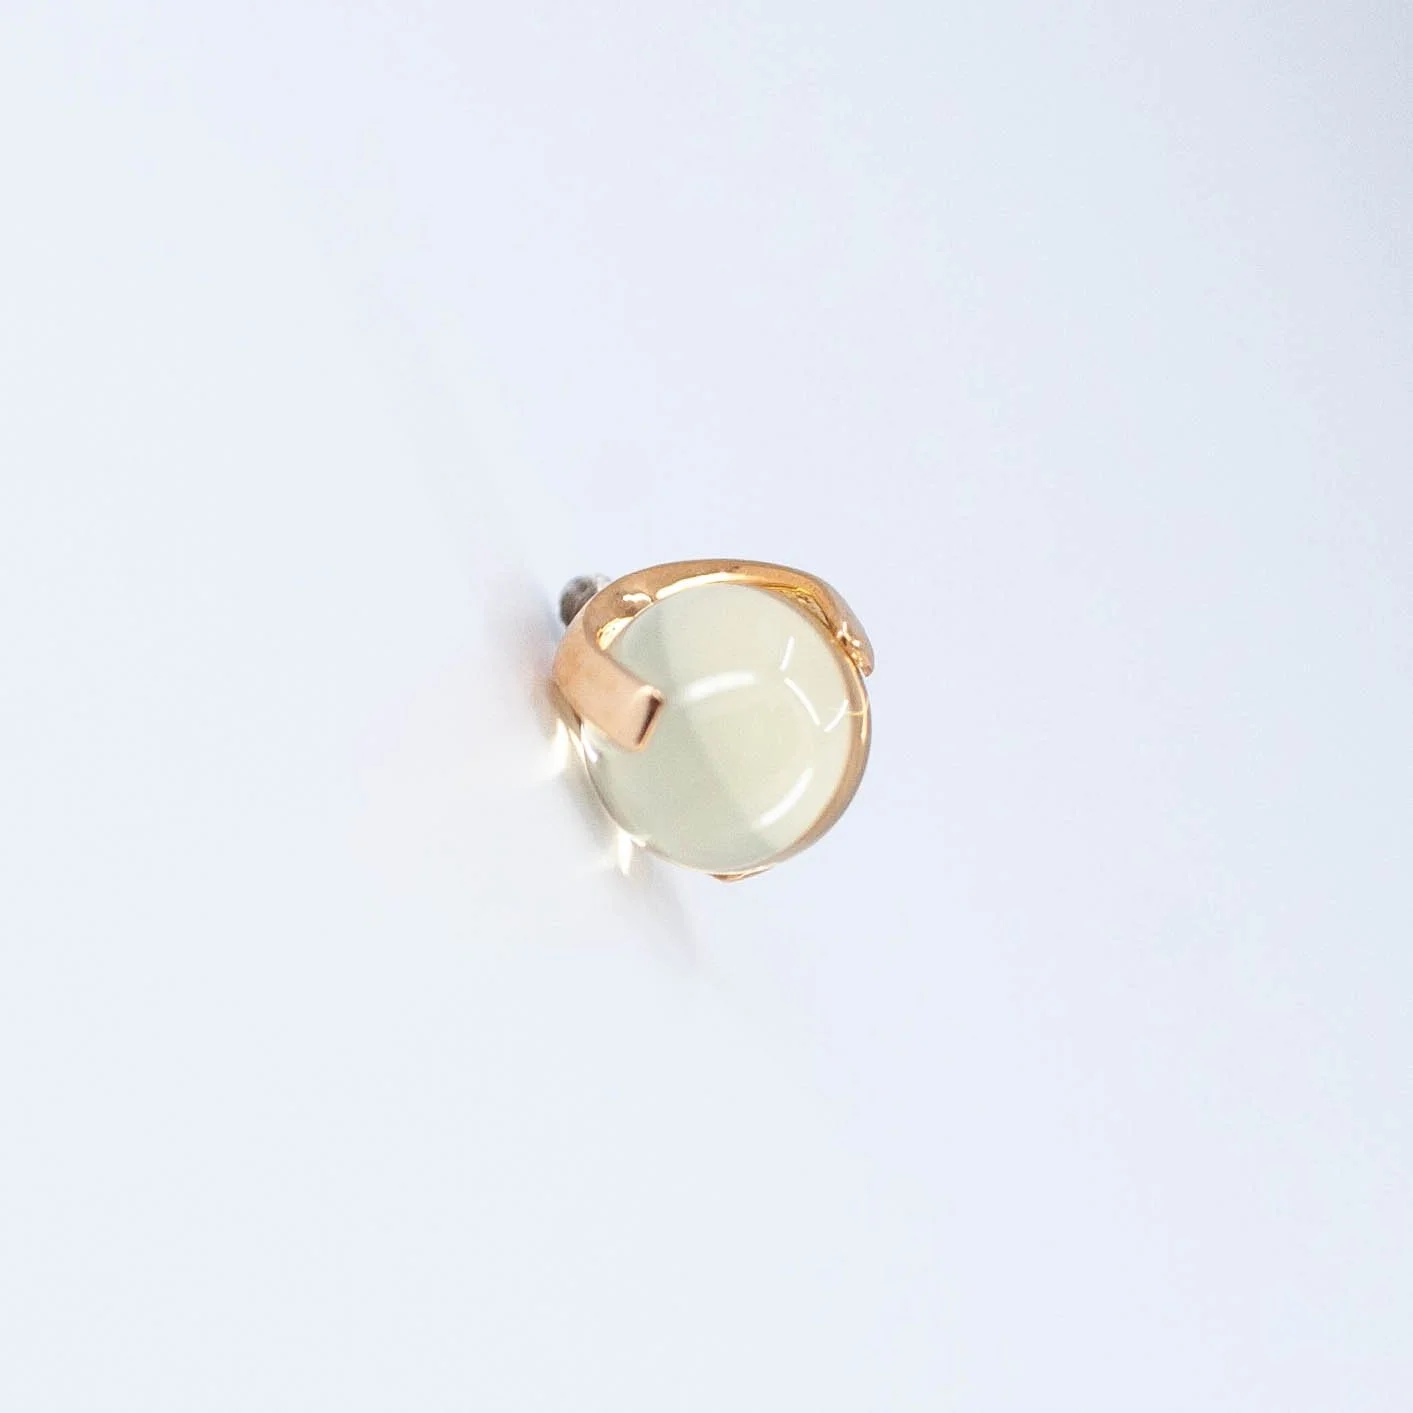
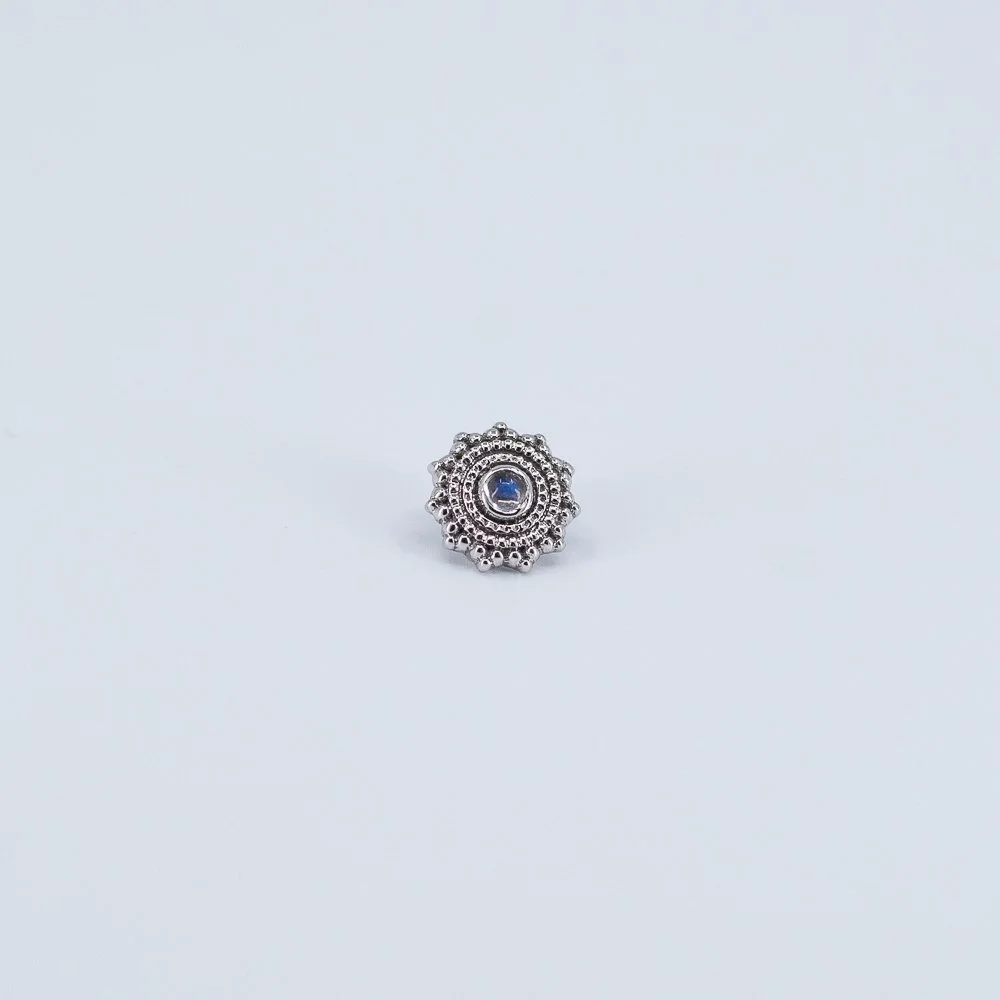
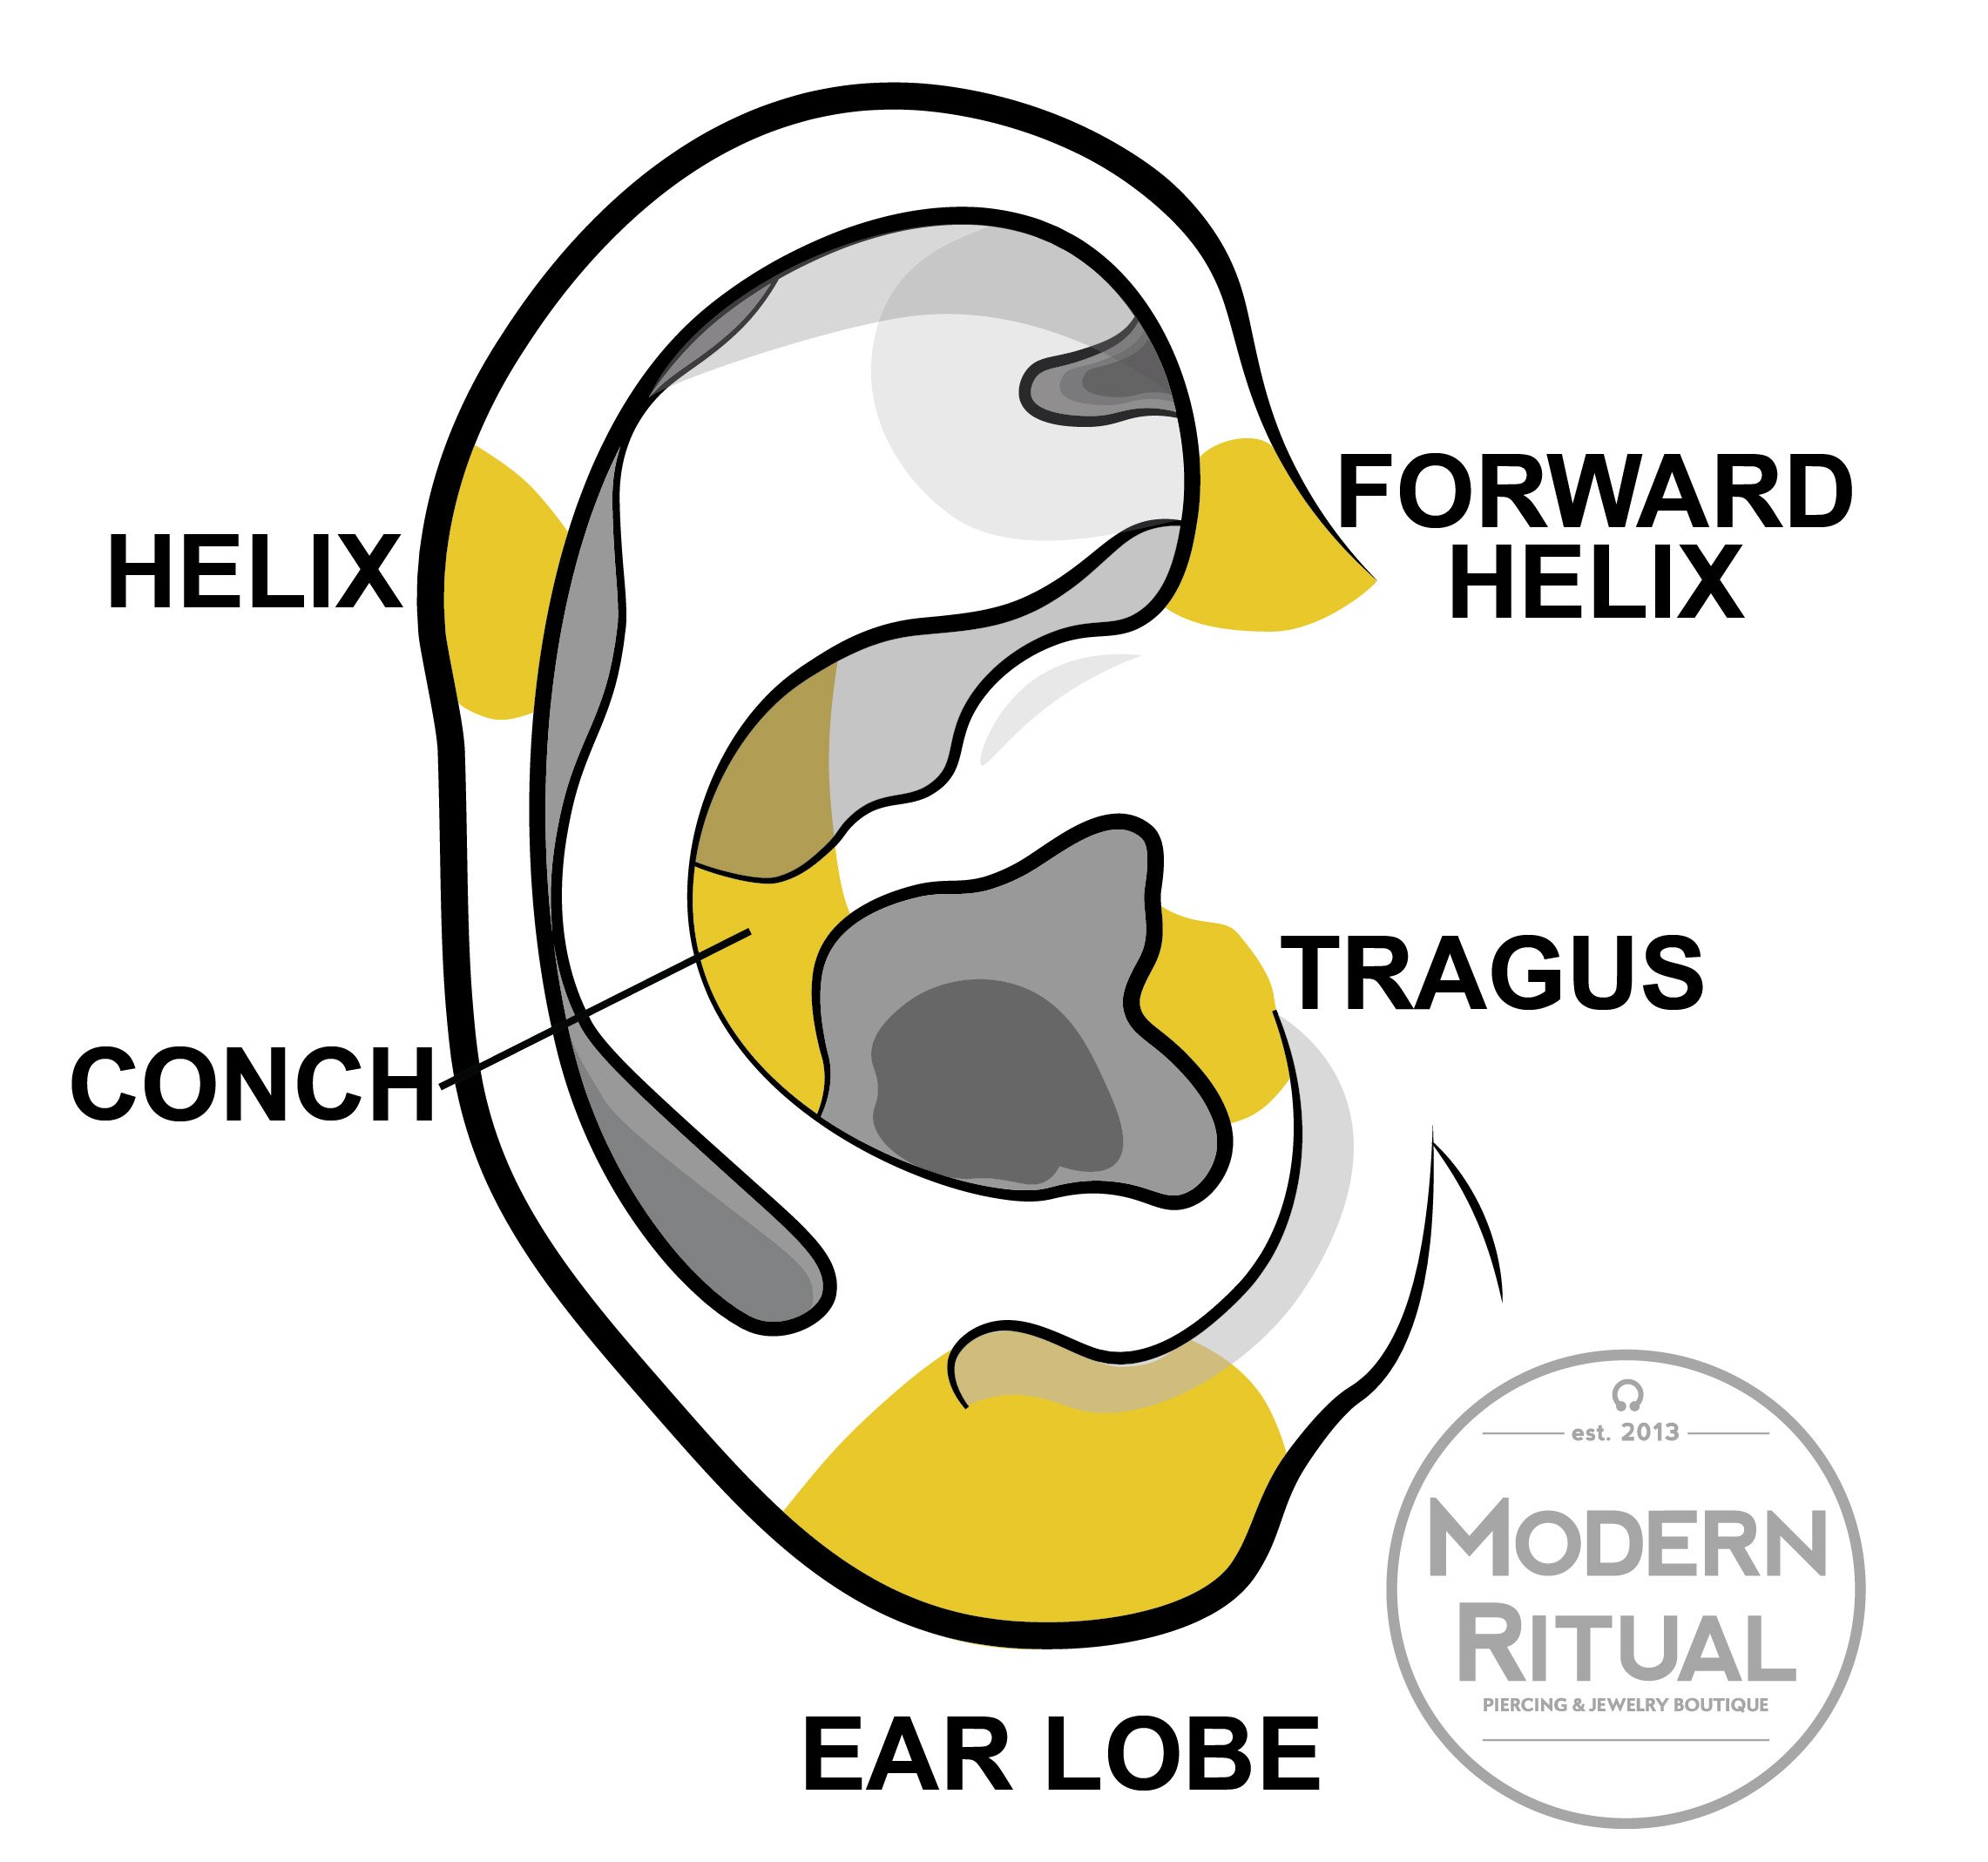
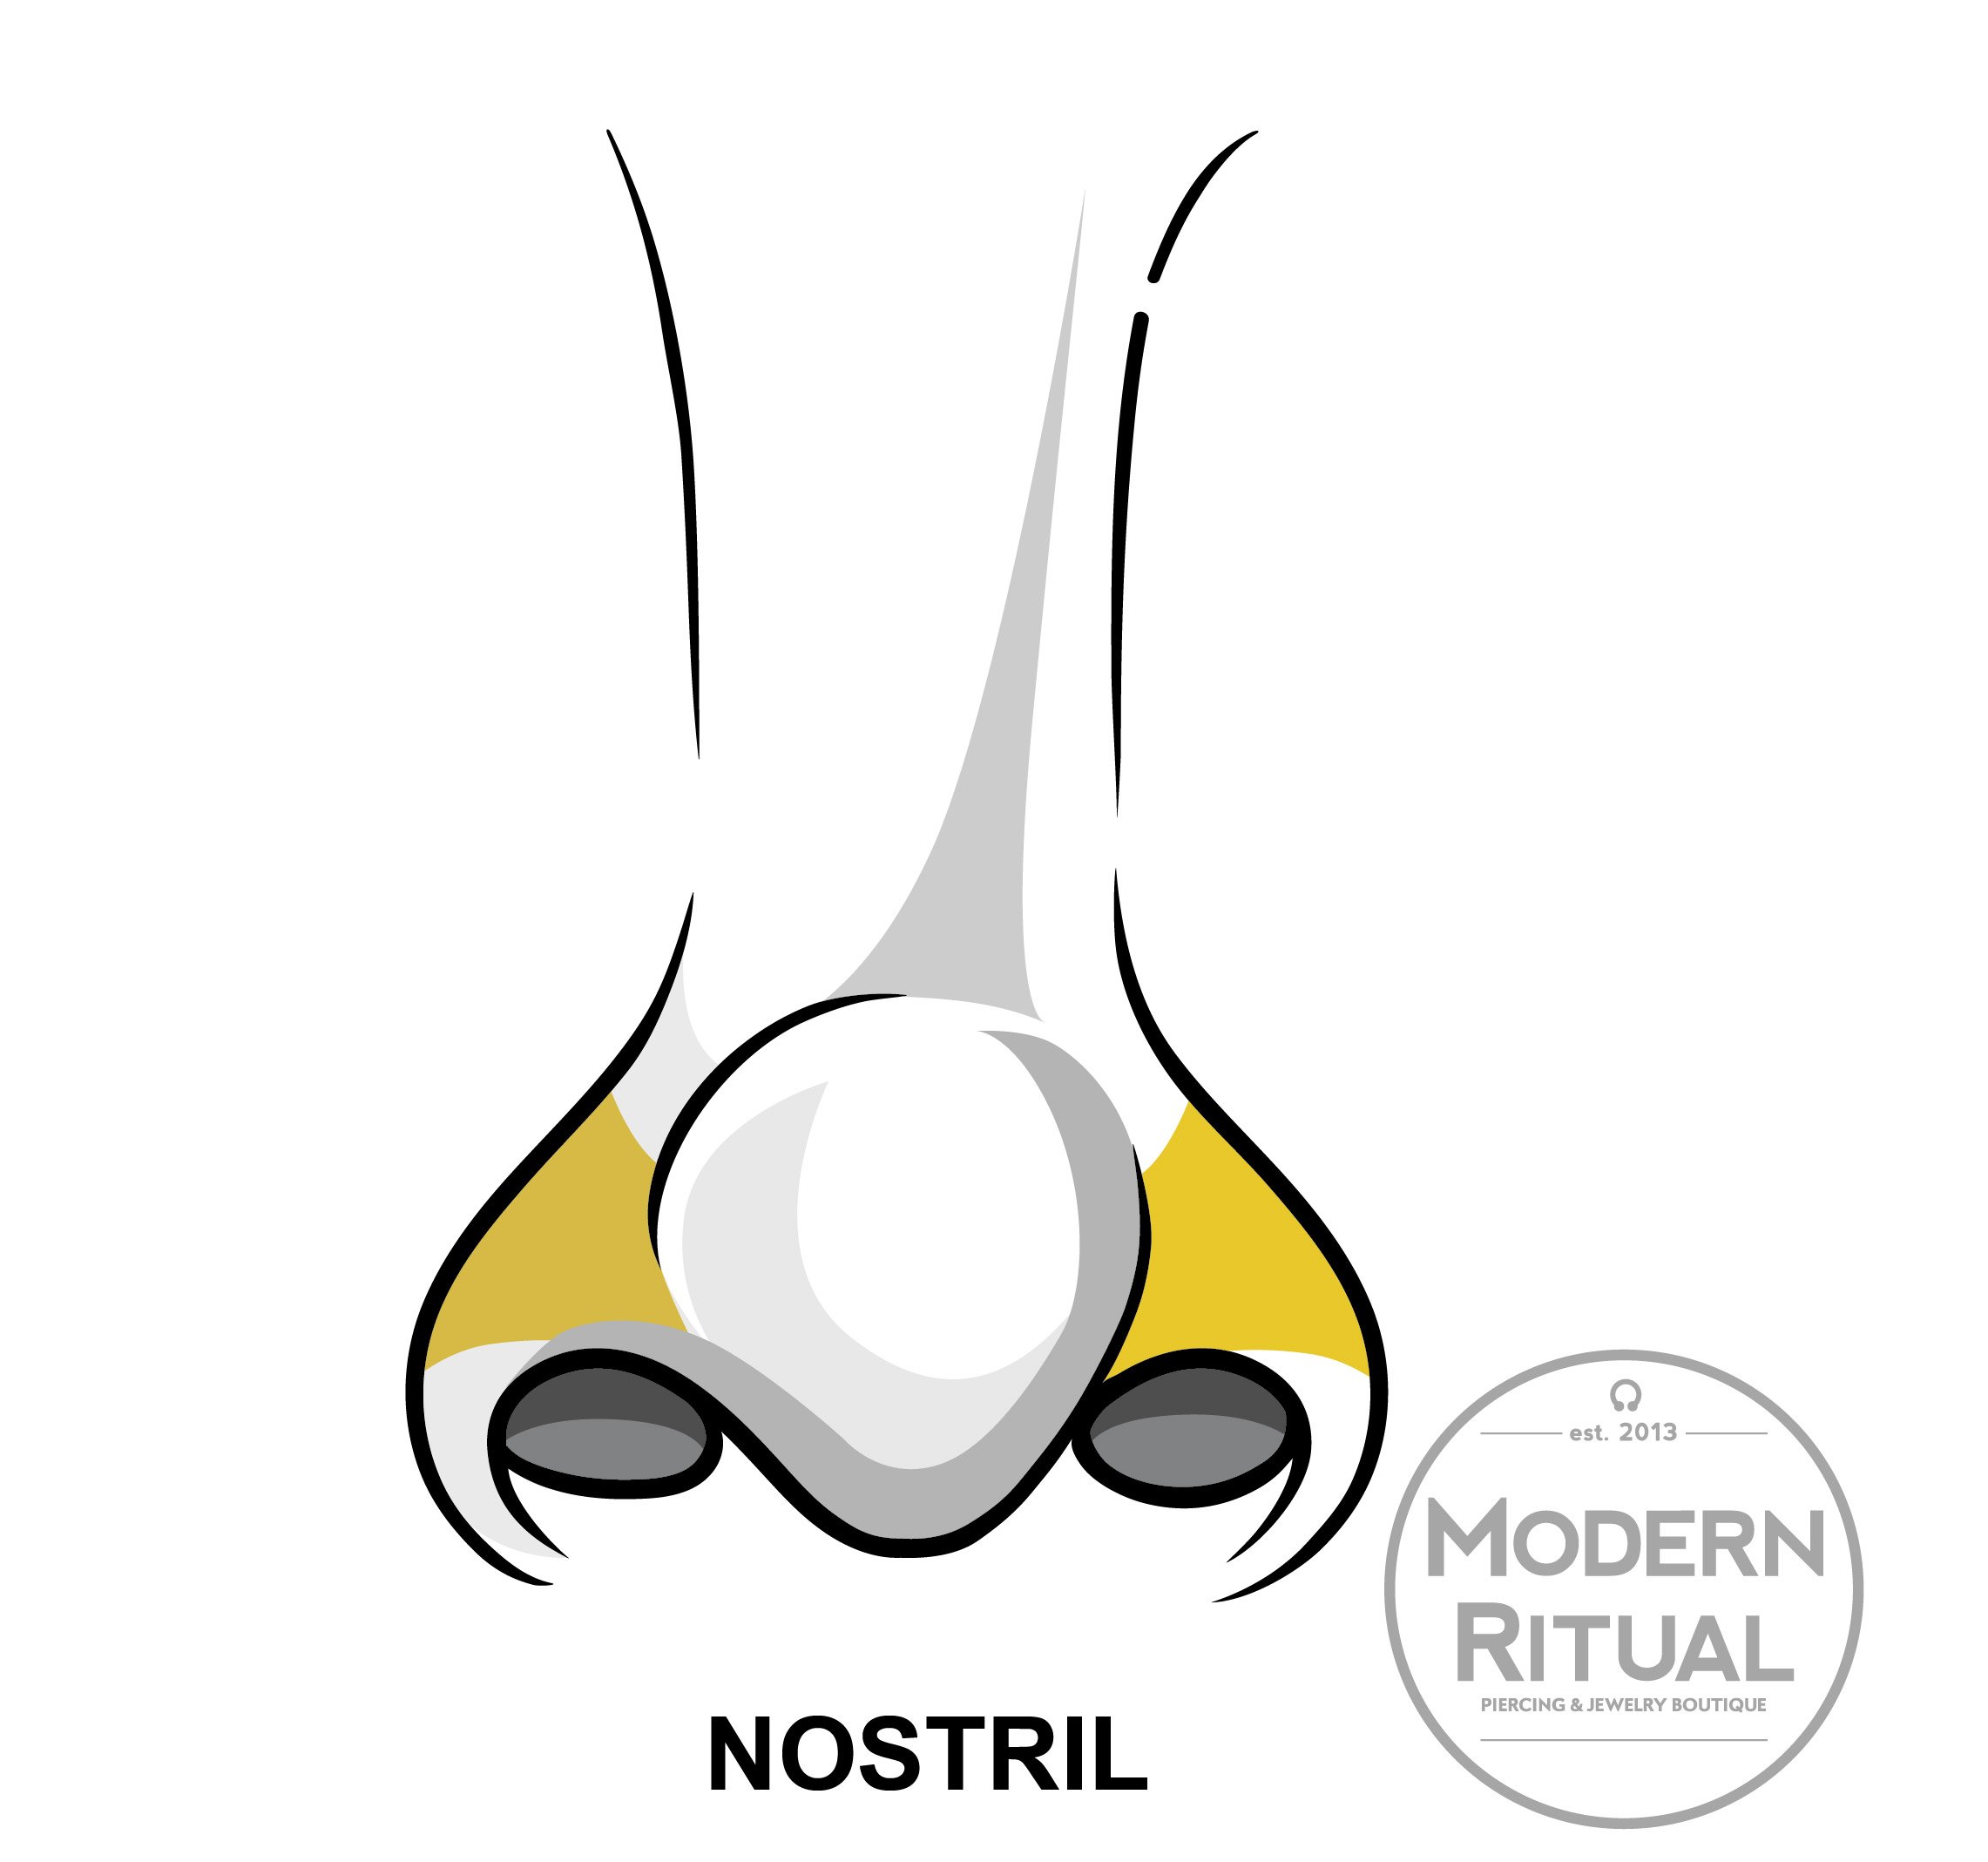
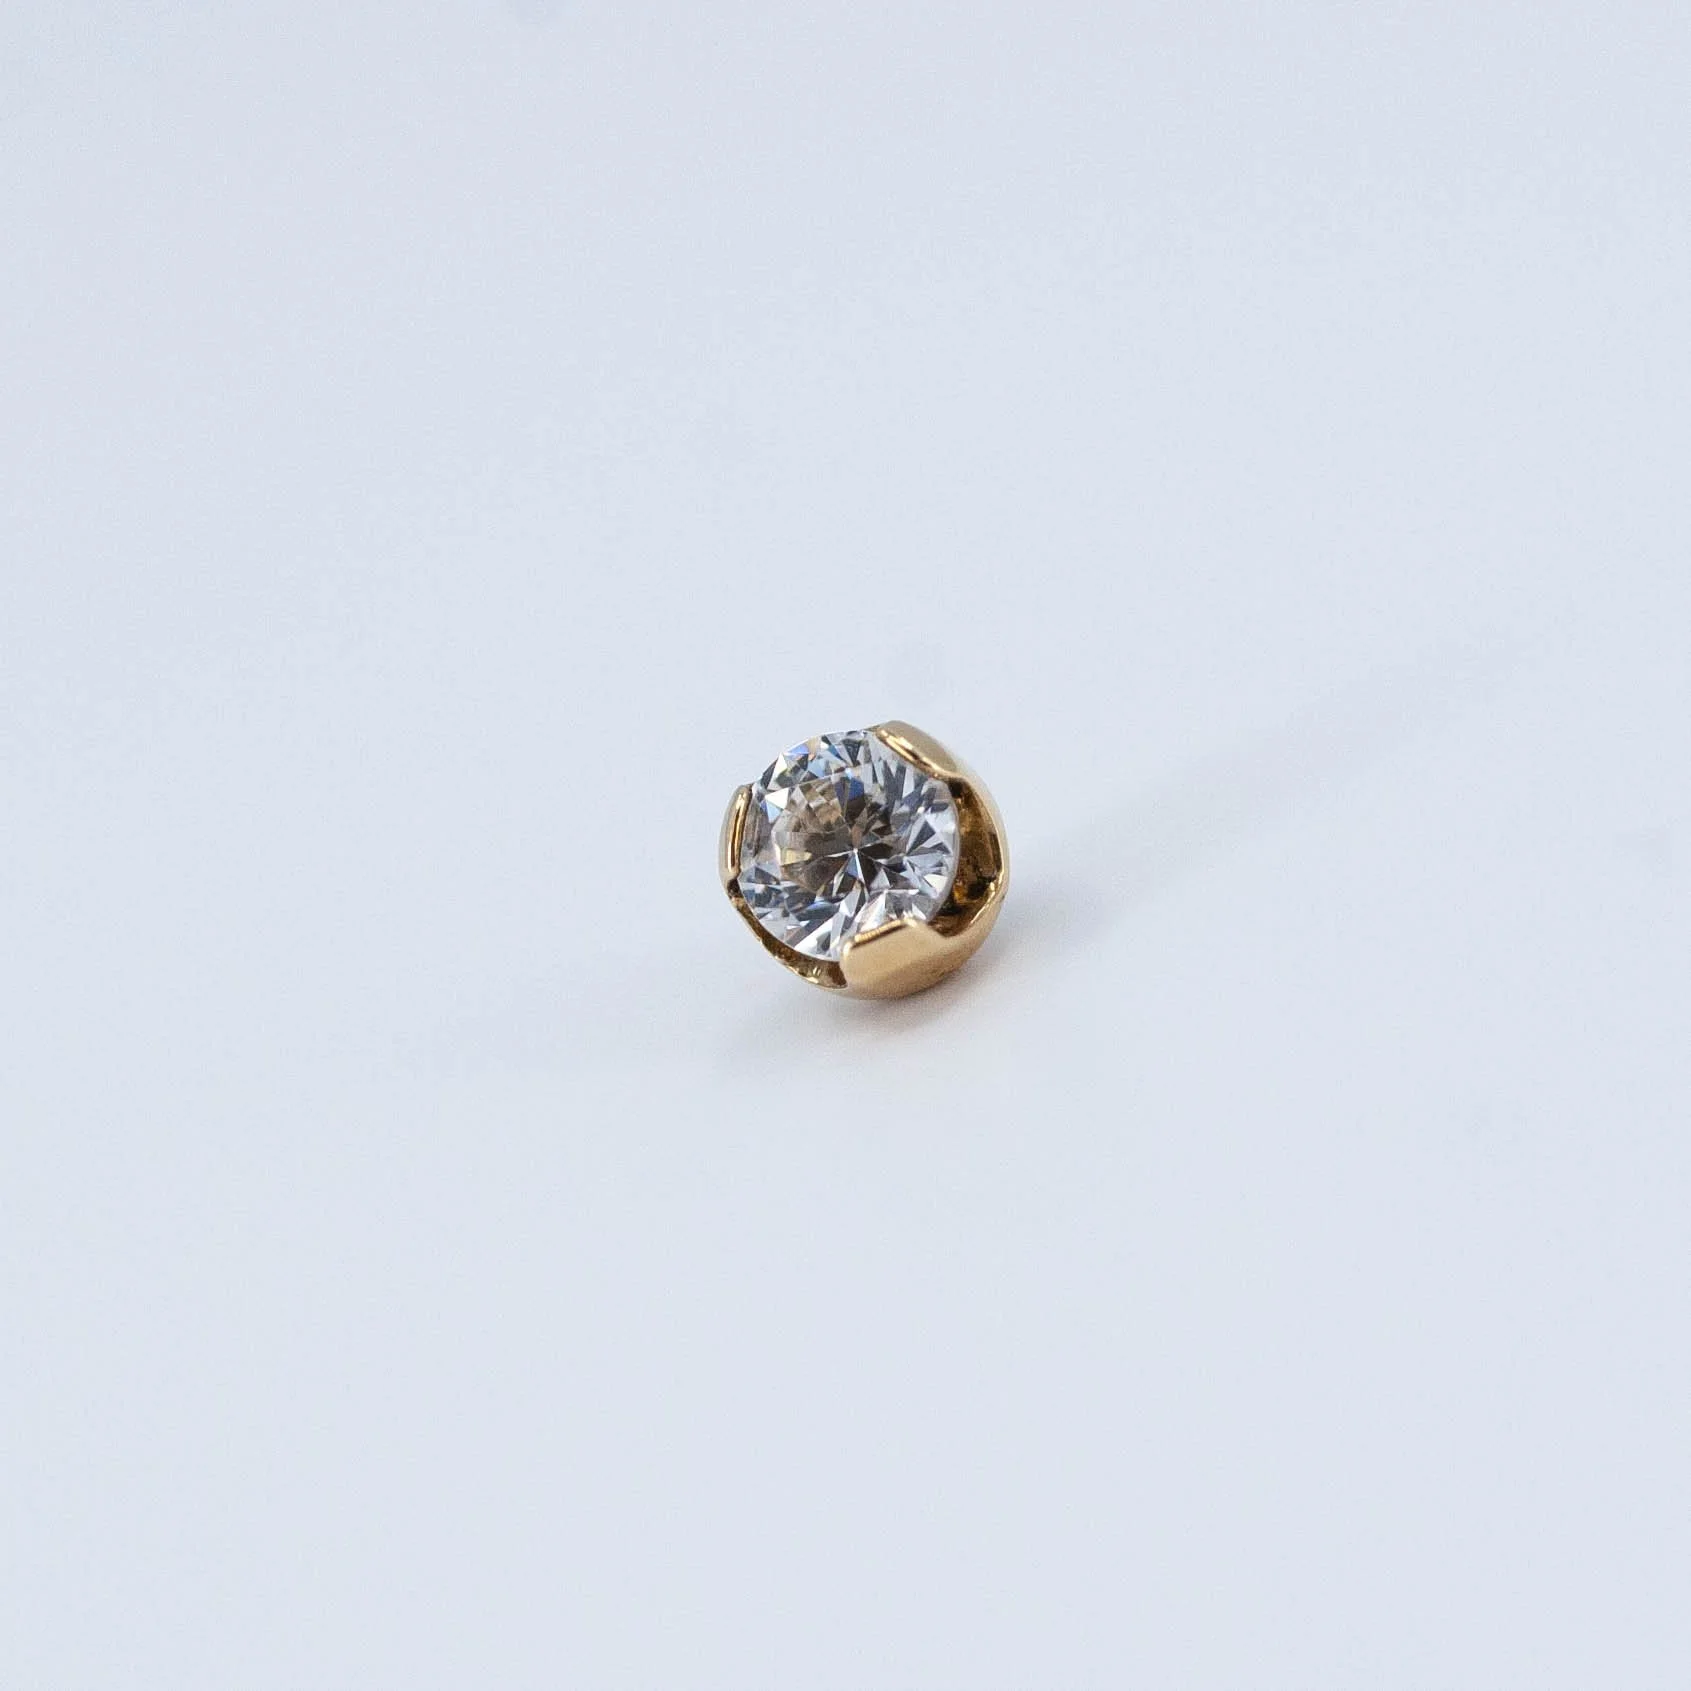
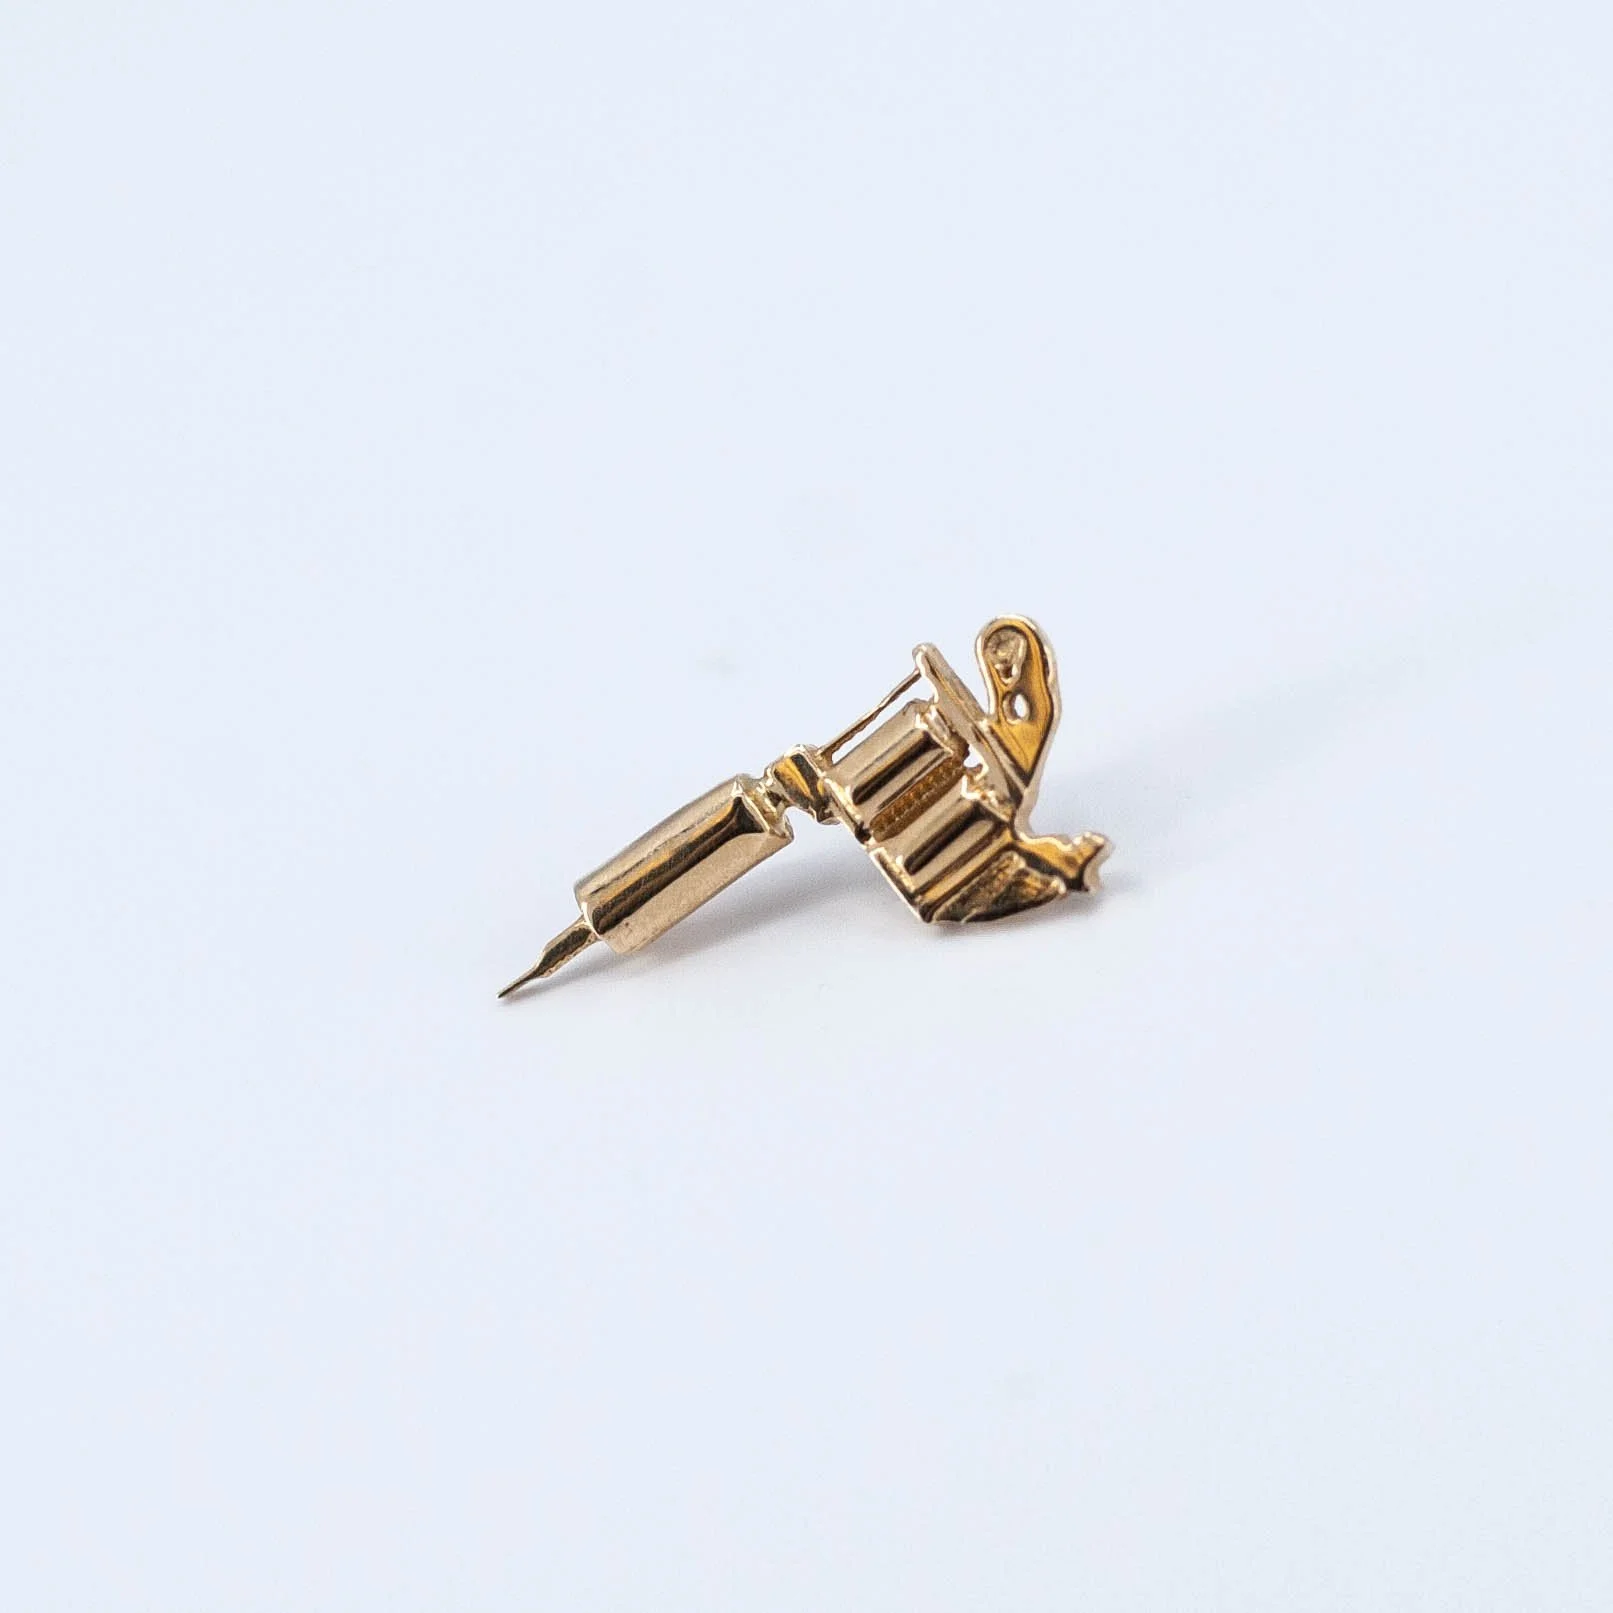
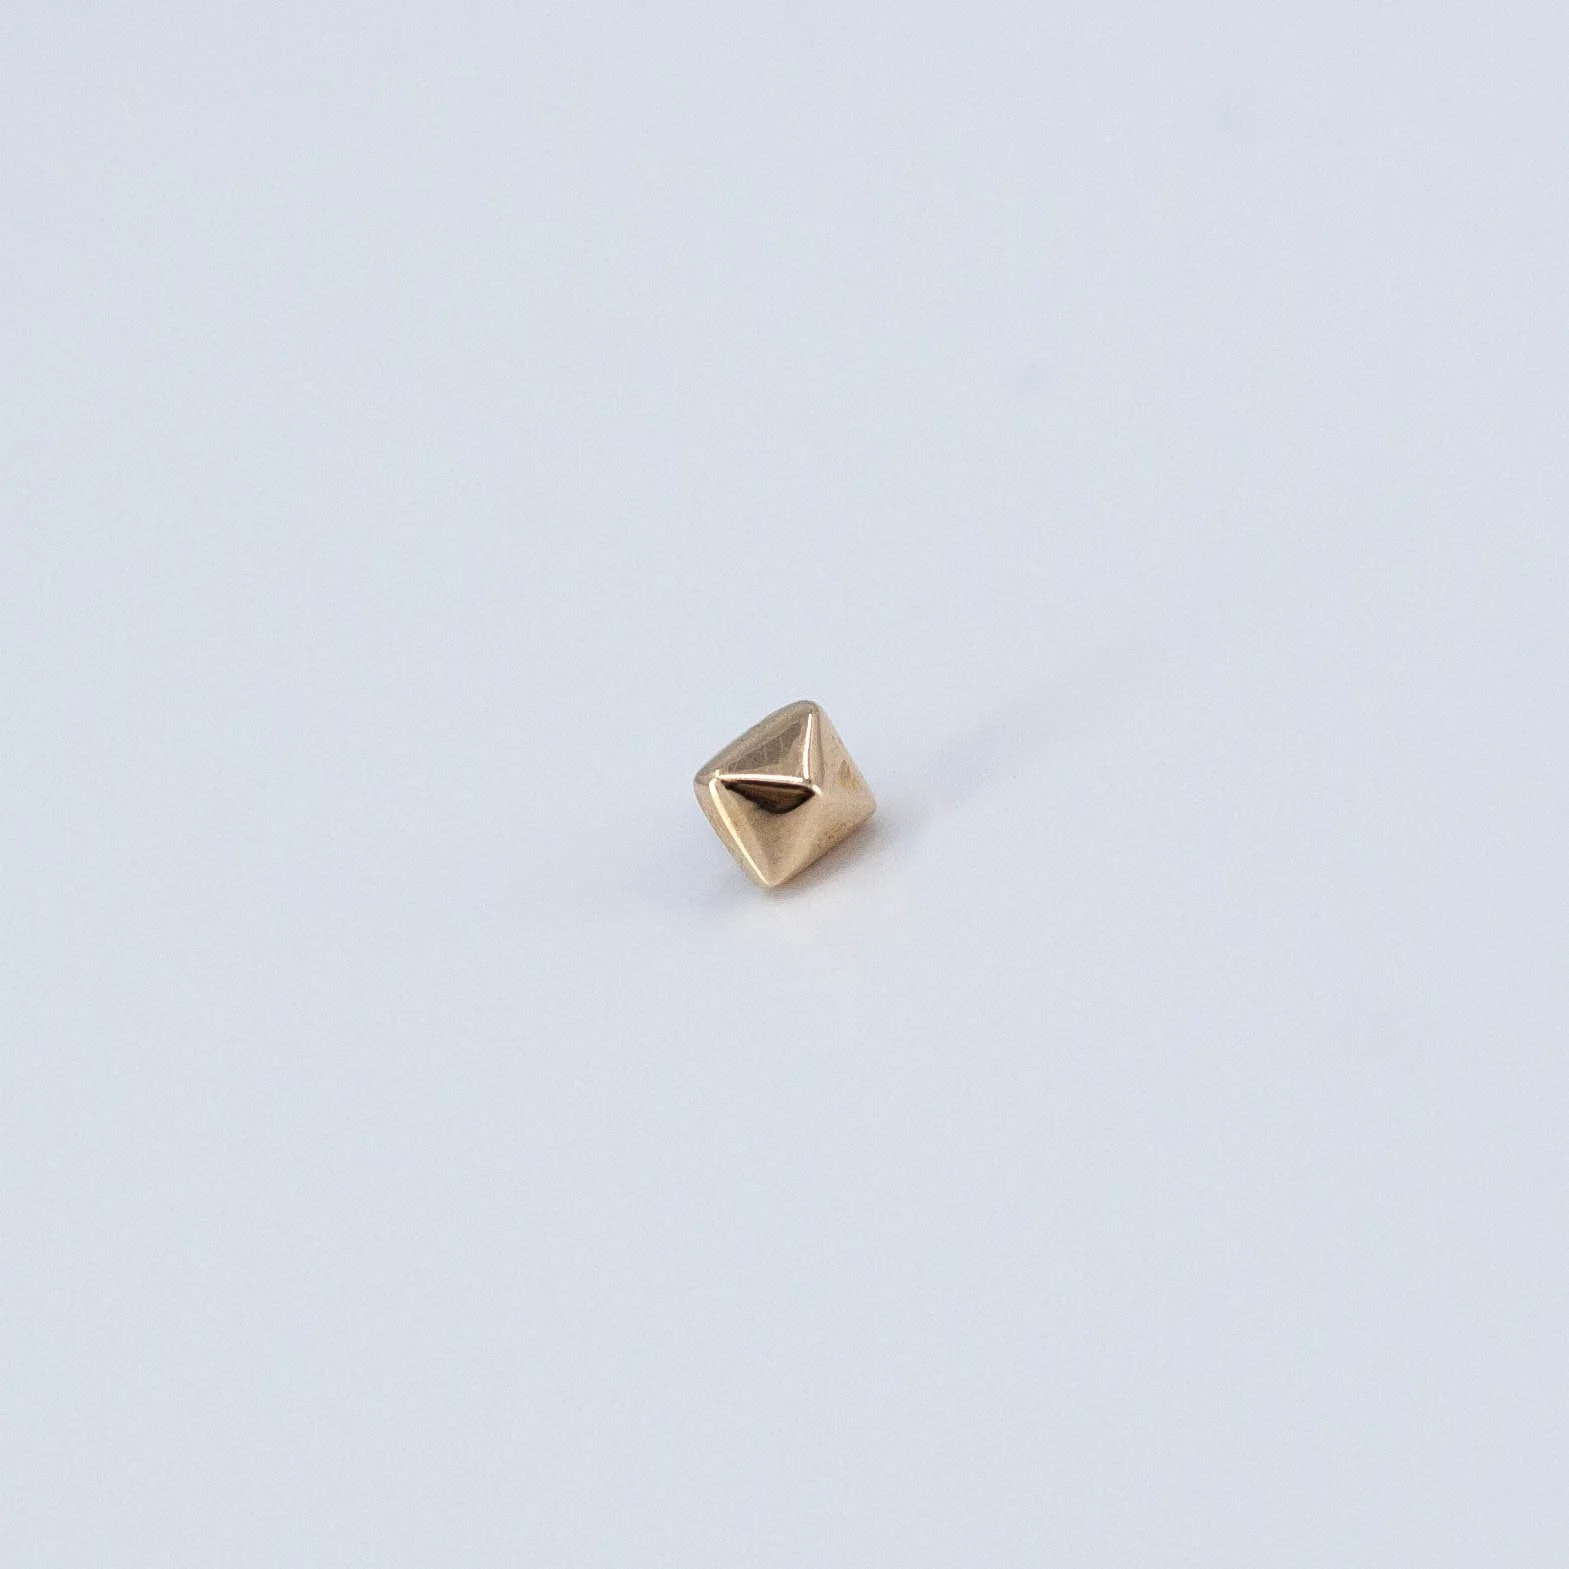
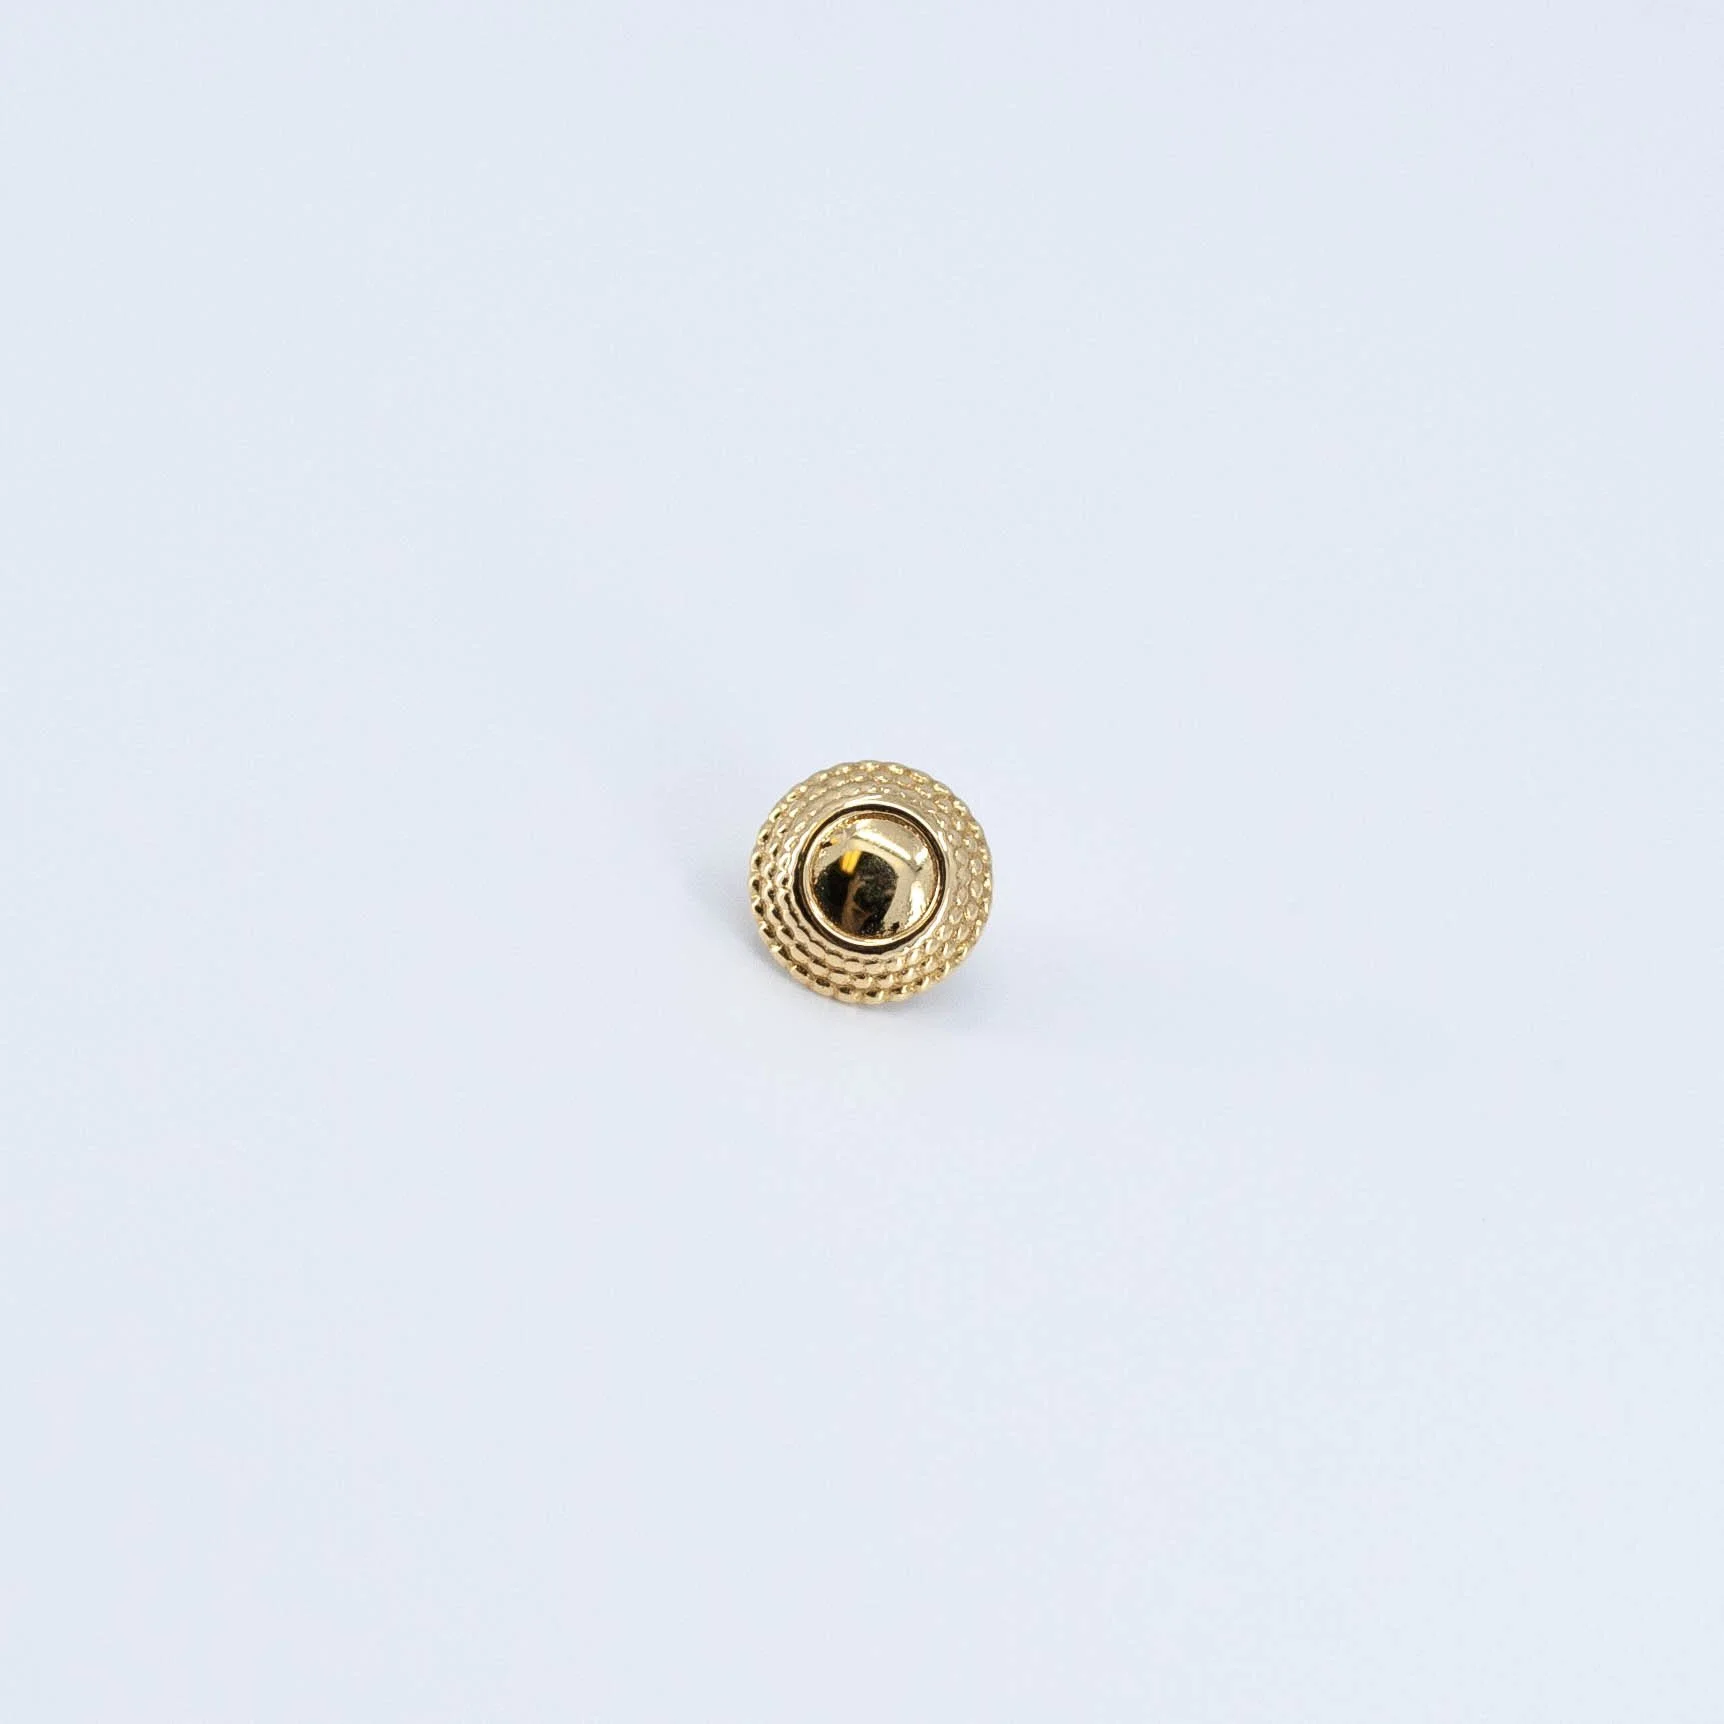
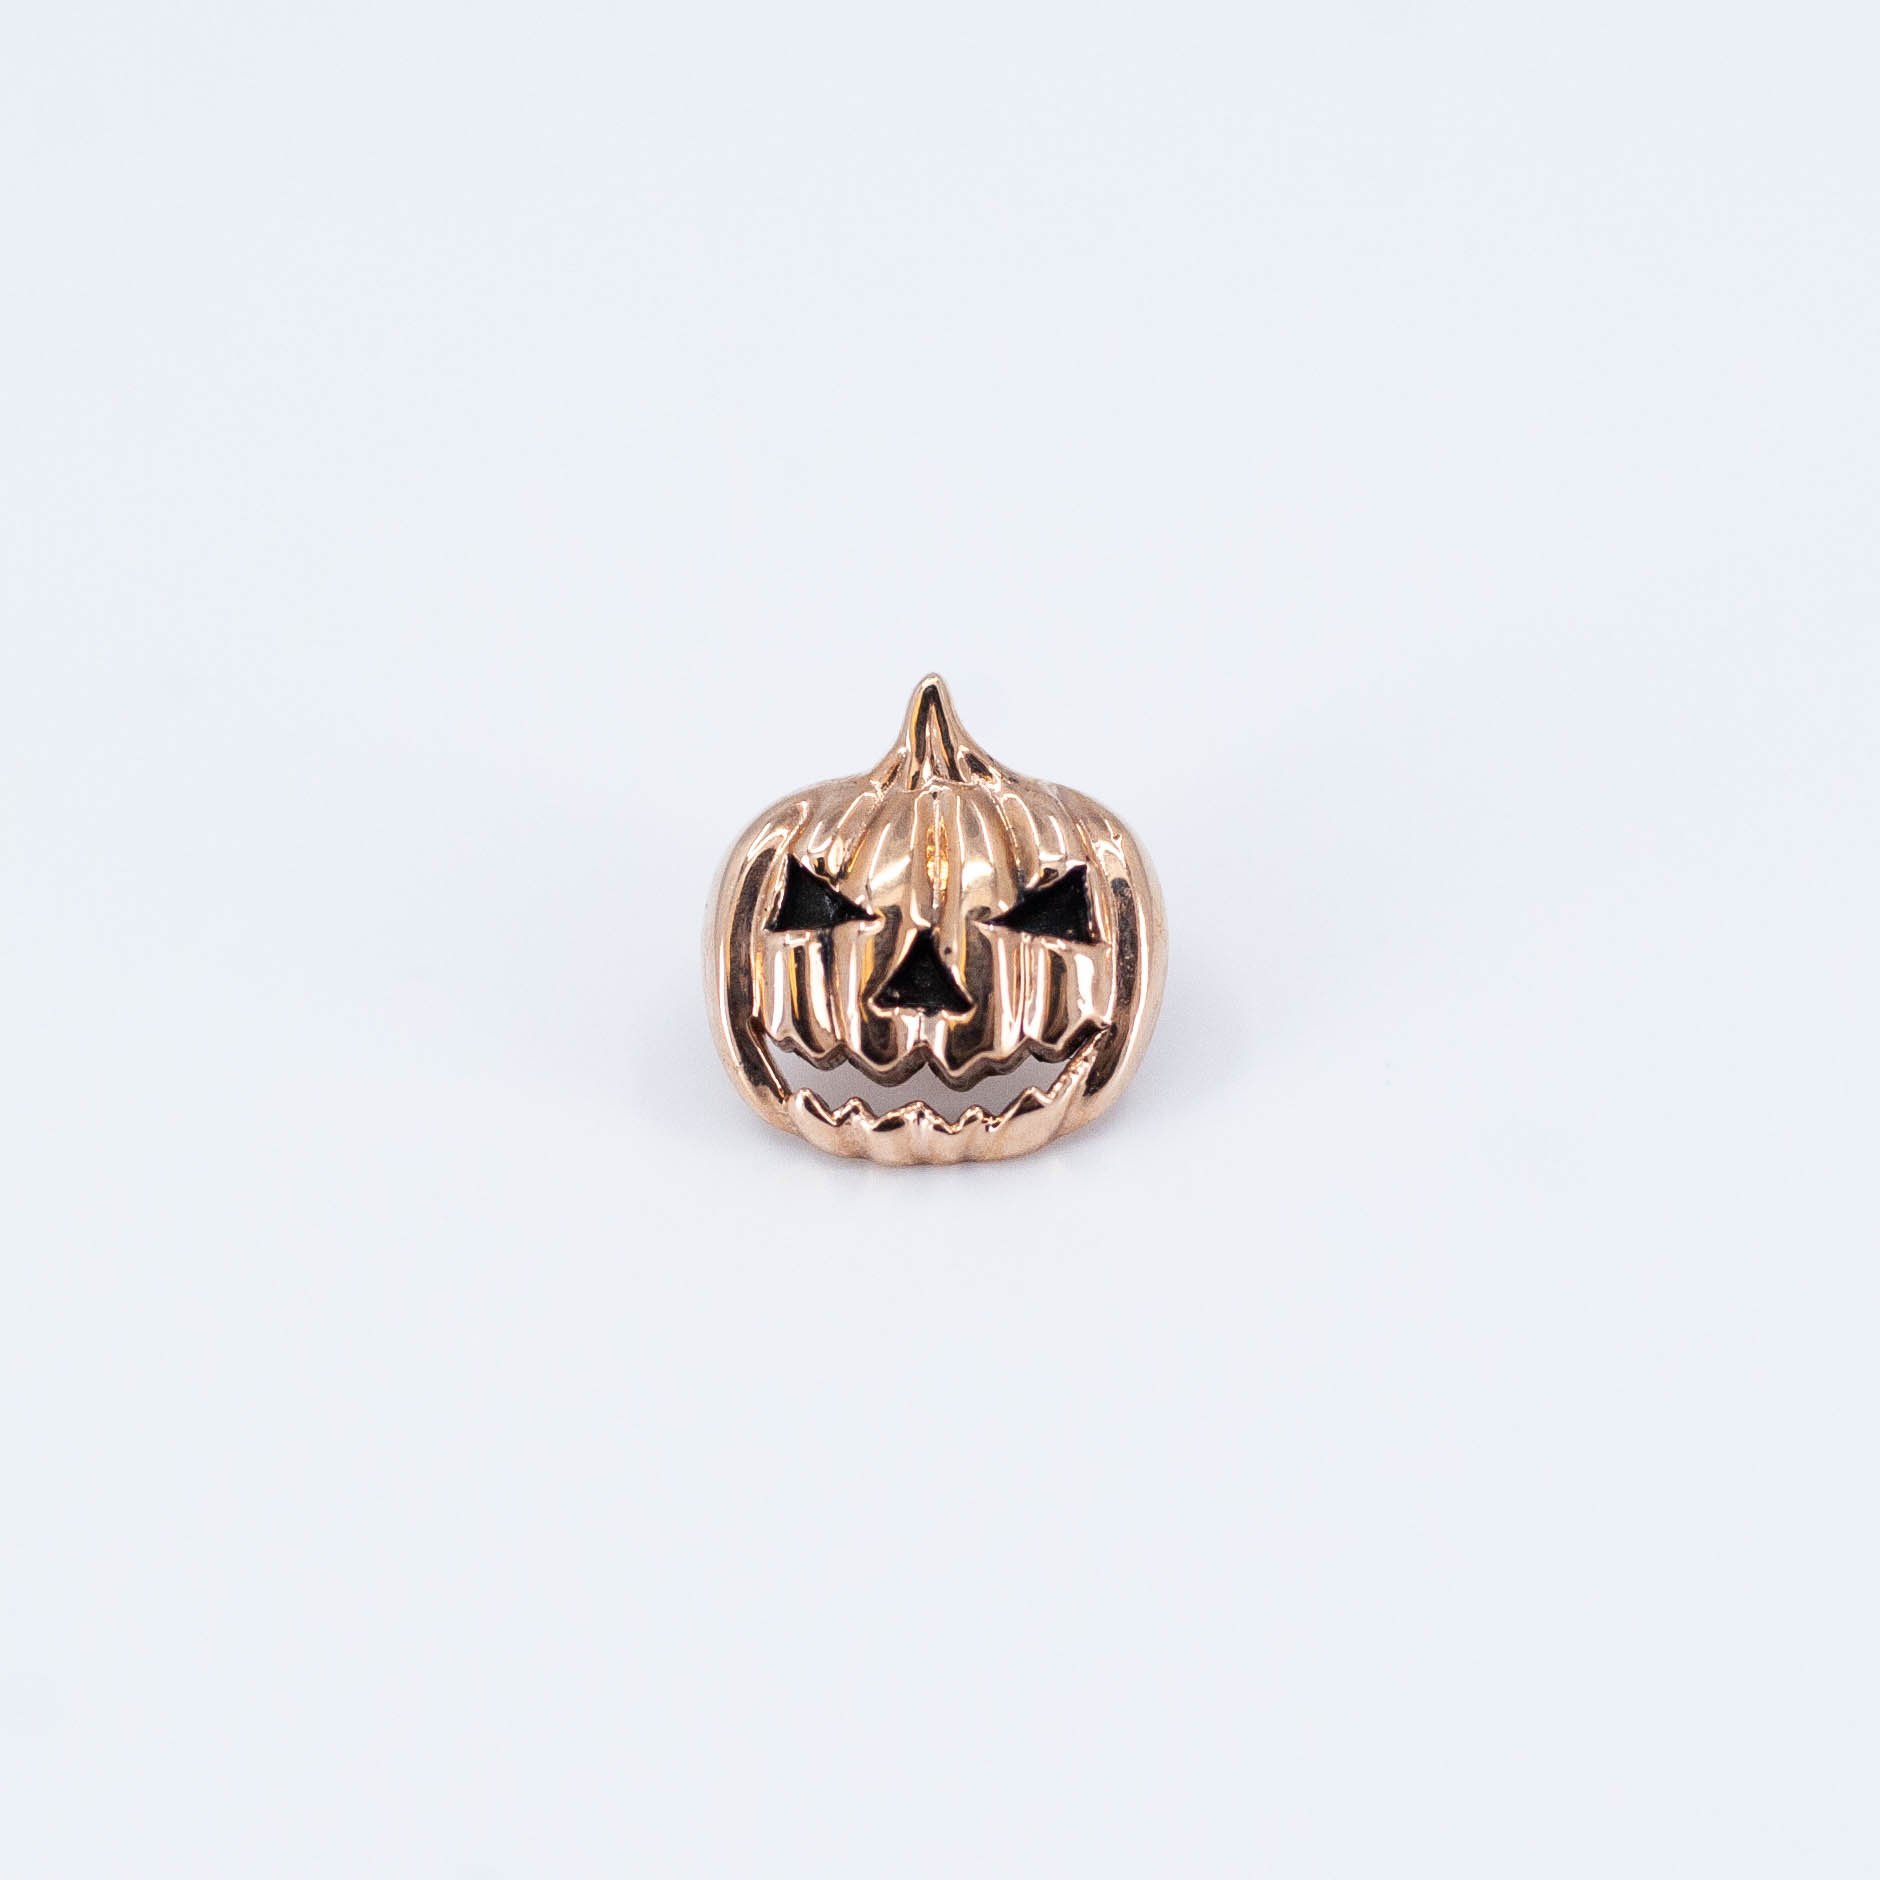
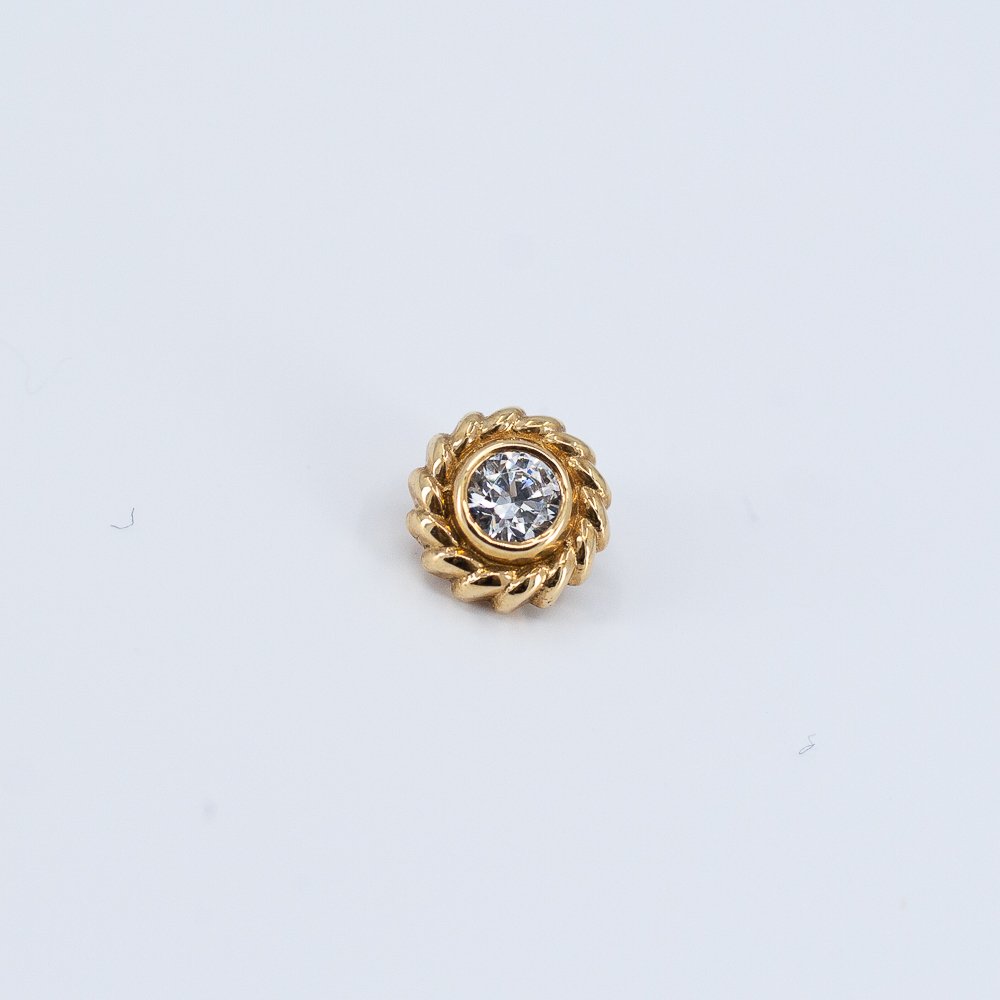
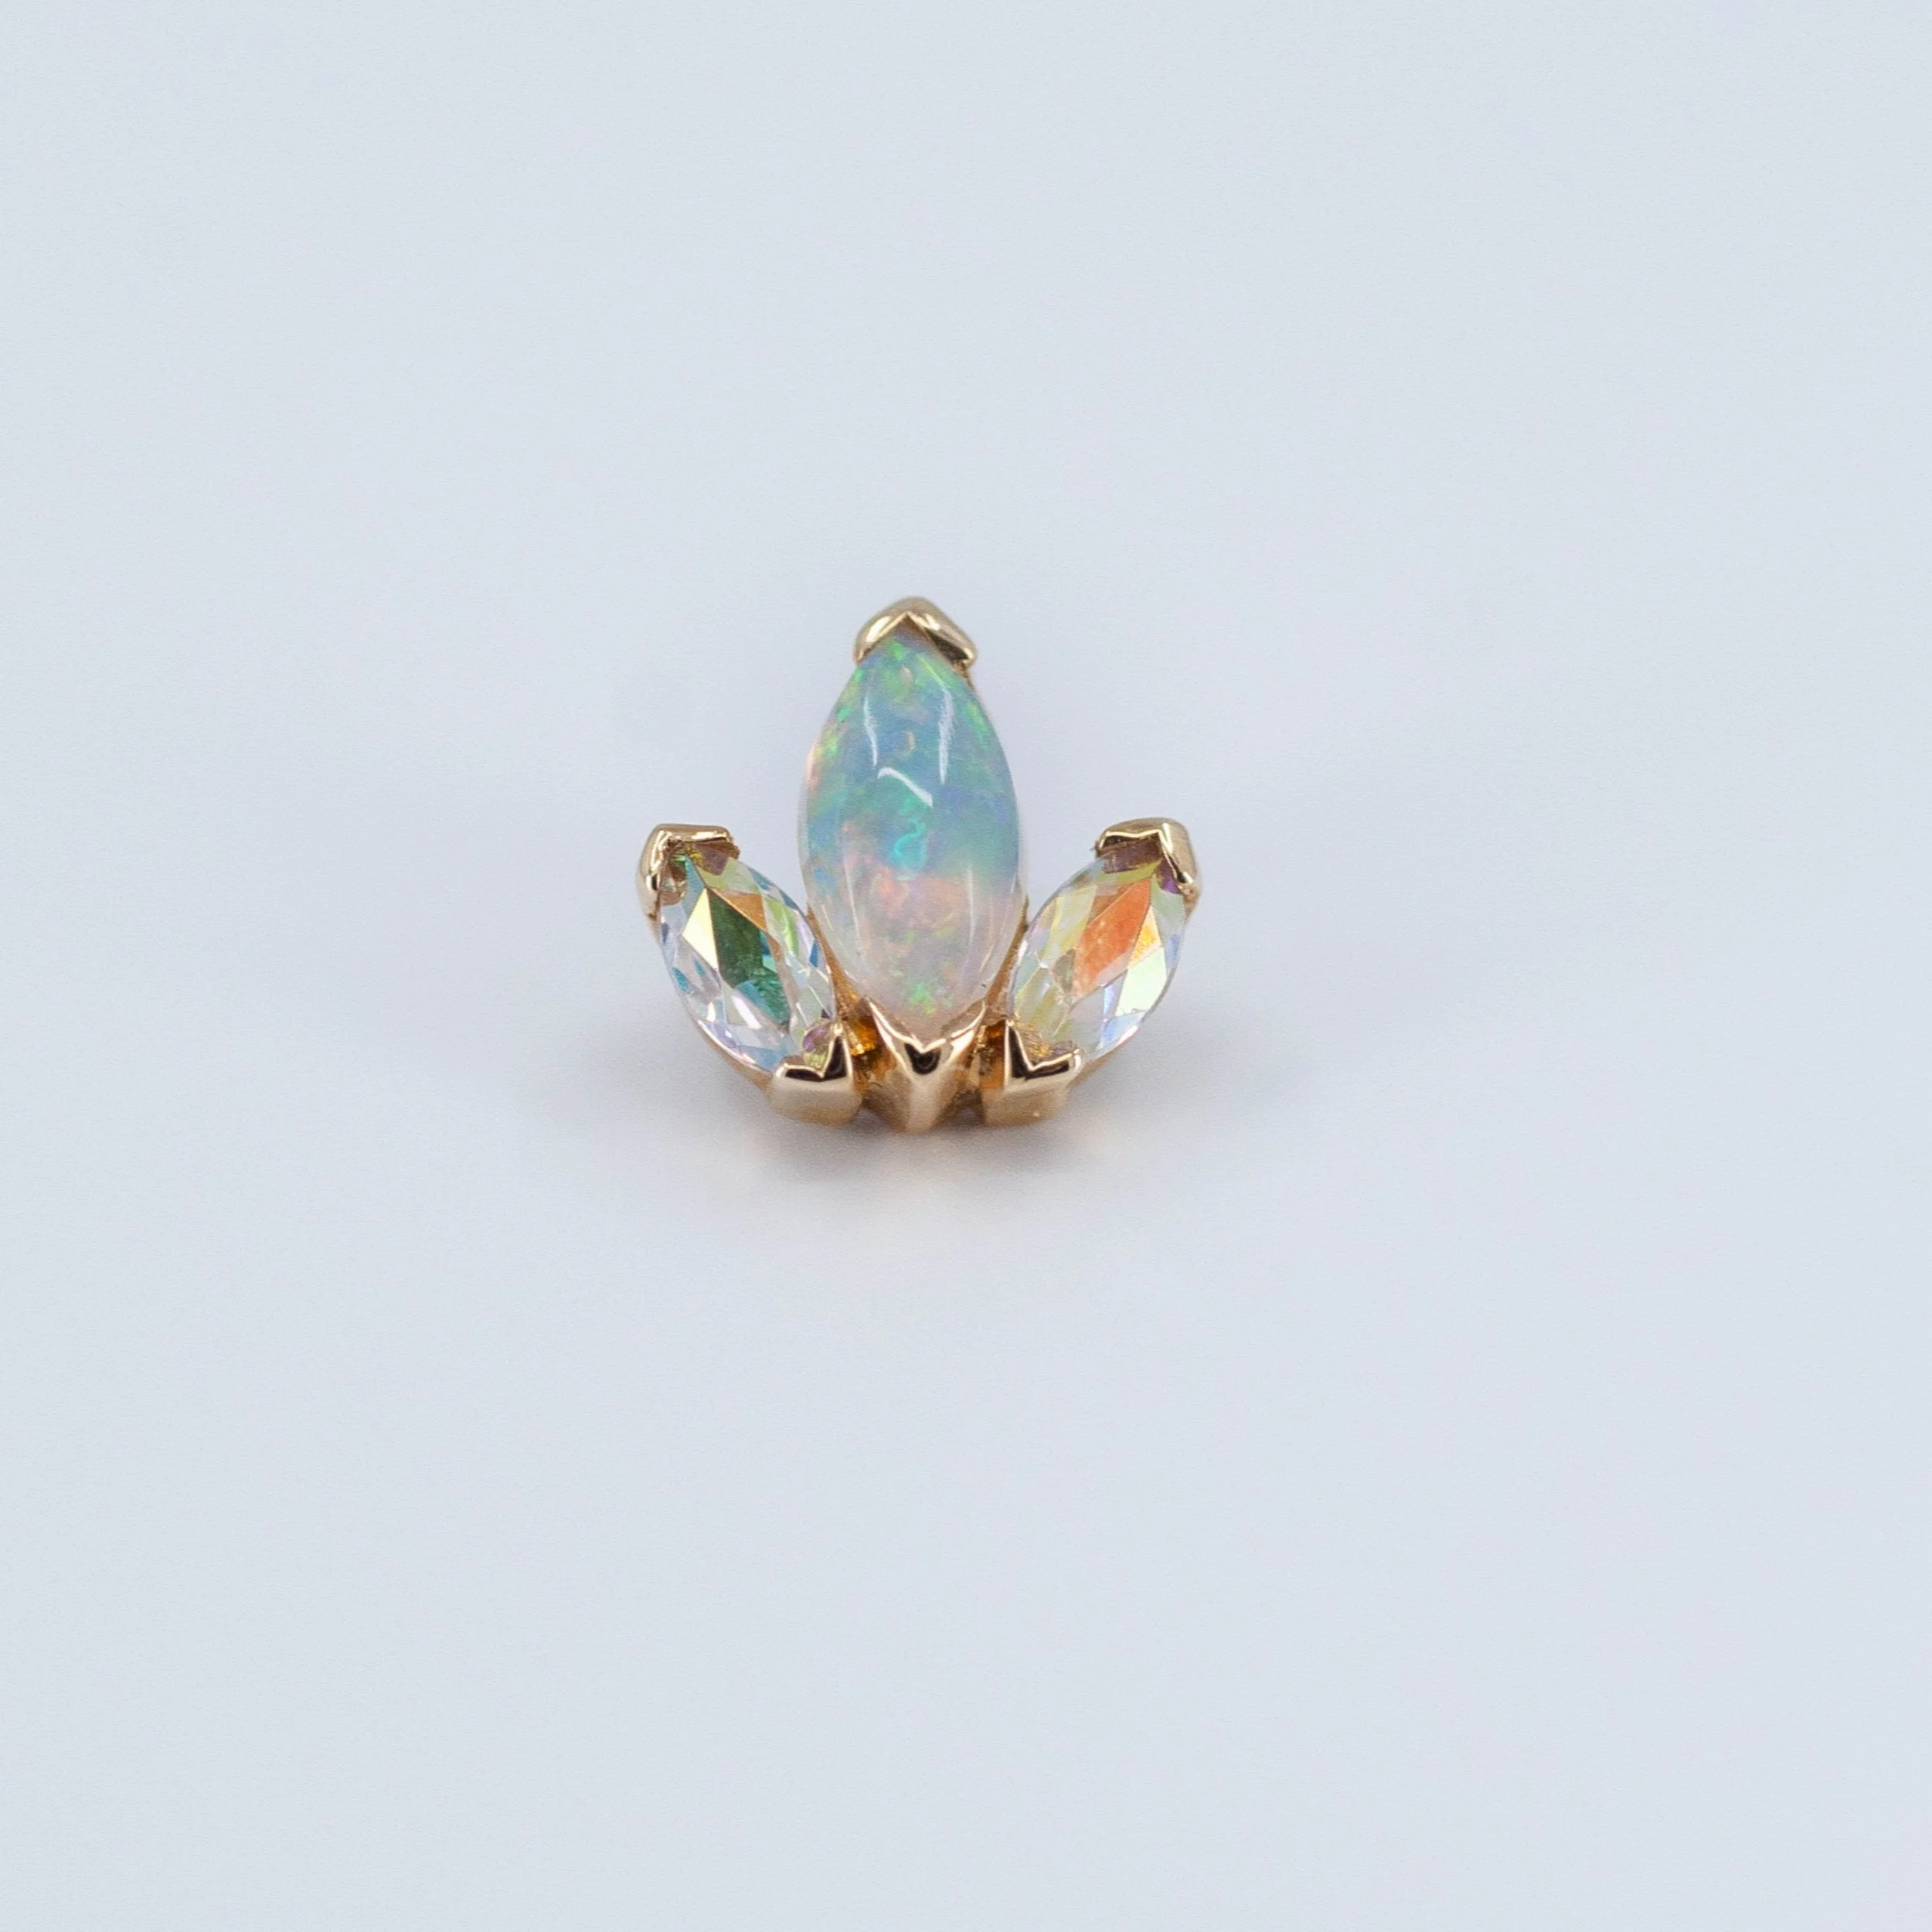
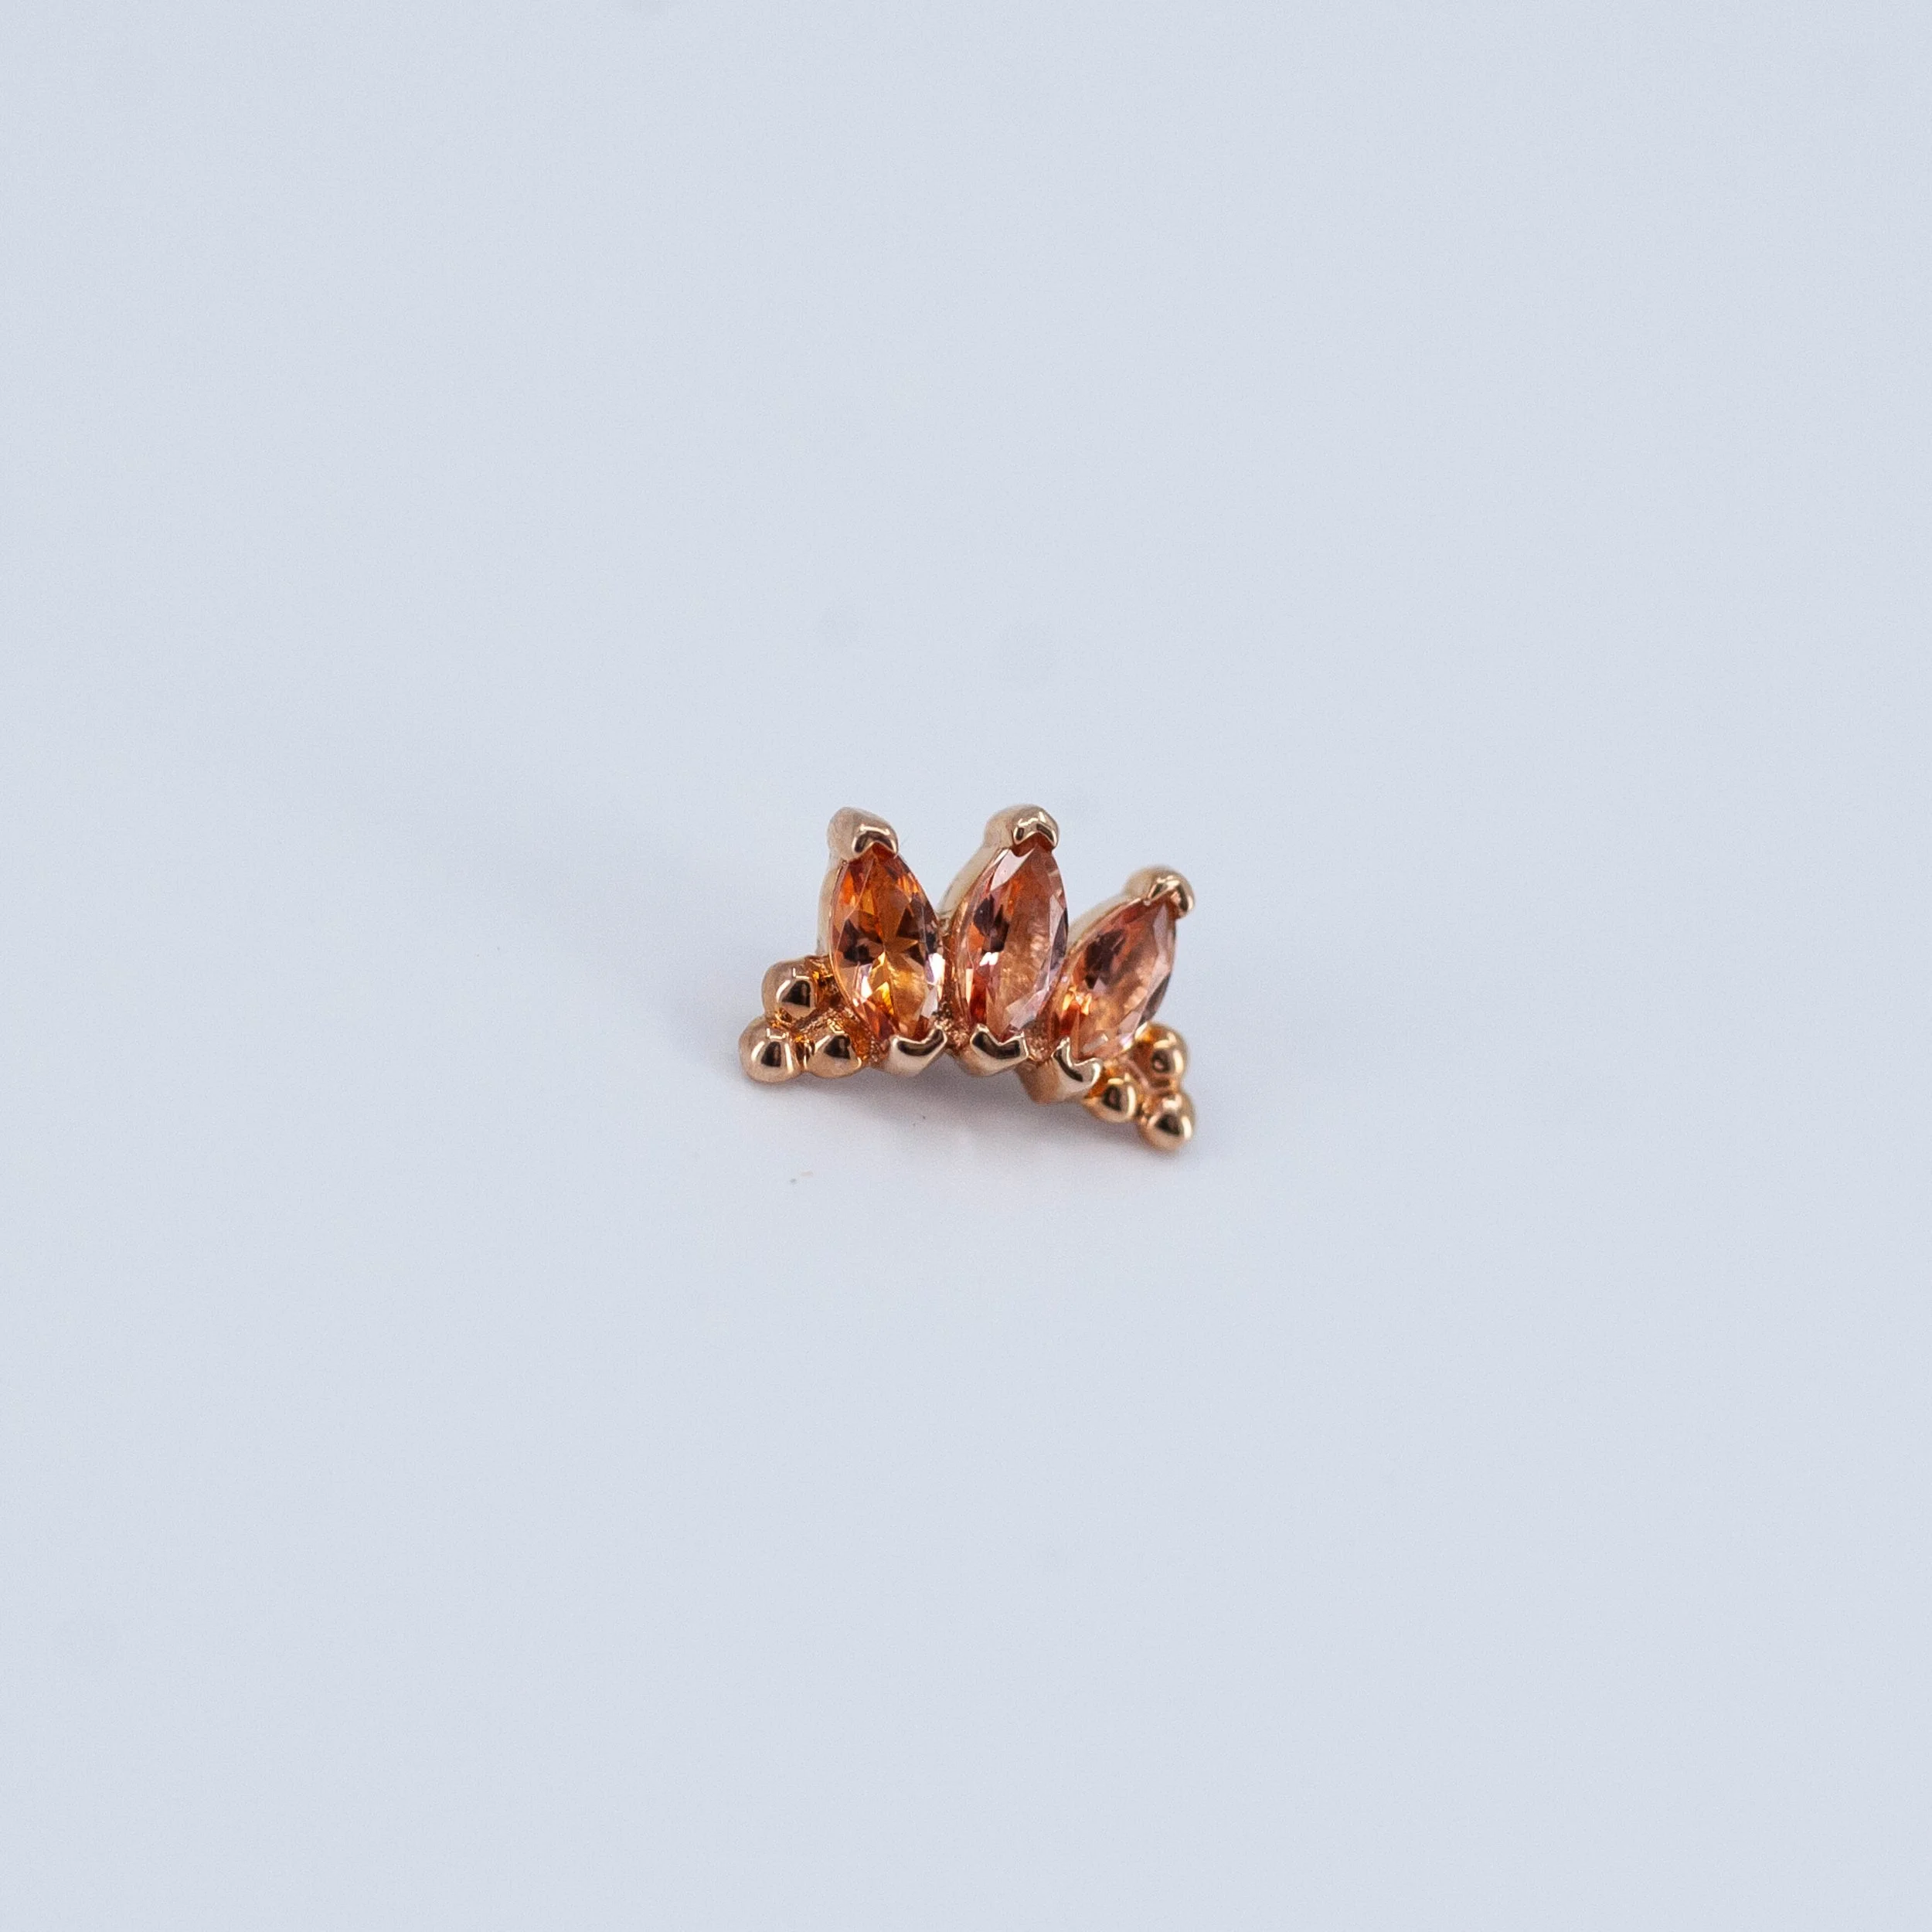
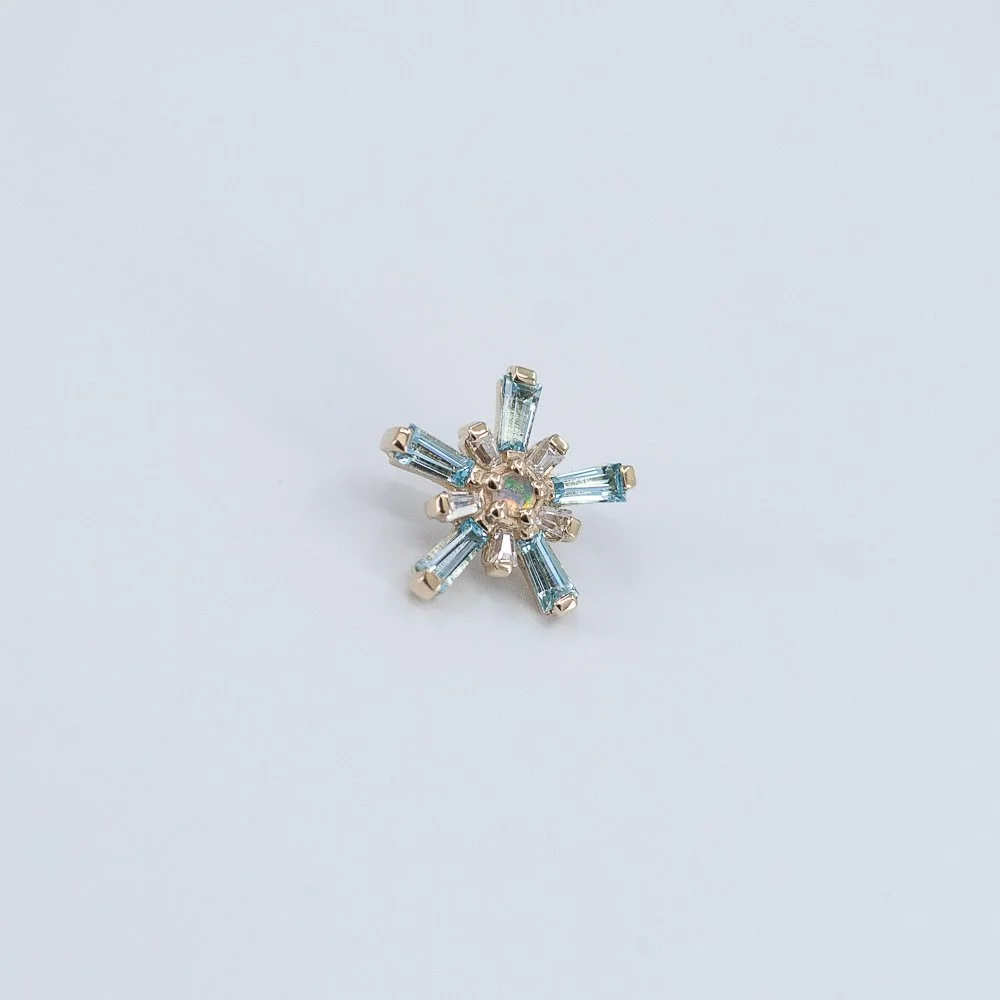
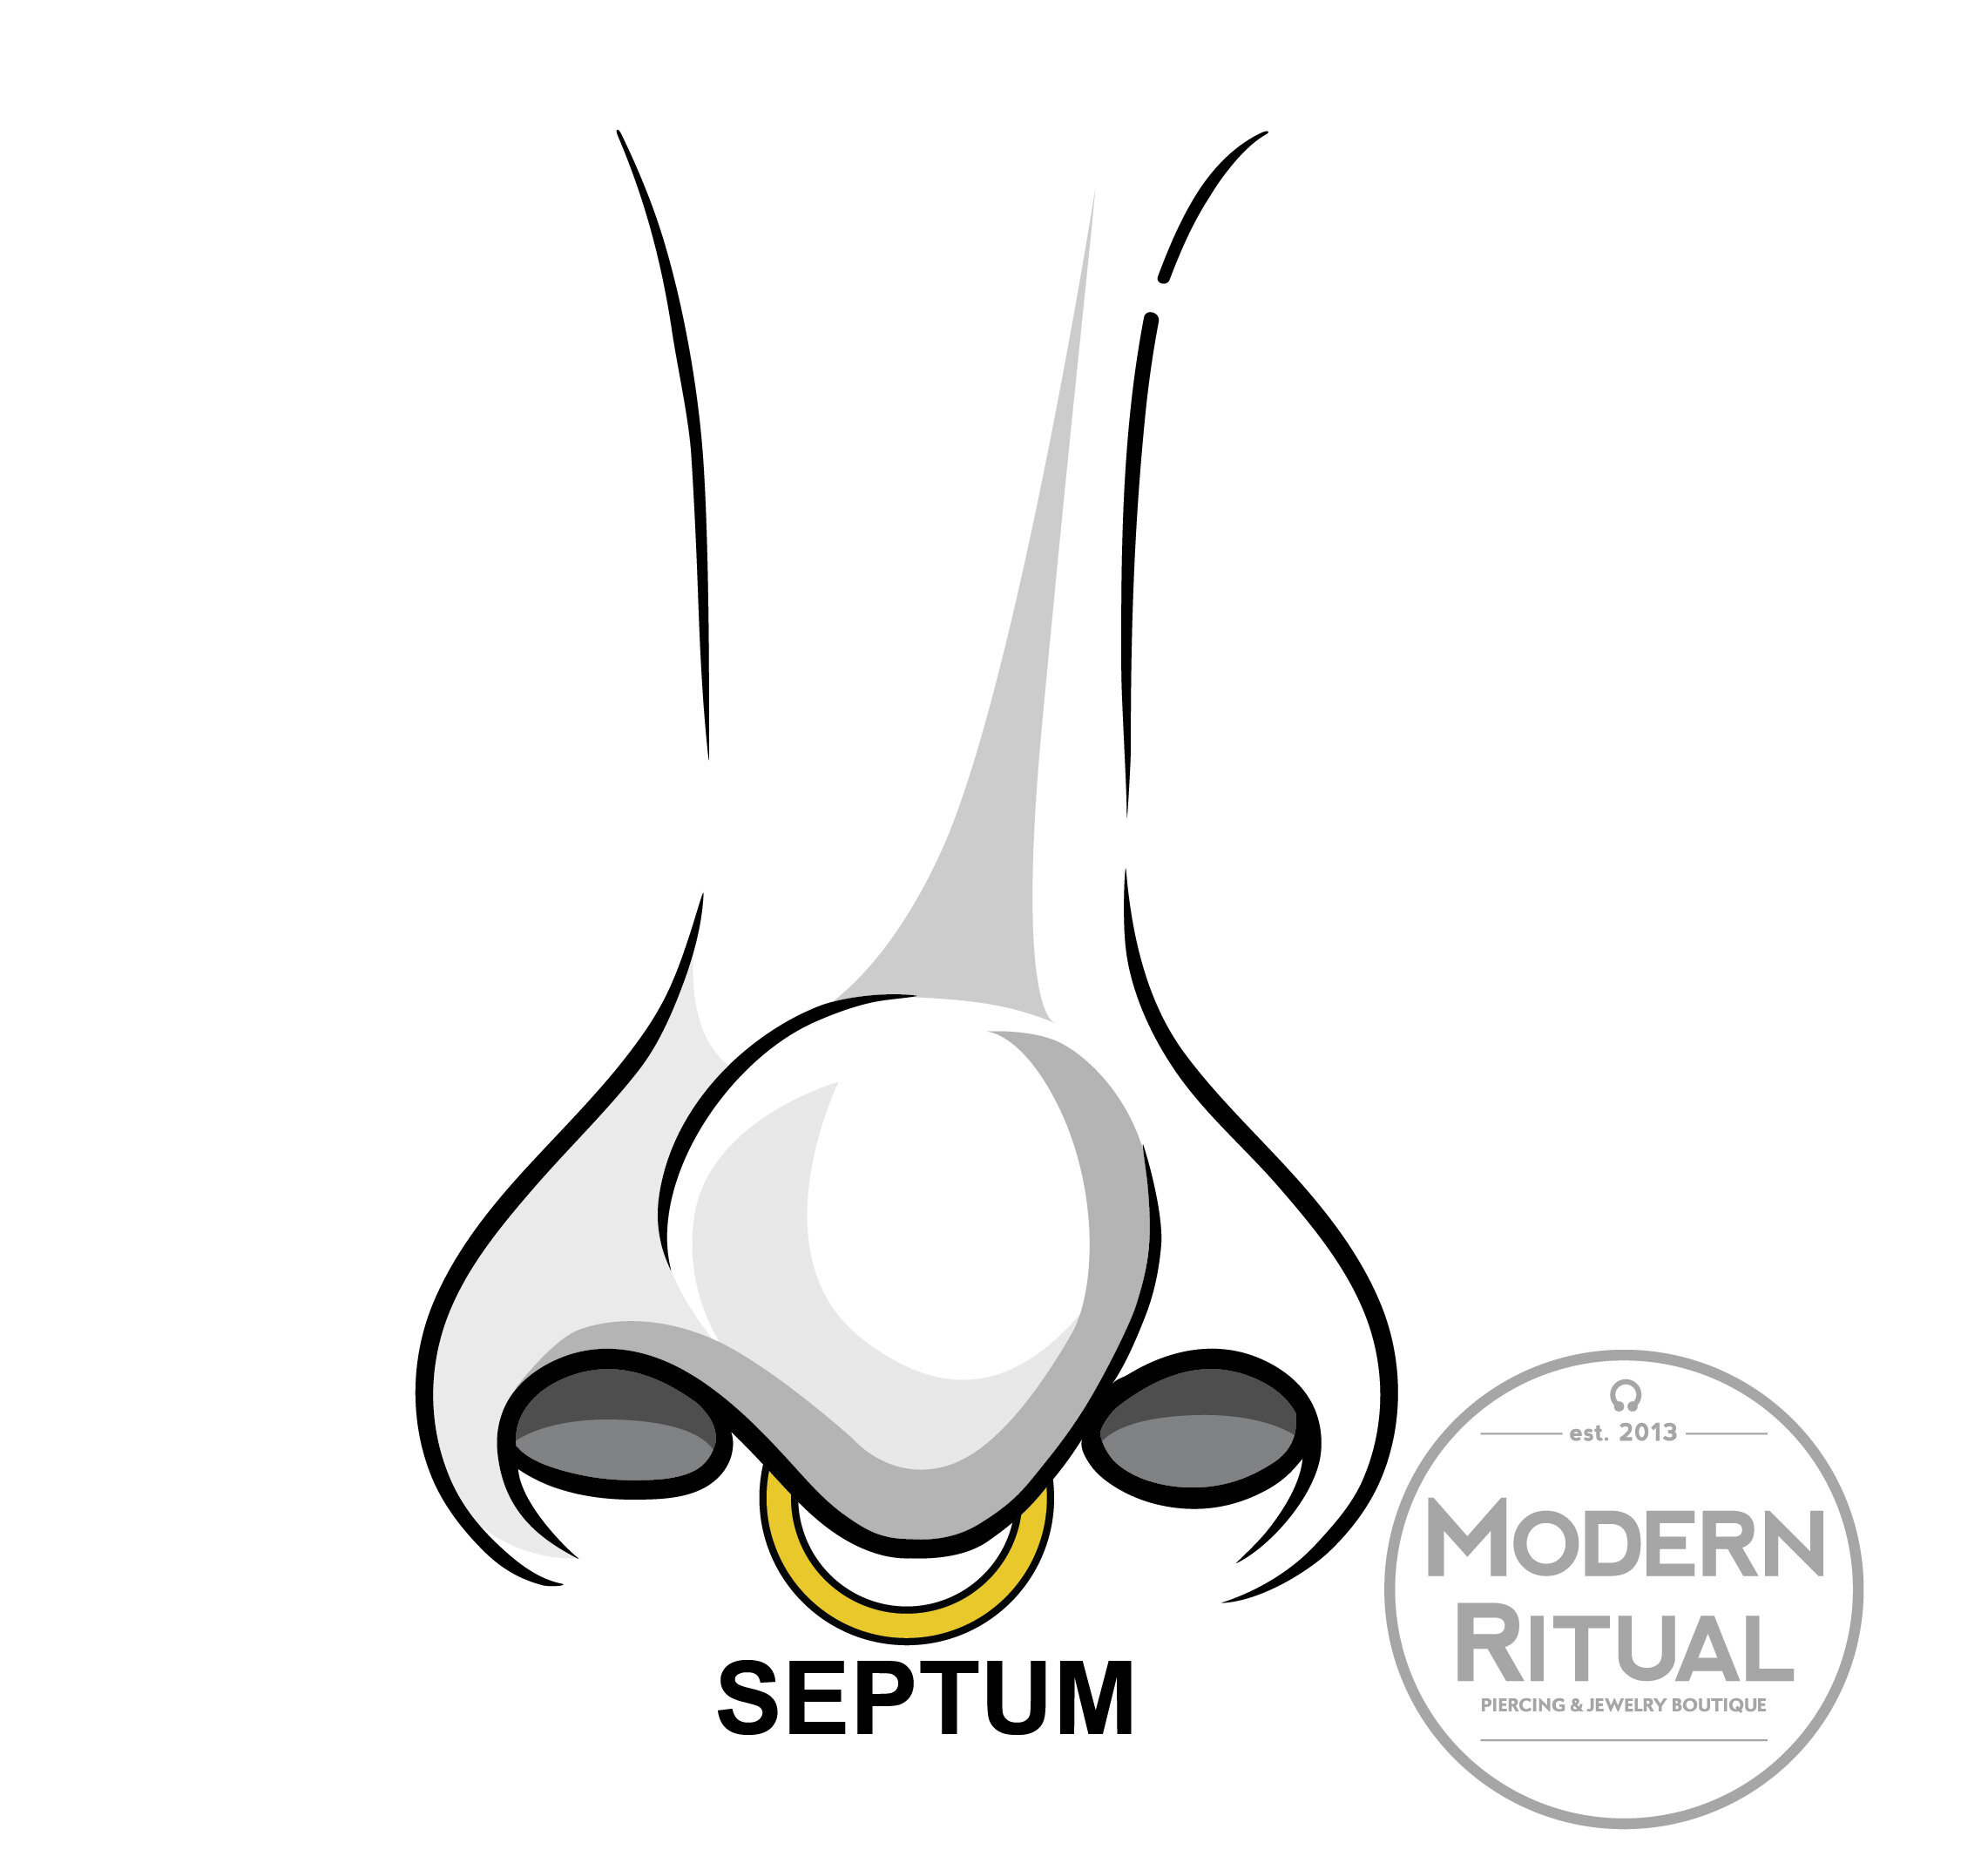
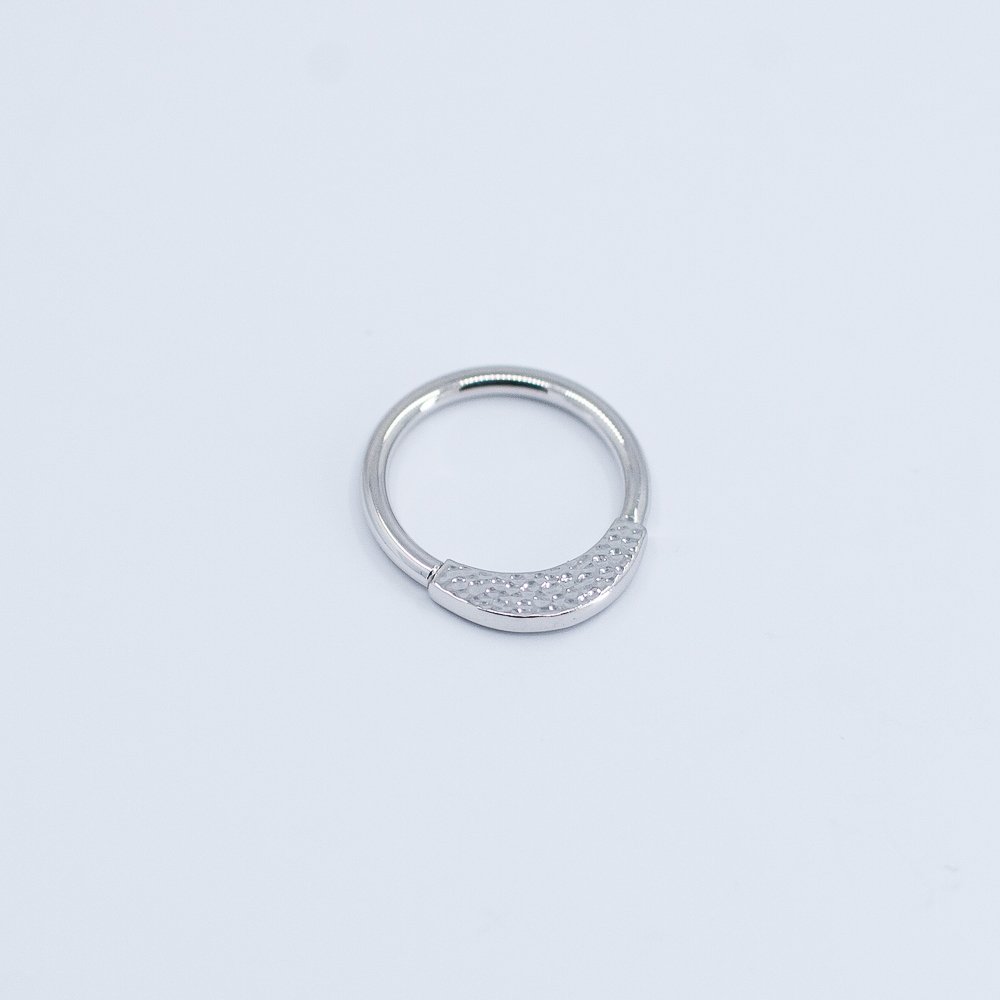
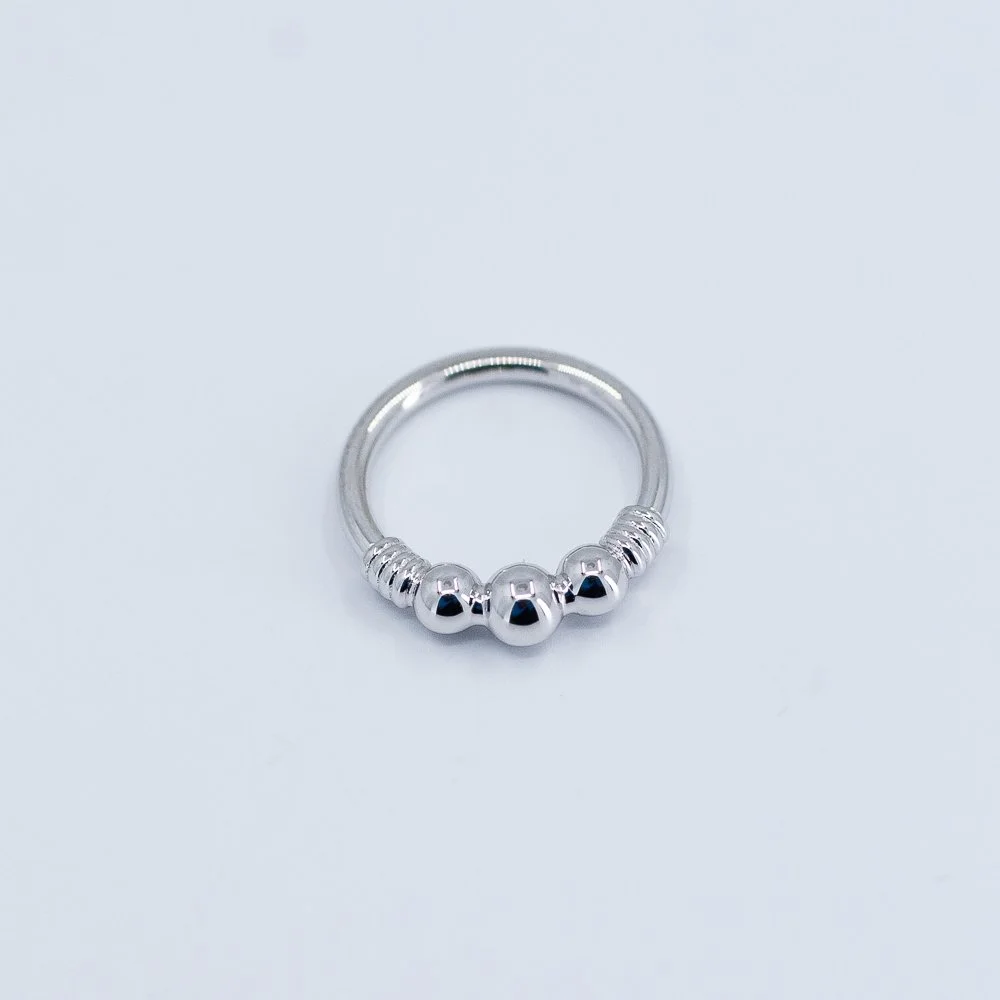
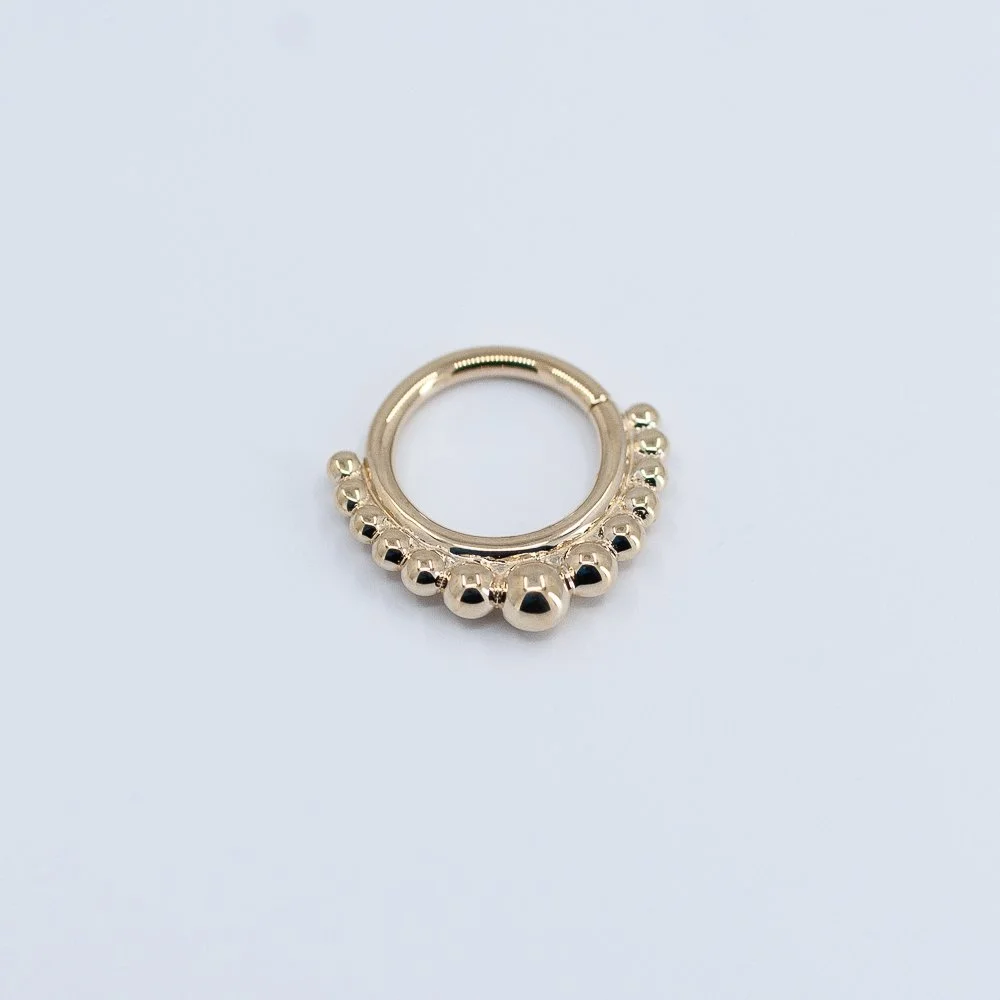
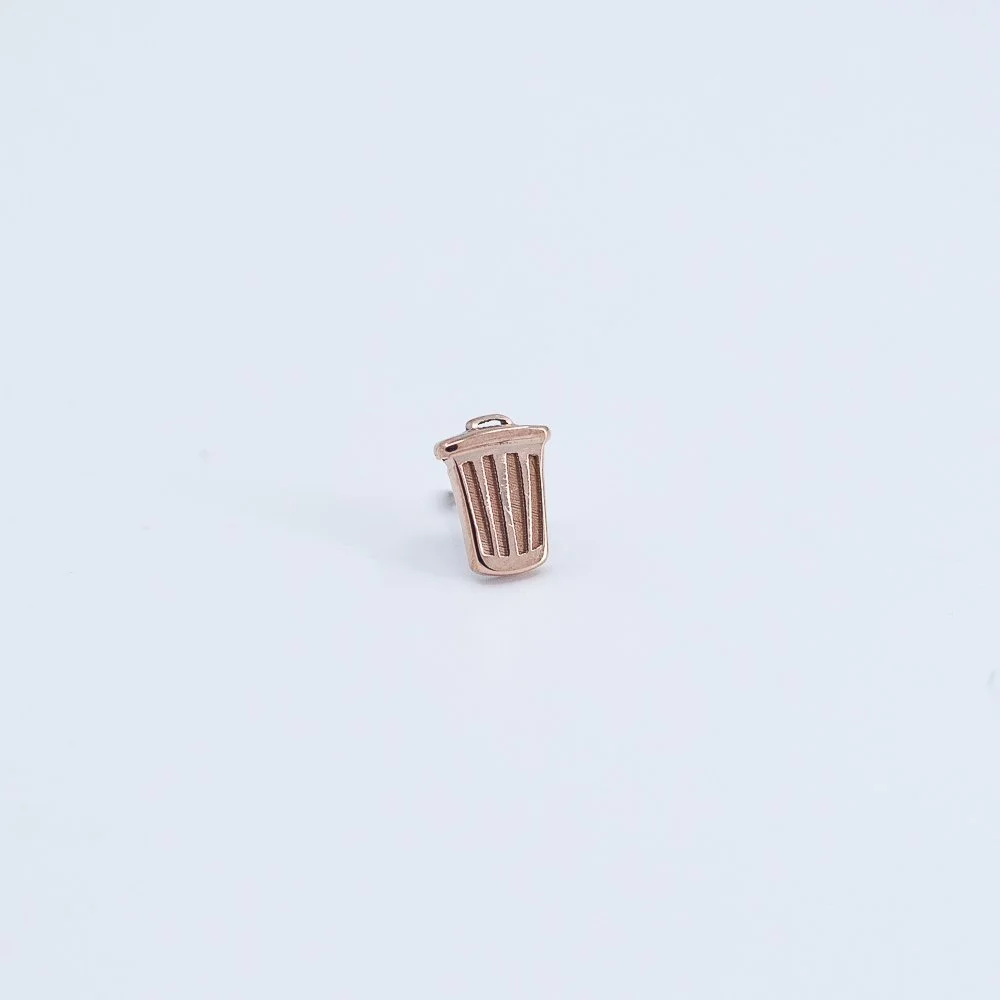
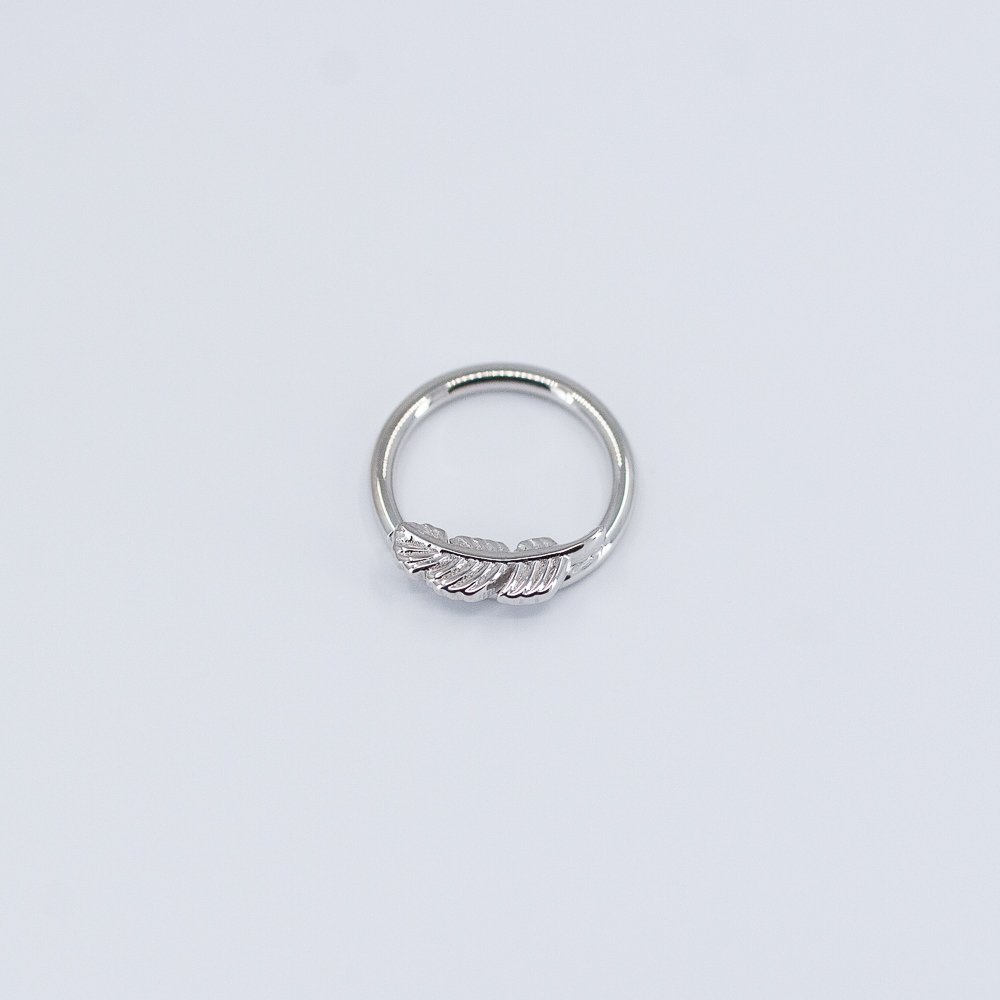
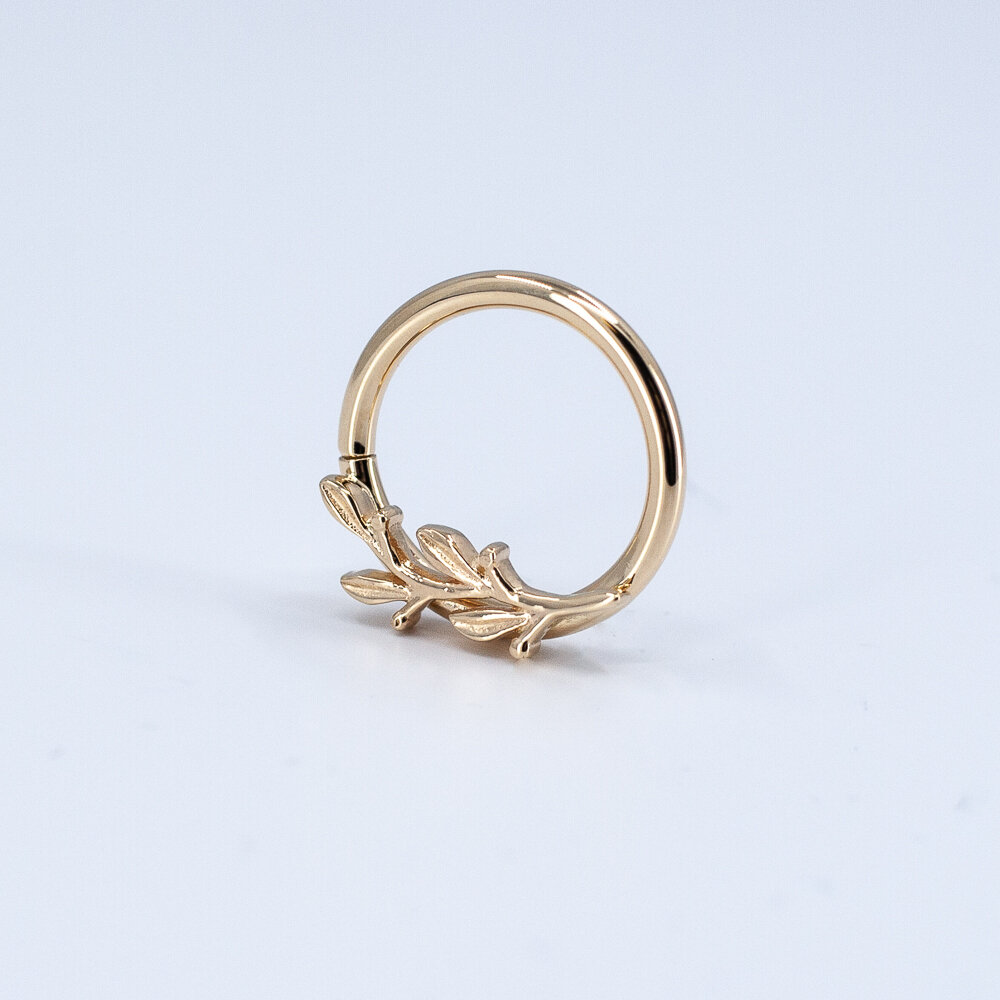
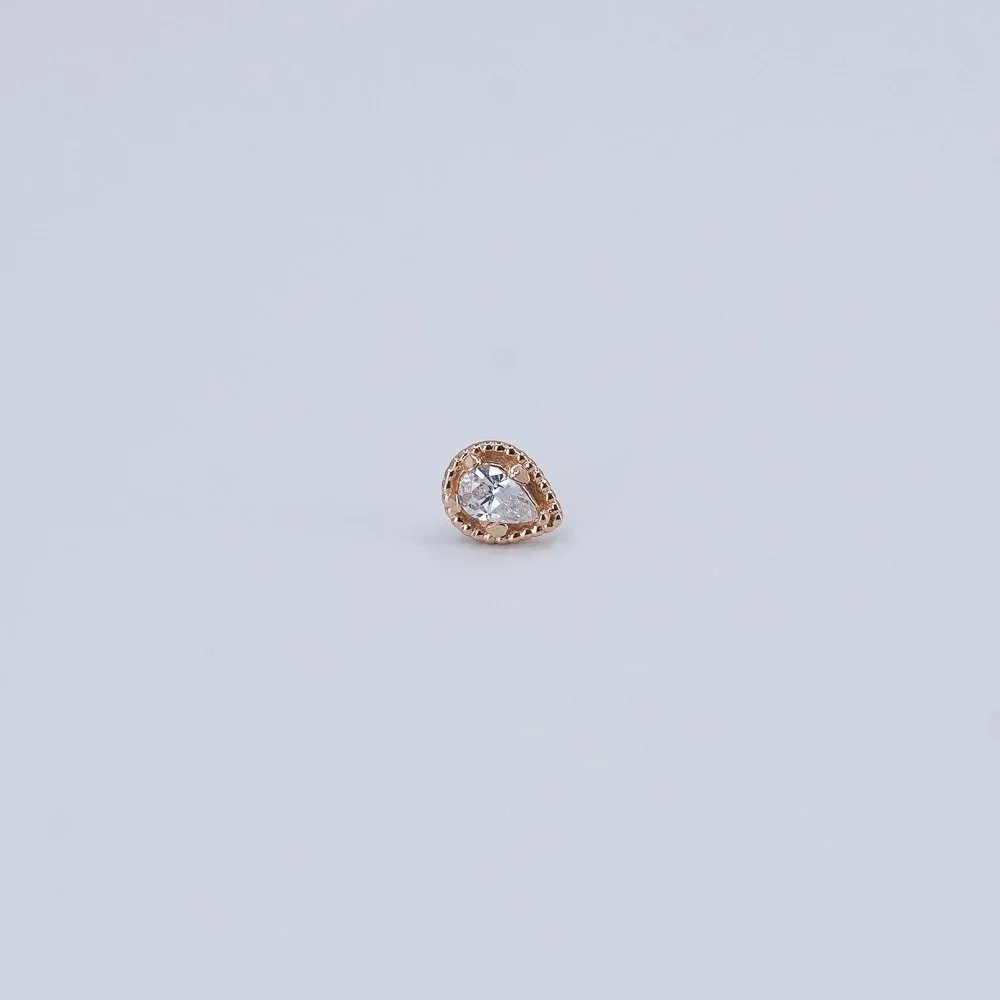
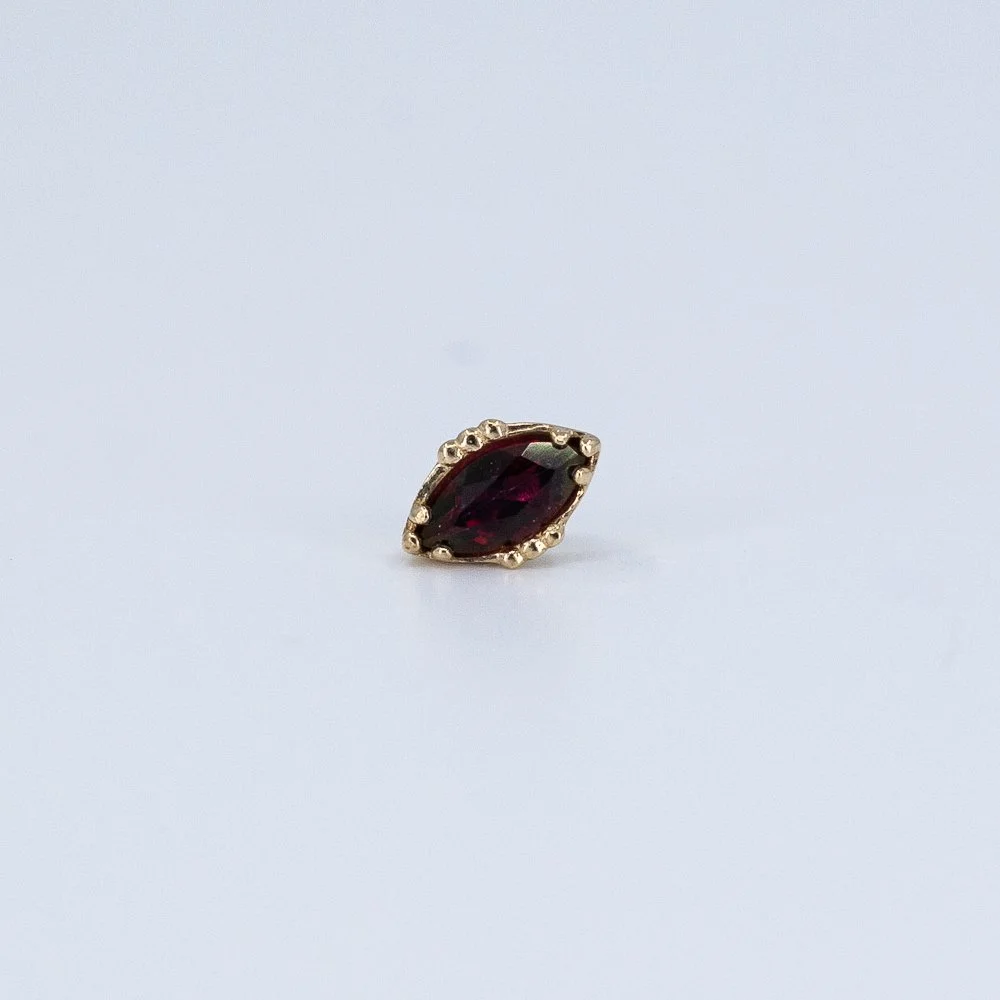
Skip to Content
MODERN RITUAL
Modern Ritual
Our Story
Our Staff
FAQs
General FAQs
Aftercare Guides
Jewelry Examples
Contact
Shop
0
0
MODERN RITUAL
Modern Ritual
Our Story
Our Staff
FAQs
General FAQs
Aftercare Guides
Jewelry Examples
Contact
Shop
0
0
Modern Ritual
Our Story
Our Staff
Folder: FAQs
Back
General FAQs
Aftercare Guides
Jewelry Examples
Contact
Shop

Shop

  • Plugs |
  • Clicker |
  • Chains |
  • Rings |
  • Ends |
  • Hangers & Weights |
  • Coils/Spreaders/Hooks |
  • Gift Certificates |
Ball - 18k Rose Gold - 18g -3/32" - End - Threaded - Anatometal Ball - 18k Rose Gold - 18g/16g - 3mm - End - Threaded - Anatometal Ear Illustration featuring the Lobe, Forward Helix, Tragus, Conch and Helix piercing areas highlighted in yellow. Mouth Illustration featuring the Lip, Labretm, Monroe and Philtrum piercing areas highlighted in yellow. Nose Illustration featuring the Nostril piercing highlighted in yellow.
Ball - 18k Rose Gold - 18g -3/32" - End - Threaded - Anatometal
$75.00
Hera - 18k Rose Gold - 18g/16g - 4mm - End - Threaded - Anatometal Hera - 18k Rose Gold - 14g/12g - 4mm - End - Threaded - Anatometal Ear Illustration featuring the Lobe, Forward Helix, Tragus, Conch and Helix piercing areas highlighted in yellow. Nose Illustration featuring the Nostril piercing highlighted in yellow. Mouth Illustration featuring the Lip, Labretm, Monroe and Philtrum piercing areas highlighted in yellow.
Hera - 18k Rose Gold - 18g/16g - 4mm - End - Threaded - Anatometal
$125.00
Claw Set - London Blue Orb - 18k Rose Gold - 14g/12g - 5mm - End - Threaded - Anatometal Claw Set - London Blue Orb - 18k Rose Gold - 14g/12g - 5mm - End - Threaded - Anatometal Ear Illustration featuring the Conch and Helix piercing areas highlighted in yellow. (Copy) Mouth Illustration featuring the Lip, Labret and Philtrum piercing areas highlighted in yellow. (Copy)
Claw Set - London Blue Orb - 18k Rose Gold - 14g/12g - 5mm - End - Threaded - Anatometal
$105.00
Prong - Diamond - 18k Rose Gold - 18g/16g - 3mm - End - Threaded - Anatometal Prong - Diamond - 18k Rose Gold - 18g/16g - 3mm - End - Threaded - Anatometal Ear Illustration featuring the Lobe, Conch, Helix, Tragus, Anti-Tragus, and Forward Helix piercings highlighted in yellow. Nose Illustration featuring the Nostril piercing highlighted in yellow. Mouth Illustration featuring the Lip, Labret, Monroe, and Philtrum piercing site highlighted in yellow.
Prong - Diamond - 18k Rose Gold - 18g/16g - 3mm - End - Threaded - Anatometal
$470.00
Vice - Mint Green - 18k Rose Gold - 18g/16g - 2.25mm - End - Threaded - Anatometal Vice - Mint Green - 18k Rose Gold - 18g/16g - 2.25mm - End - Threaded - Anatometal Ear Illustration featuring the Lobe, Conch, Helix, Tragus, Anti-Tragus, and Forward Helix piercings highlighted in yellow. Nose Illustration featuring the Nostril piercing highlighted in yellow. Mouth Illustration featuring the Lip, Labret, Monroe, and Philtrum piercing site highlighted in yellow.
Vice - Mint Green - 18k Rose Gold - 18g/16g - 2.25mm - End - Threaded - Anatometal
$70.00
Prong - White CZ - 18k Rose Gold - 18g/16g - 3.25mm - End - Threaded - Anatometal Prong - White CZ - 18k Rose Gold - 18g/16g - 3mm - End - Threaded - Anatometal Ear Illustration featuring the Lobe, Conch, Helix, Tragus, Anti-Tragus, and Forward Helix piercings highlighted in yellow. Nose Illustration featuring the Nostril piercing highlighted in yellow. Mouth Illustration featuring the Lip, Labret, Monroe, and Philtrum piercing site highlighted in yellow.
Prong - White CZ - 18k Rose Gold - 18g/16g - 3.25mm - End - Threaded - Anatometal
$105.00
Prong - Diamond - 18k Rose Gold - 18g/16g - 2mm - End - Threaded - Anatometal Prong - Diamond - 18k Rose Gold - 18g/16g - 2mm - End - Threaded - Anatometal Ear Illustration featuring the Lobe, Conch, Helix, Tragus, Anti-Tragus, and Forward Helix piercings highlighted in yellow. Nose Illustration featuring the Nostril piercing highlighted in yellow. Mouth Illustration featuring the Lip, Labret, Monroe, and Philtrum piercing site highlighted in yellow.
Prong - Diamond - 18k Rose Gold - 18g/16g - 2mm - End - Threaded - Anatometal
$140.00
Bezel - Pink Dichro - 18k Rose Gold - 14g/12g - 7.5mm - End - Threaded - Anatometal Bezel - Pink Dichro - 18k Rose Gold - 14g/12g - 7.5mm - End - Threaded - Anatometal Ear Illustration featuring the Conch and Helix piercing areas highlighted in yellow. Mouth Illustration featuring the Lip, Labret and Philtrum piercing areas highlighted in yellow.
Bezel - Pink Dichro - 18k Rose Gold - 14g/12g - 7.5mm - End - Threaded - Anatometal
$435.00
Prong - White CZ - 18k Yellow Gold - 18g/16g - 3mm - End - Threaded - Anatometal Prong - White CZ - 18k Yellow Gold - 18g/16g - 3mm - End - Threaded - Anatometal Ear Illustration featuring the Lobe, Conch, Helix, Tragus, Anti-Tragus, and Forward Helix piercings highlighted in yellow. Nose Illustration featuring the Nostril piercing highlighted in yellow. Mouth Illustration featuring the Lip, Labret, Monroe, and Philtrum piercing site highlighted in yellow.
Prong - White CZ - 18k Yellow Gold - 18g/16g - 3mm - End - Threaded - Anatometal
$115.00
Claw Set - Canary Yellow Orb - 18k Rose Gold - 14g/12g - 5.5mm - End - Threaded - Anatometal Claw Set - Canary Yellow Orb - 18k Rose Gold - 14g/12g - 5.5mm - End - Threaded - Anatometal Ear Illustration featuring the Conch and Helix piercing areas highlighted in yellow. Mouth Illustration featuring the Lip, Labret and Philtrum piercing areas highlighted in yellow.
Claw Set - Canary Yellow Orb - 18k Rose Gold - 14g/12g - 5.5mm - End - Threaded - Anatometal
$105.00
Crowned Heart - Hot Pink Opal - 18k Yellow Gold - 18g/16g - 6x5.5mm - End - Threadless - Anatometal Crowned Heart - Hot Pink Opal - 18k Yellow Gold - 18g/16g - 6x5.5mm - End - Threaded - Anatometal Ear Illustration featuring the Lobe, Conch, Helix, Tragus, Anti-Tragus, and Forward Helix piercings highlighted in yellow. Nose Illustration featuring the Nostril piercing highlighted in yellow. Mouth Illustration featuring the Lip, Labret, Monroe, and Philtrum piercing site highlighted in yellow.
Crowned Heart - Hot Pink Opal - 18k Yellow Gold - 18g/16g - 6x5.5mm - End - Threadless - Anatometal
$145.00
Crowned Heart - Light Purple Opal - 18k Rose Gold - 18g/16g - 6x5.5mm - End - Threaded - Anatometal Crowned Heart - Light Purple Opal - 18k Rose Gold - 18g/16g - 6x5.5mm - End - Threaded - Anatometal Ear Illustration featuring the Lobe, Conch, Helix, Tragus, Anti-Tragus, and Forward Helix piercings highlighted in yellow. Nose Illustration featuring the Nostril piercing highlighted in yellow. Mouth Illustration featuring the Lip, Labret, Monroe, and Philtrum piercing site highlighted in yellow.
Crowned Heart - Light Purple Opal - 18k Rose Gold - 18g/16g - 6x5.5mm - End - Threaded - Anatometal
$145.00
Large Tattoo Machine - 14k Yellow Gold - 14g/12g - 14x6.75mm - End - Threaded - TSAR Large Tattoo Machine - 14k Yellow Gold - 14g/12g - 14x6.75mm - End - Threaded - TSAR Ear Illustration featuring the Conch and Helix piercing areas highlighted in yellow. Mouth Illustration featuring the Lip, Labret and Philtrum piercing areas highlighted in yellow.
Large Tattoo Machine - 14k Yellow Gold - 14g/12g - 14x6.75mm - End - Threaded - TSAR
$210.00
Bevel Pyramid - 14k Yellow Gold - 18g/16g - 2mm - End - Threaded - Leroi Bevel Pyramid - 14k Yellow Gold - 18g/16g - 2mm - End - Threaded - Leroi Ear Illustration featuring the Lobe, Conch, Helix, Tragus, Anti-Tragus, and Forward Helix piercings highlighted in yellow. Nose Illustration featuring the Nostril piercing highlighted in yellow. Mouth Illustration featuring the Lip, Labret, Monroe, and Philtrum piercing site highlighted in yellow.
Bevel Pyramid - 14k Yellow Gold - 18g/16g - 2mm - End - Threaded - Leroi
$65.00
Heart - 14k White Gold - 18g/16g - 2.25x2.5mm - End - Threaded - Leroi Heart - 14k White Gold - 18g/16g - 2.25x2.5mm - End - Threaded - Leroi Ear Illustration featuring the Lobe, Conch, Helix, Tragus, Anti-Tragus, and Forward Helix piercings highlighted in yellow. Nose Illustration featuring the Nostril piercing highlighted in yellow. Mouth Illustration featuring the Lip, Labret, Monroe, and Philtrum piercing site highlighted in yellow.
Heart - 14k White Gold - 18g/16g - 2.25x2.5mm - End - Threaded - Leroi
$120.00
Prong Bullet - Black Opal - 18k Yellow Gold - 18g/16g - 3.75x4.75mm - End - Threaded - Anatometal Prong Bullet - Black Opal - 18k Yellow Gold - 18g/16g - 3.75x4.75mm - End - Threaded - Anatometal Ear Illustration featuring the Conch and Helix piercing areas highlighted in yellow. Mouth Illustration featuring the Lip, Labret and Philtrum piercing areas highlighted in yellow.
Prong Bullet - Black Opal - 18k Yellow Gold - 18g/16g - 3.75x4.75mm - End - Threaded - Anatometal
$120.00
Prong - White Opal - 18k Rose Gold - 18g/16g - 2.75mm - End - Threaded - Anatometal Prong - White Opal - 18k Rose Gold - 18g/16g - 2.75mm - End - Threaded - Anatometal Ear Illustration featuring the Lobe, Conch, Helix, Tragus, Anti-Tragus, and Forward Helix piercings highlighted in yellow. Nose Illustration featuring the Nostril piercing highlighted in yellow. Mouth Illustration featuring the Lip, Labret, Monroe, and Philtrum piercing site highlighted in yellow.
Prong - White Opal - 18k Rose Gold - 18g/16g - 2.75mm - End - Threaded - Anatometal
$85.00
Crown Heart - White Opal - 18k Rose Gold - 18g/16g - 6x5.75mm - End - Threadless - Anatometal Crown Heart - White Opal - 18k Rose Gold - 18g/16g - 6x5.75mm - End - Threaded - Anatometal Ear Illustration featuring the Lobe, Conch, Helix, Tragus, Anti-Tragus, and Forward Helix piercings highlighted in yellow. Nose Illustration featuring the Nostril piercing highlighted in yellow. Mouth Illustration featuring the Lip, Labret, Monroe, and Philtrum piercing site highlighted in yellow.
Crown Heart - White Opal - 18k Rose Gold - 18g/16g - 6x5.75mm - End - Threadless - Anatometal
$150.00
Claw Set - Fading Violet Orb - 18k Rose Gold - 14g/12g - 6.5mm - End - Threaded - Anatometal Claw Set - Fading Violet Orb - 18k Rose Gold - 14g/12g - 6.5mm - End - Threaded - Anatometal Ear Illustration featuring the Conch and Helix piercing areas highlighted in yellow. Mouth Illustration featuring the Lip, Labret and Philtrum piercing areas highlighted in yellow.
Claw Set - Fading Violet Orb - 18k Rose Gold - 14g/12g - 6.5mm - End - Threaded - Anatometal
$170.00
Nusura - White Opal - 18k Rose Gold - 18g/16g - 4.25mm - End - Threaded - Anatometal Nusura - White Opal - 18k Rose Gold - 18g/16g - 4.25mm - End - Threaded - Anatometal Ear Illustration featuring the Lobe, Conch, Helix, Tragus, Anti-Tragus, and Forward Helix piercings highlighted in yellow. Mouth Illustration featuring the Lip, Labret, Monroe, and Philtrum piercing site highlighted in yellow. Nose Illustration featuring the Nostril piercing highlighted in yellow.
Nusura - White Opal - 18k Rose Gold - 18g/16g - 4.25mm - End - Threaded - Anatometal
$205.00
Crown Heart - Light Purple Opal - 18k White Gold - 18g/16g - 6x5.5mm - End - Threaded - Anatometal Crown Heart - Light Purple Opal - 18k White Gold - 18g/16g - 6x5.5mm - End - Threaded - Anatometal Ear Illustration featuring the Lobe, Conch, Helix, Tragus, Anti-Tragus, and Forward Helix piercings highlighted in yellow. Nose Illustration featuring the Nostril piercing highlighted in yellow. Mouth Illustration featuring the Lip, Labret, Monroe, and Philtrum piercing site highlighted in yellow.
Crown Heart - Light Purple Opal - 18k White Gold - 18g/16g - 6x5.5mm - End - Threaded - Anatometal
$150.00
Sold out
Trio - White CZ - 18k Yellow Gold - 18g/16g - 6.5mm - End - Threaded - Anatometal Trio - White CZ - 18k Yellow Gold - 18g/16g - 6.5mm - End - Threaded - Anatometal Ear Illustration featuring the Lobe, Conch, Helix, Tragus, Anti-Tragus, and Forward Helix piercings highlighted in yellow. Nose Illustration featuring the Nostril piercing highlighted in yellow. Mouth Illustration featuring the Lip, Labret, Monroe, and Philtrum piercing site highlighted in yellow.
Trio - White CZ - 18k Yellow Gold - 18g/16g - 6.5mm - End - Threaded - Anatometal
$175.00
Hera - 18k Yellow Gold - 14g/12g - 5mm - End - Threaded - Anatometal Hera - 18k Yellow Gold - 14g/12g - 5mm - End - Threaded - Anatometal Ear Illustration featuring the Conch and Helix piercing areas highlighted in yellow. Mouth Illustration featuring the Lip, Labret and Philtrum piercing areas highlighted in yellow.
Hera - 18k Yellow Gold - 14g/12g - 5mm - End - Threaded - Anatometal
$155.00
Prong - Citrine - 18k White Gold - 18g/16g - 3.5mm - End - Threaded - Anatometal Prong - Citrine - 18k White Gold - 18g/16g - 3.5mm - End - Threaded - Anatometal Ear Illustration featuring the Lobe, Conch, Helix, Tragus, Anti-Tragus, and Forward Helix piercings highlighted in yellow. Mouth Illustration featuring the Lip, Labret, Monroe, and Philtrum piercing site highlighted in yellow. Nose Illustration featuring the Nostril piercing highlighted in yellow.
Prong - Citrine - 18k White Gold - 18g/16g - 3.5mm - End - Threaded - Anatometal
$95.00
Bezel - Pearl - 14k White Gold - 18g/16g - 3.75mm - Threaded - End - BVLA Bezel - Pearl - 14k White Gold - 18g/16g - 3.75mm - Threaded - End - BVLA Ear Illustration featuring the Lobe, Conch, Helix, Tragus, Antitragus, Forward Helix and Rook piercing areas highlighted in yellow. Nose Illustration featuring the Nostril piercing area highlighted in yellow. Mouth Illustration featuring the Lip, Philtrum and Labret piercing areas highlighted in yellow.
Bezel - Pearl - 14k White Gold - 18g/16g - 3.75mm - Threaded - End - BVLA
$175.00
Beaded Trillion - Swiss Topaz AA - 14k White Gold - 18g/16g - 4.5mm - Threaded - End - BVLA Beaded Trillion - Swiss Topaz AA - 14k White Gold - 18g/16g - 4.5mm - Threaded - End - BVLA Ear Illustration featuring the Lobe, Tragus, Conch, Helix, Rook, and Antitragus piercing areas highlighted in yellow. Mouth illustration featuring the Lip, Labret, and Philtrum piercing areas highlighted in yellow. Nose Illustration featuring the nostril piercing area highlighted in yellow.
Beaded Trillion - Swiss Topaz AA - 14k White Gold - 18g/16g - 4.5mm - Threaded - End - BVLA
$220.00
Jackolantern - 14k Rose Gold - 18g/16g - 6.5x7mm -Threaded - BVLA Jackolantern - 14k Rose Gold - 18g/16g - 6.5x7mm -Threaded - BVLA Ear Illustration featuring the Conch, Helix and Lobe piercing areas highlighted in yellow. Mouth Illustration featuring the Lip and Labret piercing areas highlighted in yellow.
Jackolantern - 14k Rose Gold - 18g/16g - 6.5x7mm -Threaded - BVLA
$250.00
Tama - Synthetic White Opal - 14k Yellow Gold - 18g/16g - 4.75mm - End - Threaded - Anatometal Tama - Synthetic White Opal - 14k Yellow Gold - 18g/16g - 4.75mm - End - Threaded - Anatometal Ear Illustration featuring the Lobe, Conch, Forward Helix, Tragus, Antitragus, Rook and Helix piercing areas highlighted in yellow. Mouth Illustration featuring the Lip, Labret, and Philtrum piercing areas highlighted in yellow. Nose Illustration featuring the Nostril highlighted in yellow.
Tama - Synthetic White Opal - 14k Yellow Gold - 18g/16g - 4.75mm - End - Threaded - Anatometal
$105.00
FaraTa - Sandblasted Amethyst - 18k White Gold - 14g/12g -12.5x6.5mm - Threaded - End - Anatometal FaraTa - Sandblasted Amethyst - 18k White Gold - 14g/12g -12.5x6.5mm - Threaded - End - Anatometal Ear Illustration featuring the Conch, Helix and Lobe piercing areas highlighted in yellow. Mouth Illustration featuring the Philtrum and Labret piercing areas highlighted in yellow.
FaraTa - Sandblasted Amethyst - 18k White Gold - 14g/12g -12.5x6.5mm - Threaded - End - Anatometal
$355.00
Nusura - Synthetic White Opal - 18k Rose Gold - 18g/16g -6.5mm - Threaded - End - Anatometal Nusura - Synthetic White Opal - 18k Rose Gold - 18g/16g -6.5mm - Threaded - End - Anatometal Ear Illustration featuring the Lobe, Conch, Helix, Rook, and Tragus piercing areas highlighted in yellow. Nose Illustration featuring the Nostril piercing areas highlighted in yellow. Mouth Illustration featuring the Lip, Philtrum and Labret piercing areas highlighted in yellow.
Nusura - Synthetic White Opal - 18k Rose Gold - 18g/16g -6.5mm - Threaded - End - Anatometal
$405.00
Nusura - White CZ - 18k Yellow Gold - 18g/16g -6.5mm - Threaded - End - Anatometal Nusura - White CZ - 18k Yellow Gold - 18g/16g -6.5mm - Threaded - End - Anatometal Ear Illustration featuring the Lobe, Conch, Helix, Rook, and Tragus piercing areas highlighted in yellow. Nose Illustration featuring the Nostril piercing areas highlighted in yellow. Mouth Illustration featuring the Lip, Philtrum and Labret piercing areas highlighted in yellow.
Nusura - White CZ - 18k Yellow Gold - 18g/16g -6.5mm - Threaded - End - Anatometal
$405.00
Nusura - White CZ - 18k White Gold - 18g/16g -6.5mm - Threaded - End - Anatometal Nusura - White CZ - 18k White Gold - 18g/16g -6.5mm - Threaded - End - Anatometal Ear Illustration featuring the Lobe, Conch, Helix, Rook, and Tragus piercing areas highlighted in yellow. Nose Illustration featuring the Nostril piercing areas highlighted in yellow. Mouth Illustration featuring the Lip, Philtrum and Labret piercing areas highlighted in yellow.
Nusura - White CZ - 18k White Gold - 18g/16g -6.5mm - Threaded - End - Anatometal
$405.00
Scallop Bezel Teardrop - Rutilated Quartz - 14k Rose Gold - 18g/16g -5x7.5mm - Threaded - End - Auris Scallop Bezel Teardrop - Rutilated Quartz - 14k Rose Gold - 18g/16g -5x7.5mm - Threaded - End - Auris Ear Illustration featuring the Lobe, Conch, Helix, Rook, and Tragus piercing areas highlighted in yellow. Nose Illustration featuring the Nostril piercing areas highlighted in yellow. Mouth Illustration featuring the Lip, Philtrum and Labret piercing areas highlighted in yellow.
Scallop Bezel Teardrop - Rutilated Quartz - 14k Rose Gold - 18g/16g -5x7.5mm - Threaded - End - Auris
$330.00
Astra Flower - Pink Sapphire, Champagne Diamond - 14k Yellow Gold - 18g/16g -6mm - Threaded - End - Auris Astra Flower - Pink Sapphire, Champagne Diamond - 14k Yellow Gold - 18g/16g -6mm - Threaded - End - Auris Ear Illustration featuring the Lobe, Conch, Helix, and Tragus piercing areas highlighted in yellow. Nose Illustration featuring the Nostril piercing areas highlighted in yellow. Mouth Illustration featuring the Lip, Philtrum and Labret piercing areas highlighted in yellow.
Astra Flower - Pink Sapphire, Champagne Diamond - 14k Yellow Gold - 18g/16g -6mm - Threaded - End - Auris
$435.00
Astra Flower - Pink Druzy, Black Diamond - 14k White Gold - 14g/12g -8mm - Threaded - End - Auris Astra Flower - Pink Druzy, Black Diamond - 14k White Gold - 14g/12g -8mm - Threaded - End - Auris Ear Illustration featuring the Lobe, Conch, Helix, and Tragus piercing areas highlighted in yellow. Nose Illustration featuring the Nostril piercing areas highlighted in yellow. Mouth Illustration featuring the Lip, Philtrum and Labret piercing areas highlighted in yellow.
Astra Flower - Pink Druzy, Black Diamond - 14k White Gold - 14g/12g -8mm - Threaded - End - Auris
$435.00
Diadema - Diamond - 14k White Gold - 18g/16g - 6x9.5mm - Threaded - End - AURIS Diadema - Diamond - 14k White Gold - 18g/16g - 6x9.5mm - Threaded - End - AURIS Ear Illustration featuring the Lobe, Helix, and Conch piercing areas highlighted in yellow.
Diadema - Diamond - 14k White Gold - 18g/16g - 6x9.5mm - Threaded - End - AURIS
$795.00
French Kiss Left - White CZ - 14k Rose Gold - 18g/16g - 6x6.5mm - Threaded - End - BVLA French Kiss Left - White CZ - 14k Rose Gold - 18g/16g - 6x6.5mm - Threaded - End - BVLA Ear Illustration featuring the Lobe, Helix, Conch, Tragus, Rook, and AntiTragus piercing areas highlighted in yellow.
French Kiss Left - White CZ - 14k Rose Gold - 18g/16g - 6x6.5mm - Threaded - End - BVLA
$465.00
French Kiss Left - White CZ - 14k White Gold - 18g/16g - 6x6.5mm - Threaded - End - BVLA French Kiss Left - White CZ - 14k White Gold - 18g/16g - 6x6.5mm - Threaded - End - BVLA Ear Illustration featuring the Lobe, Helix, Conch, Tragus, Rook, and AntiTragus piercing areas highlighted in yellow.
French Kiss Left - White CZ - 14k White Gold - 18g/16g - 6x6.5mm - Threaded - End - BVLA
$465.00
French Kiss Right - White CZ - 14k White Gold - 18g/16g - 6x6.5mm - Threaded - End - BVLA French Kiss Right - White CZ - 14k White Gold - 18g/16g - 6x6.5mm - Threaded - End - BVLA Ear Illustration featuring the Lobe, Helix, Conch, Tragus, Rook, and AntiTragus piercing areas highlighted in yellow.
French Kiss Right - White CZ - 14k White Gold - 18g/16g - 6x6.5mm - Threaded - End - BVLA
$465.00
French Kiss Right - White CZ - 14k Yellow Gold - 18g/16g - 6x6.5mm - Threaded - End - BVLA French Kiss Right - White CZ - 14k Yellow Gold - 18g/16g - 6x6.5mm - Threaded - End - BVLA Ear Illustration featuring the Lobe, Helix, Conch, Tragus, Rook, and AntiTragus piercing areas highlighted in yellow.
French Kiss Right - White CZ - 14k Yellow Gold - 18g/16g - 6x6.5mm - Threaded - End - BVLA
$465.00
AJ - Mercury Mist, White Opal AAA - 14k Yellow Gold - 18g/16g - 6x6.5mm - Threaded - End - BVLA AJ - Mercury Mist, White Opal AAA - 14k Yellow Gold - 18g/16g - 6x6.5mm - Threaded - End - BVLA Ear Illustration featuring the Lobe, Helix, Conch, Tragus, Rook, and AntiTragus piercing areas highlighted in yellow. Mouth Illustration featuring the Labret piercing areas highlighted in yellow.
AJ - Mercury Mist, White Opal AAA - 14k Yellow Gold - 18g/16g - 6x6.5mm - Threaded - End - BVLA
$445.00
Lucinda - White CZ, White Opal AAA - 14k Rose Gold - 18g/16g - 8.5mm - Threaded - End - BVLA Lucinda - White CZ, White Opal AAA - 14k Rose Gold - 18g/16g - 8.5mm - Threaded - End - BVLA Ear Illustration featuring the Lobe, Helix, Conch, Tragus, and AntiTragus piercing areas highlighted in yellow. Mouth Illustration featuring the Labret and Philtrum piercing areas highlighted in yellow.
Lucinda - White CZ, White Opal AAA - 14k Rose Gold - 18g/16g - 8.5mm - Threaded - End - BVLA
$180.00
Eloise - Peach Topaz - 14k Rose Gold - 18g/16g - 6x9.5mm - Threaded - End - BVLA Eloise - Peach Topaz - 14k Rose Gold - 18g/16g - 6x9.5mm - Threaded - End - BVLA Ear Illustration featuring the Lobe, Helix, Conch, Tragus, and AntiTragus piercing areas highlighted in yellow.
Eloise - Peach Topaz - 14k Rose Gold - 18g/16g - 6x9.5mm - Threaded - End - BVLA
$525.00
Cherry Blossom Cluster - White Opal AAA, Pink Tourmaline AA - 14k Rose Gold - 18g/16g - 6x14mm - Threaded - End - BVLA Cherry Blossom Cluster - White Opal AAA, Pink Tourmaline AA - 14k Rose Gold - 18g/16g - 6x14mm - Threaded - End - BVLA Ear Illustration featuring the Helix, Conch and Lobe piercing areas highlighted in yellow.
Cherry Blossom Cluster - White Opal AAA, Pink Tourmaline AA - 14k Rose Gold - 18g/16g - 6x14mm - Threaded - End - BVLA
$1,035.00
Seam Ring - 18k Rose Gold - 11/32" - 18g - Ring - Anatometal Seam Ring - 18k Rose Gold - 11/32" - 18g - Ring - Anatometal Ear Illustration featuring the Lobe, Helix, Tragus, and Rook piercing areas highlighted in yellow. Nose Illustration featuring the Nostril piercing area highlighted in yellow.
Seam Ring - 18k Rose Gold - 11/32" - 18g - Ring - Anatometal
Sale Price: $65.00 Original Price: $115.00
Sold out
Seam Ring - 18k Rose Gold - 5/16" - 18g - Ring - Anatometal Seam Ring - 18k Rose Gold - 5/16" - 18g - Ring - Anatometal Ear Illustration featuring the Lobe, Helix, Tragus, and Rook piercing areas highlighted in yellow. Nose Illustration featuring the Nostril piercing area highlighted in yellow.
Seam Ring - 18k Rose Gold - 5/16" - 18g - Ring - Anatometal
Sale Price: $60.00 Original Price: $115.00
Sold out
Seam Ring - 18k White Gold - 9/32" - 18g - Ring - Anatometal Seam Ring - 18k White Gold - 9/32" - 18g - Ring - Anatometal Ear Illustration featuring the Lobe, Helix, Tragus, and Rook piercing areas highlighted in yellow. Nose Illustration featuring the Nostril piercing area highlighted in yellow.
Seam Ring - 18k White Gold - 9/32" - 18g - Ring - Anatometal
Sale Price: $60.00 Original Price: $115.00
Sold out
Seam Ring - 18k White Gold - 1/4" - 18g - Ring - Anatometal Seam Ring - 18k White Gold - 1/4" - 18g - Ring - Anatometal Ear Illustration featuring the Lobe, Helix, Tragus, and Rook piercing areas highlighted in yellow. Nose Illustration featuring the Nostril piercing area highlighted in yellow.
Seam Ring - 18k White Gold - 1/4" - 18g - Ring - Anatometal
Sale Price: $55.00 Original Price: $115.00
Sold out
Mininova - White CZ - 14k Rose Gold - 16g - 8.5mm - Threaded - End - BVLA Mininova - White CZ - 14k Rose Gold - 16g - 8.5mm - Threaded - End - BVLA Ear Illustration featuring the Lobe, Conch and Helix piercing areas highlighted in yellow. Mouth Illustration featuring the Philtrum and Labret piercing areas highlighted in yellow.
Mininova - White CZ - 14k Rose Gold - 16g - 8.5mm - Threaded - End - BVLA
$720.00
Mininova - Swizz Topaz, White CZ, White Opal AAA - 14k Yellow Gold - 16g - 8.5mm - Threaded - End - BVLA Mininova - Swizz Topaz, White CZ, White Opal AAA - 14k Yellow Gold - 16g - 8.5mm - Threaded - End - BVLA Ear Illustration featuring the Lobe, Conch and Helix piercing areas highlighted in yellow. Mouth Illustration featuring the Philtrum and Labret piercing areas highlighted in yellow.
Mininova - Swizz Topaz, White CZ, White Opal AAA - 14k Yellow Gold - 16g - 8.5mm - Threaded - End - BVLA
$720.00
Marisol - Swiss Blue Topaz AA - 14k White Gold - 18g/16g - 7mm - Threaded - End - BVLA Marisol - Swiss Blue Topaz AA - 14k White Gold - 18g/16g - 7mm - Threaded - End - BVLA Ear Illustration featuring the Lobe, Conch, Helix, Tragus, Antitragus and Rook piercing areas highlighted in yellow. Mouth Illustration featuring the Lip, Philtrum and Labret piercing areas highlighted in yellow. Nose Illustration featuring the Nostril piercing areas highlighted in yellow.
Marisol - Swiss Blue Topaz AA - 14k White Gold - 18g/16g - 7mm - Threaded - End - BVLA
$230.00
The Rose - Champagne CZ, Sanblasted Onyx Cab - 14k White Gold - 18g/16g - 6.5mm - Threaded - End - BVLA The Rose - Champagne CZ, Sanblasted Onyx Cab - 14k White Gold - 18g/16g - 6.5mm - Threaded - End - BVLA Ear Illustration featuring the Lobe, Conch, Helix, Tragus, Antitragus and Rook piercing areas highlighted in yellow. Nose Illustration featuring the Nostril piercing areas highlighted in yellow. Mouth Illustration featuring the Lip, Philtrum and Labret piercing areas highlighted in yellow.
The Rose - Champagne CZ, Sanblasted Onyx Cab - 14k White Gold - 18g/16g - 6.5mm - Threaded - End - BVLA
$450.00
The Rose - Arctic Blue CZ, Synth Baby Blue Opal - 14k Yellow Gold - 18g/16g - 7mm - Threaded - End - BVLA The Rose - Arctic Blue CZ, Synth Baby Blue Opal - 14k Yellow Gold - 18g/16g - 7mm - Threaded - End - BVLA Ear Illustration featuring the Lobe, Conch, Helix, Tragus, Antitragus and Rook piercing areas highlighted in yellow. Mouth Illustration featuring the Lip, Philtrum and Labret piercing areas highlighted in yellow. Nose Illustration featuring the Nostril piercing areas highlighted in yellow.
The Rose - Arctic Blue CZ, Synth Baby Blue Opal - 14k Yellow Gold - 18g/16g - 7mm - Threaded - End - BVLA
$450.00
Afghan - Rainbow Moonstone - 14k White Gold - 18g/16g - 6mm - Threaded - End - BVLA Afghan - Rainbow Moonstone - 14k White Gold - 18g/16g - 6mm - Threaded - End - BVLA Ear Illustration featuring the Lobe, Conch, Helix, Tragus, Antitragus and Rook piercing areas highlighted in yellow. Nose Illustration featuring the Nostril piercing area highlighted in yellow. Mouth Illustration featuring the Lip, Philtrum and Labret piercing areas highlighted in yellow.
Afghan - Rainbow Moonstone - 14k White Gold - 18g/16g - 6mm - Threaded - End - BVLA
$220.00
Sold out
Pear Pleads - Swiss Blue Topaz - 14k White Gold - 16g - 10mm - Threaded - End - BVLA Pear Pleads - Swiss Blue Topaz - 14k White Gold - 16g - 10mm - Threaded - End - BVLA Ear Illustration featuring the Conch and Helix piercing areas highlighted in yellow. Mouth Illustration featuring the Philtrum and Labret piercing areas highlighted in yellow.
Pear Pleads - Swiss Blue Topaz - 14k White Gold - 16g - 10mm - Threaded - End - BVLA
$475.00
Alana - Light Amethyst x2, Rhodolyte Pear - 14k White Gold - 18g/16g - 6.5x5mm - Threaded - End - BVLA Alana - Light Amethyst x2, Rhodolyte Pear - 14k White Gold - 18g/16g - 6.5x5mm - Threaded - End - BVLA Ear Illustration featuring the Lobe, Conch, Helix, Tragus, Antitragus and Rook piercing areas highlighted in yellow.
Alana - Light Amethyst x2, Rhodolyte Pear - 14k White Gold - 18g/16g - 6.5x5mm - Threaded - End - BVLA
$450.00
Rectangle Illusion - Champagne CZ - 14k Rose Gold - 18g/16g - 4.5x2.5mm - Threadless - End - BVLA Rectangle Illusion - Champagne CZ - 14k Rose Gold - 18g/16g - 4.5x2.5mm - Threadless - End - BVLA Ear Illustration featuring the Lobe, Conch, Helix, Tragus, Antitragus and Rook piercing areas highlighted in yellow. Nose Illustration featuring the Nostril piercing area highlighted in yellow. Mouth Illustration featuring the Lip, Philtrum and Labret piercing areas highlighted in yellow.
Rectangle Illusion - Champagne CZ - 14k Rose Gold - 18g/16g - 4.5x2.5mm - Threadless - End - BVLA
$225.00
Rectangle Illusion - White CZ - 14k White Gold - 18g/16g - 4.5x2.5mm - Threadless - End - BVLA Rectangle Illusion - White CZ - 14k White Gold - 18g/16g - 4.5x2.5mm - Threadless - End - BVLA Ear Illustration featuring the Lobe, Conch, Helix, Tragus, Antitragus and Rook piercing areas highlighted in yellow. Mouth Illustration featuring the Lip, Philtrum and Labret piercing areas highlighted in yellow. Nose Illustration featuring the Nostril piercing area highlighted in yellow.
Rectangle Illusion - White CZ - 14k White Gold - 18g/16g - 4.5x2.5mm - Threadless - End - BVLA
$225.00
Rectangle Illusion - Sandblasted Chrysoprase - 14k Rose Gold - 18g/16g - 4.5x2.5mm - Threadless - End - BVLA Rectangle Illusion - Sandblasted Chrysoprase - 14k Rose Gold - 18g/16g - 4.5x2.5mm - Threadless - End - BVLA Ear Illustration featuring the Lobe, Conch, Helix, Tragus, Antitragus and Rook piercing areas highlighted in yellow. Mouth Illustration featuring the Lip, Philtrum and Labret piercing areas highlighted in yellow. Nose Illustration featuring the Nostril piercing area highlighted in yellow.
Rectangle Illusion - Sandblasted Chrysoprase - 14k Rose Gold - 18g/16g - 4.5x2.5mm - Threadless - End - BVLA
$225.00
Mini Kandy - White CZ - 14k Yellow Gold - 18g/16g - 5mm - Threadless - End - BVLA Mini Kandy - White CZ - 14k Yellow Gold - 18g/16g - 5mm - Threadless - End - BVLA Ear Illustration featuring the Lobe, Conch, Helix, Tragus, Antitragus and Rook piercing areas highlighted in yellow. Nose Illustration featuring the Nostril piercing area highlighted in yellow. Mouth Illustration featuring the Lip, Philtrum and Labret piercing areas highlighted in yellow.
Mini Kandy - White CZ - 14k Yellow Gold - 18g/16g - 5mm - Threadless - End - BVLA
$180.00
Mini Kandy - White CZ - 14k Rose Gold - 18g/16g - 5mm - Threadless - End - BVLA Mini Kandy - White CZ - 14k Rose Gold - 18g/16g - 5mm - Threadless - End - BVLA Ear Illustration featuring the Lobe, Conch, Helix, Tragus, Antitragus and Rook piercing areas highlighted in yellow. Mouth Illustration featuring the Lip, Philtrum and Labret piercing areas highlighted in yellow. Nose Illustration featuring the Nostril piercing area highlighted in yellow.
Mini Kandy - White CZ - 14k Rose Gold - 18g/16g - 5mm - Threadless - End - BVLA
$180.00
Mini Kandy - Sandblastred Onyx Cab - 14k Yellow Gold - 18g/16g - 5mm - Threadless - End - BVLA Mini Kandy - Sandblastred Onyx Cab - 14k Yellow Gold - 18g/16g - 5mm - Threadless - End - BVLA Ear Illustration featuring the Lobe, Conch, Helix, Tragus, Antitragus and Rook piercing areas highlighted in yellow. Nose Illustration featuring the Nostril piercing area highlighted in yellow. Mouth Illustration featuring the Lip, Philtrum and Labret piercing areas highlighted in yellow.
Mini Kandy - Sandblastred Onyx Cab - 14k Yellow Gold - 18g/16g - 5mm - Threadless - End - BVLA
$180.00
Mini Kandy - Sandblasted London Blue Topaz - 14k Yellow Gold - 18g/16g - 5mm - Threadless - End - BVLA Mini Kandy - Sandblasted London Blue Topaz - 14k Yellow Gold - 18g/16g - 5mm - Threadless - End - BVLA Ear Illustration featuring the Lobe, Conch, Helix, Tragus, Antitragus and Rook piercing areas highlighted in yellow. Nose Illustration featuring the Nostril piercing area highlighted in yellow. Mouth Illustration featuring the Lip, Philtrum and Labret piercing areas highlighted in yellow.
Mini Kandy - Sandblasted London Blue Topaz - 14k Yellow Gold - 18g/16g - 5mm - Threadless - End - BVLA
$180.00
Glow Worm - Chrysoprase - 14k Rose Gold - 18g/16g - 6.5x3mm - Threadless - End - BVLA Glow Worm - Chrysoprase - 14k Rose Gold - 18g/16g - 6.5x3mm - Threadless - End - BVLA Ear Illustration featuring the Lobe, Tragus, Helix, Forward Helix, and Conch piercing area highlighted in yellow.
Glow Worm - Chrysoprase - 14k Rose Gold - 18g/16g - 6.5x3mm - Threadless - End - BVLA
$185.00
Millgrain Prong - Midnight Topaz - 14k Rose Gold - 18g/16g/14g - 4mm - Threadless - End - BVLA Millgrain Prong - Midnight Topaz - 14k Rose Gold - 18g/16g/14g - 4mm - Threadless - End - BVLA Ear Illustration featuring the Lobe, Conch, Helix, Tragus, Antitragus and Rook piercing areas highlighted in yellow. Mouth Illustration featuring the Lip, Philtrum and Labret piercing areas highlighted in yellow. Nose Illustration featuring the Nostril piercing area highlighted in yellow.
Millgrain Prong - Midnight Topaz - 14k Rose Gold - 18g/16g/14g - 4mm - Threadless - End - BVLA
$205.00
Square Illusion - White CZ - 14k White Gold - 18g/16g - 3mm - Threadless - End - BVLA Square Illusion - White CZ - 14k White Gold - 18g/16g - 3mm - Threadless - End - BVLA Ear Illustration featuring the Lobe, Conch, Helix, Tragus, Antitragus and Rook piercing areas highlighted in yellow. Nose Illustration featuring the Nostril piercing area highlighted in yellow. Mouth Illustration featuring the Lip, Philtrum and Labret piercing areas highlighted in yellow.
Square Illusion - White CZ - 14k White Gold - 18g/16g - 3mm - Threadless - End - BVLA
$165.00
Pear Prong - Onyx Faceted Pear - 14k White Gold - 16g/18g - 3x2mm - Threadless - End - BVLA Pear Prong - Onyx Faceted Pear - 14k White Gold - 16g/18g - 3x2mm - Threadless - End - BVLA Ear Illustration featuring the Lobe, Conch, Helix, Tragus, Antitragus and Rook piercing areas highlighted in yellow. Mouth Illustration featuring the Lip, Philtrum and Labret piercing areas highlighted in yellow. Nose Illustration featuring the Nostril piercing area highlighted in yellow.
Pear Prong - Onyx Faceted Pear - 14k White Gold - 16g/18g - 3x2mm - Threadless - End - BVLA
$215.00
Pear Prong - White CZ Pear - 14k White Gold - 16g/18g - 3x2mm - Threadless - End - BVLA Pear Prong - White CZ Pear - 14k White Gold - 16g/18g - 3x2mm - Threadless - End - BVLA Ear Illustration featuring the Lobe, Conch, Helix, Tragus, Antitragus and Rook piercing areas highlighted in yellow. Nose Illustration featuring the Nostril piercing area highlighted in yellow. Mouth Illustration featuring the Lip, Philtrum and Labret piercing areas highlighted in yellow.
Pear Prong - White CZ Pear - 14k White Gold - 16g/18g - 3x2mm - Threadless - End - BVLA
$215.00
Glow Worm - Anastasia Topaz - 14k Yellow Gold - 18g/16g -6.5x3mm - Threadless - End - BVLA Glow Worm - Anastasia Topaz - 14k Yellow Gold - 18g/16g -6.5x3mm - Threadless - End - BVLA Ear Illustration featuring the Lobe, Tragus, Helix, Forward Helix, and Conch piercing area highlighted in yellow.
Glow Worm - Anastasia Topaz - 14k Yellow Gold - 18g/16g -6.5x3mm - Threadless - End - BVLA
$185.00
Bezel - Smokey Quartz Rose Cut - 14k Rose Gold -18g/16g/14g - Threadless - End - BVLA Bezel - Smokey Quartz Rose Cut - 14k Rose Gold - 16g/18g/14g - Threadless - End - BVLA Ear Illustration featuring the Lobe, Conch, Helix, Tragus, Antitragus and Rook piercing areas highlighted in yellow. Mouth Illustration featuring the Lip, Philtrum and Labret piercing areas highlighted in yellow. Nose Illustration featuring the Nostril piercing area highlighted in yellow.
Bezel - Smokey Quartz Rose Cut - 14k Rose Gold -18g/16g/14g - Threadless - End - BVLA
$200.00
Bezel - Abalone Shell Round - 14k White Gold - 18g/16g/14g - Threadless - End - BVLA Bezel - Abalone Shell Round - 14k White Gold - 16g/18g/14g - Threadless - End - BVLA Ear Illustration featuring the Lobe, Conch, Helix, Tragus, Antitragus and Rook piercing areas highlighted in yellow. Mouth Illustration featuring the Lip, Philtrum and Labret piercing areas highlighted in yellow. Nose Illustration featuring the Nostril piercing area highlighted in yellow.
Bezel - Abalone Shell Round - 14k White Gold - 18g/16g/14g - Threadless - End - BVLA
$200.00
Bezel - Sandblasted Chrysoprase - 14k Rose Gold - 18g/16g - Threadless - End - BVLA Bezel - Sandblasted Chrysoprase - 14k Rose Gold - 16g/18g - Threadless - End - BVLA Ear Illustration featuring the Lobe, Conch, Helix, Tragus, Antitragus and Rook piercing areas highlighted in yellow. Mouth Illustration featuring the Lip, Philtrum and Labret piercing areas highlighted in yellow. Nose Illustration featuring the Nostril piercing area highlighted in yellow.
Bezel - Sandblasted Chrysoprase - 14k Rose Gold - 18g/16g - Threadless - End - BVLA
$195.00
Bezel - Chalcedony Rose Cut - 14k White Gold - 18g/16g - Threadless - End - BVLA Bezel - Chalcedony Rose Cut - 14k White Gold - 16g/18g - Threadless - End - BVLA Ear Illustration featuring the Lobe, Conch, Helix, Tragus, Antitragus and Rook piercing areas highlighted in yellow. Nose Illustration featuring the Nostril piercing area highlighted in yellow. Mouth Illustration featuring the Lip, Philtrum and Labret piercing areas highlighted in yellow.
Bezel - Chalcedony Rose Cut - 14k White Gold - 18g/16g - Threadless - End - BVLA
$195.00
Tension Ring - White CZ - 14k Yellow Gold - 7/16 - 16g - Ring - BVLA Tension Ring - White CZ - 14k Yellow Gold - 7/16 - 16g - Ring - BVLA Ear Illustration featuring the Daith and Helix piercing areas highlighted in yellow.
Tension Ring - White CZ - 14k Yellow Gold - 7/16 - 16g - Ring - BVLA
$175.00
Tension Ring - White CZ - 14k White Gold - 7/16 - 16g - Ring - BVLA Tension Ring - White CZ - 14k White Gold - 7/16 - 16g - Ring - BVLA Ear Illustration featuring the Daith and Helix piercing areas highlighted in yellow.
Tension Ring - White CZ - 14k White Gold - 7/16 - 16g - Ring - BVLA
$175.00
Tension Ring - White CZ - 14k Rose Gold - 7/16 - 16g - Ring - BVLA Tension Ring - White CZ - 14k Rose Gold - 7/16 - 16g - Ring - BVLA Ear Illustration featuring the Daith and Helix piercing areas highlighted in yellow.
Tension Ring - White CZ - 14k Rose Gold - 7/16 - 16g - Ring - BVLA
$175.00
Tension Ring - White CZ - 14k Rose Gold - 3/8 - 16g - Ring - BVLA Tension Ring - White CZ - 14k Rose Gold - 3/8 - 16g - Ring - BVLA Ear Illustration featuring the Daith and Helix piercing areas highlighted in yellow. Nose Illustration featuring the Septum piercing highlighted in yellow.
Tension Ring - White CZ - 14k Rose Gold - 3/8 - 16g - Ring - BVLA
$175.00
Tension Ring - White CZ - 14k White Gold - 3/8 - 16g - Ring - BVLA Tension Ring - White CZ - 14k White Gold - 3/8 - 16g - Ring - BVLA Ear Illustration featuring the Daith and Helix piercing areas highlighted in yellow. Nose Illustration featuring the Septum piercing highlighted in yellow.
Tension Ring - White CZ - 14k White Gold - 3/8 - 16g - Ring - BVLA
$175.00
Tension Ring - White CZ - 14k Yellow Gold - 3/8 - 16g - Ring - BVLA Tension Ring - White CZ - 14k Yellow Gold - 3/8 - 16g - Ring - BVLA Ear Illustration featuring the Daith and Helix piercing areas highlighted in yellow. Nose Illustration featuring the Septum piercing highlighted in yellow.
Tension Ring - White CZ - 14k Yellow Gold - 3/8 - 16g - Ring - BVLA
$175.00
Dione Seam Ring - Amethyst AA - 14k White Gold - 3/8 - 16g - Ring - BVLA Dione Seam Ring - Amethyst AA - 14k White Gold - 3/8 - 16g - Ring - BVLA Ear Illustration featuring the Daith and Helix piercing areas highlighted in yellow. Nose Illustration featuring the Septum piercing highlighted in yellow.
Dione Seam Ring - Amethyst AA - 14k White Gold - 3/8 - 16g - Ring - BVLA
$450.00
Tiny Double Gem Swirl - Arctic Blue CZ - 14k White Gold - 18g/16g - 5x2mm - Threadless - End - BVLA Tiny Double Gem Swirl - Arctic Blue CZ - 14k White Gold - 18g/16g - 5x2mm - Threadless - End - BVLA Ear Illustration featuring the Lobe, Helix, Tragus, Wntitragus, Forward Helix, Helix and Conch piercing areas highlighted in yellow. Nose Illustration featuring the Nostril piercing area highlighted in yellow.
Tiny Double Gem Swirl - Arctic Blue CZ - 14k White Gold - 18g/16g - 5x2mm - Threadless - End - BVLA
$160.00
Tiny Double Gem Swirl - Champagne CZ - 14k White Gold - 18g/16g - 5x2mm - Threadless - End - BVLA Tiny Double Gem Swirl - Champagne CZ - 14k White Gold - 18g/16g - 5x2mm - Threadless - End - BVLA Ear Illustration featuring the Lobe, Helix, Tragus, Wntitragus, Forward Helix, Helix and Conch piercing areas highlighted in yellow. Nose Illustration featuring the Nostril piercing area highlighted in yellow.
Tiny Double Gem Swirl - Champagne CZ - 14k White Gold - 18g/16g - 5x2mm - Threadless - End - BVLA
$160.00
Tiny Double Gem Swirl - White CZ - 14k White Gold - 18g/16g - 5x2mm - Threadless - End - BVLA Tiny Double Gem Swirl - White CZ - 14k White Gold - 18g/16g - 5x2mm - Threadless - End - BVLA Ear Illustration featuring the Lobe, Helix, Tragus, Wntitragus, Forward Helix, Helix and Conch piercing areas highlighted in yellow. Nose Illustration featuring the Nostril piercing area highlighted in yellow.
Tiny Double Gem Swirl - White CZ - 14k White Gold - 18g/16g - 5x2mm - Threadless - End - BVLA
$160.00
Tiny Double Gem Swirl - White CZ - 14k Yellow Gold - 18g/16g - 5x2mm - Threadless - End - BVLA Tiny Double Gem Swirl - White CZ - 14k Yellow Gold - 18g/16g - 5x2mm - Threadless - End - BVLA Ear Illustration featuring the Lobe, Helix, Tragus, Wntitragus, Forward Helix, Helix and Conch piercing areas highlighted in yellow. Nose Illustration featuring the Nostril piercing area highlighted in yellow.
Tiny Double Gem Swirl - White CZ - 14k Yellow Gold - 18g/16g - 5x2mm - Threadless - End - BVLA
$160.00
Hammered Pentagram - Black CZ - 14k Yellow Gold - 18g/16g/14g - 6mm - Threadless - End - BVLA Hammered Pentagram - Black CZ - 14k Yellow Gold - 18g/16g/14g - 6mm - Threadless - End - BVLA Ear Illustration that features the Lobe, Conch, Helix, Rook, Tragus and Antitragus piercing areas highlighted in yellow. Mouth Illustration featuring the Lip, Labret and Philtrum piercing areas highlighted in yellow. Nose Illustration featuring the Nostril piercing area highlighted in yellow.
Hammered Pentagram - Black CZ - 14k Yellow Gold - 18g/16g/14g - 6mm - Threadless - End - BVLA
$265.00
Afghan - Red CZ - 14k Yellow Gold - 18g/16g/14g - 6mm - Threadless - End - BVLA Afghan - Red CZ - 14k Yellow Gold - 18g/16g/14g - 6mm - Threadless - End - BVLA Ear Illustration that features the Lobe, Conch, Helix, Rook, Tragus and Antitragus piercing areas highlighted in yellow. Mouth Illustration featuring the Lip, Labret and Philtrum piercing areas highlighted in yellow. Nose Illustration featuring the Nostril piercing area highlighted in yellow.
Afghan - Red CZ - 14k Yellow Gold - 18g/16g/14g - 6mm - Threadless - End - BVLA
$220.00
Afghan - White CZ - 14k White Gold - 18g/16g/14g - 6mm - Threadless - End - BVLA Afghan - White CZ - 14k White Gold - 18g/16g/14g - 6mm - Threadless - End - BVLA Ear Illustration that features the Lobe, Conch, Helix, Rook, Tragus and Antitragus piercing areas highlighted in yellow. Mouth Illustration featuring the Lip, Labret and Philtrum piercing areas highlighted in yellow. Nose Illustration featuring the Nostril piercing area highlighted in yellow.
Afghan - White CZ - 14k White Gold - 18g/16g/14g - 6mm - Threadless - End - BVLA
$220.00
Afghan - Black CZ - 14k Rose Gold - 18g/16g/14g - 6mm - Threadless - End - BVLA Afghan - Black CZ - 14k Rose Gold - 18g/16g/14g - 6mm - Threadless - End - BVLA Ear Illustration that features the Lobe, Conch, Helix, Rook, Tragus and Antitragus piercing areas highlighted in yellow. Mouth Illustration featuring the Lip, Labret and Philtrum piercing areas highlighted in yellow. Nose Illustration featuring the Nostril piercing area highlighted in yellow.
Afghan - Black CZ - 14k Rose Gold - 18g/16g/14g - 6mm - Threadless - End - BVLA
$220.00
Afghan - Marcasite - 14k White Gold - 18g/16g/14g - 6mm - Threadless - End - BVLA Afghan - Marcasite - 14k White Gold - 18g/16g/14g - 6mm - Threadless - End - BVLA Ear Illustration that features the Lobe, Conch, Helix, Rook, Tragus and Antitragus piercing areas highlighted in yellow. Mouth Illustration featuring the Lip, Labret and Philtrum piercing areas highlighted in yellow. Nose Illustration featuring the Nostril piercing area highlighted in yellow.
Afghan - Marcasite - 14k White Gold - 18g/16g/14g - 6mm - Threadless - End - BVLA
$220.00
Mini Marquise Sarai - White CZ & Opal - 14k White Gold - 18g/16g - 7x4.5mm -Threaded - BVLA Mini Marquise Sarai - White CZ & Opal - 14k White Gold - 18g/16g - 7x4.5mm -Threaded - BVLA Ear Illustration featuring the Lobe, Rook, Conch, Helix, and Tragus piercing sites highlighted in yellow. Mouth Illustration featuring the Lip, Philtrum and Labret piercing sites highlighted in yellow.
Mini Marquise Sarai - White CZ & Opal - 14k White Gold - 18g/16g - 7x4.5mm -Threaded - BVLA
$400.00
Fan Fare Left - White CZ - 18k Rose Gold - 18g/16g - 6.5x3.5mm - End - Threadless - Anatometal Fan Fare Left - White CZ - 18k Rose Gold - 18g/16g - 6.5x3.5mm - End - Threadless - Anatometal Ear Illustration featuring the Lobe, Conch, Helix, Tragus, AntiTragus, and Forward Helix piercing areas highlighted in yellow. Nose Illustration featuring the Nostril highlighted in yellow.
Fan Fare Left - White CZ - 18k Rose Gold - 18g/16g - 6.5x3.5mm - End - Threadless - Anatometal
$165.00
Fan Fare Right - White CZ - 18k Rose Gold - 18g/16g - 6.5x3.5mm - End - Threadless - Anatometal Fan Fare Right - White CZ - 18k Rose Gold - 18g/16g - 6.5x3.5mm - End - Threadless - Anatometal Ear Illustration featuring the Lobe, Conch, Helix, Tragus, AntiTragus, and Forward Helix piercing areas highlighted in yellow. Nose Illustration featuring the Nostril highlighted in yellow.
Fan Fare Right - White CZ - 18k Rose Gold - 18g/16g - 6.5x3.5mm - End - Threadless - Anatometal
$165.00
Fan Fare Right - White CZ - 18k White Gold - 18g/16g - 6.5x3.5mm - End - Threadless - Anatometal Fan Fare Right - White CZ - 18k White Gold - 18g/16g - 6.5x3.5mm - End - Threadless - Anatometal Ear Illustration featuring the Lobe, Conch, Helix, Tragus, AntiTragus, and Forward Helix piercing areas highlighted in yellow. Nose Illustration featuring the Nostril highlighted in yellow.
Fan Fare Right - White CZ - 18k White Gold - 18g/16g - 6.5x3.5mm - End - Threadless - Anatometal
$165.00
Fan Fare Left - White CZ - 18k Yellow Gold - 18g/16g - 6.5x3.5mm - End - Threadless - Anatometal Fan Fare Left - White CZ - 18k Yellow Gold - 18g/16g - 6.5x3.5mm - End - Threadless - Anatometal Ear Illustration featuring the Lobe, Conch, Helix, Tragus, AntiTragus, and Forward Helix piercing areas highlighted in yellow. Nose Illustration featuring the Nostril highlighted in yellow.
Fan Fare Left - White CZ - 18k Yellow Gold - 18g/16g - 6.5x3.5mm - End - Threadless - Anatometal
$165.00
Beaded Marquise Fan - White CZ - 18k Rose Gold - 18g/16g/14g - 7.5x5.5mm - End - Threadless - Anatometal Beaded Marquise Fan - White CZ - 18k Rose Gold - 18g/16g/14g - 7.5x5.5mm - End - Threadless - Anatometal Ear Illustration featuring the Lobe, Helix, Conch and Tragus highlighted in yellow. Nose Illustration featuring the Nostril highlighted in yellow.
Beaded Marquise Fan - White CZ - 18k Rose Gold - 18g/16g/14g - 7.5x5.5mm - End - Threadless - Anatometal
$245.00
Beaded Marquise Fan - White CZ - 18k Yellow Gold - 18g/16g/14g - 7.5x5.5mm - End - Threadless - Anatometal Beaded Marquise Fan - White CZ - 18k Yellow Gold - 18g/16g/14g - 7.5x5.5mm - End - Threadless - Anatometal Ear Illustration featuring the Lobe, Helix, Conch and Tragus highlighted in yellow. Nose Illustration featuring the Nostril highlighted in yellow.
Beaded Marquise Fan - White CZ - 18k Yellow Gold - 18g/16g/14g - 7.5x5.5mm - End - Threadless - Anatometal
$245.00
Sold out
Beaded Marquise Fan - White CZ - 18k White Gold - 18g/16g/14g - 7.5x5.5mm - End - Threadless - Anatometal Beaded Marquise Fan - White CZ - 18k White Gold - 18g/16g/14g - 7.5x5.5mm - End - Threadless - Anatometal Ear Illustration featuring the Lobe, Helix, Conch and Tragus highlighted in yellow.
Beaded Marquise Fan - White CZ - 18k White Gold - 18g/16g/14g - 7.5x5.5mm - End - Threadless - Anatometal
$245.00
Cat Head - 14k White Gold - 18g/16g - 4mm - Threaded - BVLA Cat Head - 14k White Gold - 18g/16g - 4mm - Threaded - BVLA Ear Illustration featuring the Lobe, Conch, Helix, Forward Helix, Tragus, Anti-Tragus, and Rook piercings sites highlighted in yellow. Mouth Illustration featuring the Lip, Philtrum and Labret piercings sites highlighted in yellow. Nose Illustration featuring the Nostril piercings sites highlighted in yellow.
Cat Head - 14k White Gold - 18g/16g - 4mm - Threaded - BVLA
$240.00
Hibiscus Flower - 14k Yellow Gold - 18g/16g - 4mm - Threadless - BVLA Hibiscus Flower - 14k Yellow Gold - 18g/16g - 4mm - Threadless - BVLA Ear Illustration featuring the Lobe, Conch, Helix, Forward Helix, Tragus, Anti-Tragus, and Rook piercings sites highlighted in yellow. Mouth Illustration featuring the Lip, Philtrum and Labret piercings sites highlighted in yellow. Nose Illustration featuring the Nostril piercings sites highlighted in yellow.
Hibiscus Flower - 14k Yellow Gold - 18g/16g - 4mm - Threadless - BVLA
$190.00
Flat Triangle - 14k Rose Gold - 18g/16g - 3mm - Threadless - BVLA Flat Triangle - 14k Rose Gold - 18g/16g - 3mm - Threadless - BVLA Ear Illustration featuring the Lobe, Conch, Helix, Forward Helix, Tragus, Anti-Tragus, and Rook piercings sites highlighted in yellow. Nose Illustration featuring the Nostril piercings sites highlighted in yellow. Mouth Illustration featuring the Lip, Philtrum and Labret piercings sites highlighted in yellow.
Flat Triangle - 14k Rose Gold - 18g/16g - 3mm - Threadless - BVLA
$140.00
Flat Teardrop - 14k White Gold - 18g/16g - 4x2.5mm - Threadless - BVLA Flat Teardrop - 14k White Gold - 18g/16g - 4x2.5mm - Threadless - BVLA Ear Illustration featuring the Lobe, Conch, Helix, Forward Helix, Tragus, Anti-Tragus, and Rook piercings sites highlighted in yellow. Nose Illustration featuring the Nostril piercings sites highlighted in yellow. Mouth Illustration featuring the Lip, Philtrum and Labret piercings sites highlighted in yellow.
Flat Teardrop - 14k White Gold - 18g/16g - 4x2.5mm - Threadless - BVLA
$150.00
Feel The Spin Seam Ring - 14k Yellow Gold - 18g - 3/8" - Ring - BVLA Feel The Spin Seam Ring - 14k Yellow Gold - 18g - 3/8" - Ring - BVLA Ear Illustration featuring the Helix, Daith and Lobe piercing placements highlighted in yellow. Nose Illustration featuring the Nostril piercing placements highlighted in yellow.
Feel The Spin Seam Ring - 14k Yellow Gold - 18g - 3/8" - Ring - BVLA
$505.00
Feel The Spin Seam Ring - 14k White Gold - 18g - 3/8" - Ring - BVLA Feel The Spin Seam Ring - 14k White Gold - 18g - 3/8" - Ring - BVLA Ear Illustration featuring the Helix, Daith and Lobe piercing placements highlighted in yellow. Nose Illustration featuring the Nostril piercing placements highlighted in yellow.
Feel The Spin Seam Ring - 14k White Gold - 18g - 3/8" - Ring - BVLA
$505.00
Hammered Janna Seam Ring - 14k White Gold - 16g - 3/8" - Ring - BVLA Hammered Janna Seam Ring - 14k White Gold - 16g - 3/8" - Ring - BVLA Ear Illustration featuring the Helix, Daith and Lobe piercing placements highlighted in yellow. Nose Illustration featuring the Nostril piercing placements highlighted in yellow.
Hammered Janna Seam Ring - 14k White Gold - 16g - 3/8" - Ring - BVLA
$405.00
Hammered Janna Seam Ring - 14k Yellow Gold - 16g - 3/8" - Ring - BVLA Hammered Janna Seam Ring - 14k Yellow Gold - 16g - 3/8" - Ring - BVLA Ear Illustration featuring the Helix, Daith and Lobe piercing placements highlighted in yellow. Nose Illustration featuring the Nostril piercing placements highlighted in yellow.
Hammered Janna Seam Ring - 14k Yellow Gold - 16g - 3/8" - Ring - BVLA
$400.00
Myla Seam Ring - 14k White Gold - 16g - 3/8" - Ring - BVLA Myla Seam Ring - 14k White Gold - 16g - 3/8" - Ring - BVLA Ear Illustration featuring the Helix, Daith and Lobe piercing placements highlighted in yellow. Nose Illustration featuring the Nostril piercing placements highlighted in yellow.
Myla Seam Ring - 14k White Gold - 16g - 3/8" - Ring - BVLA
$415.00
Graduating Latchmi Seam Ring - 14k Yellow Gold - 16g - 5/16" - Ring - BVLA Graduating Latchmi Seam Ring - 14k Yellow Gold - 16g - 5/16" - Ring - BVLA Ear Illustration featuring the Helix, Daith and Lobe piercing placements highlighted in yellow. Nose Illustration featuring the Nostril piercing placements highlighted in yellow.
Graduating Latchmi Seam Ring - 14k Yellow Gold - 16g - 5/16" - Ring - BVLA
$490.00
Graduating Latchmi Seam Ring - 14k White Gold - 16g - 5/16" - Ring - BVLA Graduating Latchmi Seam Ring - 14k White Gold - 16g - 5/16" - Ring - BVLA Ear Illustration featuring the Helix, Daith and Lobe piercing placements highlighted in yellow. Nose Illustration featuring the Nostril piercing placements highlighted in yellow.
Graduating Latchmi Seam Ring - 14k White Gold - 16g - 5/16" - Ring - BVLA
$490.00
Graduating Latchmi Seam Ring - 14k Rose Gold - 16g - 5/16" - Ring - BVLA Graduating Latchmi Seam Ring - 14k Rose Gold - 16g - 5/16" - Ring - BVLA Ear Illustration featuring the Helix, Daith and Lobe piercing placements highlighted in yellow. Nose Illustration featuring the Nostril piercing placements highlighted in yellow.
Graduating Latchmi Seam Ring - 14k Rose Gold - 16g - 5/16" - Ring - BVLA
$490.00
Graduating Latchmi Seam Ring - 14k Yellow Gold - 16g - 3/8" - Ring - BVLA Graduating Latch Seam Ring - 14k Yellow Gold - 16g - 3/8" - Ring - BVLA Ear Illustration featuring the Helix, Daith and Lobe piercing placements highlighted in yellow. Nose Illustration featuring the Nostril piercing placements highlighted in yellow.
Graduating Latchmi Seam Ring - 14k Yellow Gold - 16g - 3/8" - Ring - BVLA
$505.00
Graduating Latchmi Seam Ring - 14k White Gold - 16g - 3/8" - Ring - BVLA Graduating Latch Seam Ring - 14k White Gold - 16g - 3/8" - Ring - BVLA Ear Illustration featuring the Helix, Daith and Lobe piercing placements highlighted in yellow. Nose Illustration featuring the Nostril piercing placements highlighted in yellow.
Graduating Latchmi Seam Ring - 14k White Gold - 16g - 3/8" - Ring - BVLA
$505.00
Graduating Latchmi Seam Ring - 14k Rose Gold - 16g - 3/8" - Ring - BVLA Graduating Latch Seam Ring - 14k Rose Gold - 16g - 3/8" - Ring - BVLA Ear Illustration featuring the Helix, Daith and Lobe piercing placements highlighted in yellow. Nose Illustration featuring the Nostril piercing placements highlighted in yellow.
Graduating Latchmi Seam Ring - 14k Rose Gold - 16g - 3/8" - Ring - BVLA
$505.00
Hammered Janna Seam Ring - 14k White Gold - 16g - 5/16" - Ring - BVLA Hammered Janna Seam Ring - 14k White Gold - 16g - 5/16" - Ring - BVLA Ear Illustration featuring the Helix, Daith and Lobe piercing placements highlighted in yellow. Nose Illustration featuring the Nostril piercing placements highlighted in yellow.
Hammered Janna Seam Ring - 14k White Gold - 16g - 5/16" - Ring - BVLA
$400.00
Hammered Janna Seam Ring - 14k Rose Gold - 16g - 5/16" - Ring - BVLA Hammered Janna Seam Ring - 14k Rose Gold - 16g - 5/16" - Ring - BVLA Ear Illustration featuring the Helix, Daith and Lobe piercing placements highlighted in yellow. Nose Illustration featuring the Nostril piercing placements highlighted in yellow.
Hammered Janna Seam Ring - 14k Rose Gold - 16g - 5/16" - Ring - BVLA
$400.00
14 Bead Seam Ring - Moissanite/Kashmire Topaz - 14k Yellow Gold - 16g - 7/16" - Ring - DUSK 14 Bead Seam Ring - Moissanite/Kashmire Topaz - 14k Yellow Gold - 16g - 7/16" - Ring - DUSK Ear Illustration featuring the Daith piercing site highlighted in yellow. Nose Illustration featuring the Nostril piercing placements highlighted in yellow.
14 Bead Seam Ring - Moissanite/Kashmire Topaz - 14k Yellow Gold - 16g - 7/16" - Ring - DUSK
$750.00
10 Bead Seam Ring - Swiss Blue Topaz/Tanzanite - 14k Rose Gold - 16g - 3/8" - Ring - DUSK 10 Bead Seam Ring - Swiss Blue Topaz/Tanzanite - 14k Rose Gold - 16g - 3/8" - Ring - DUSK Ear Illustration featuring the Helix, Daith and Lobe piercing placements highlighted in yellow. Nose Illustration featuring the Nostril piercing placements highlighted in yellow.
10 Bead Seam Ring - Swiss Blue Topaz/Tanzanite - 14k Rose Gold - 16g - 3/8" - Ring - DUSK
$675.00
Hammered Seam Ring - 14k White Gold - 16g - 3/8" - Ring - DUSK Hammered Seam Ring - 14k White Gold - 16g - 3/8" - Ring - DUSK Ear Illustration featuring the Helix, Daith and Lobe piercing placements highlighted in yellow. Nose Illustration featuring the Nostril piercing placements highlighted in yellow.
Hammered Seam Ring - 14k White Gold - 16g - 3/8" - Ring - DUSK
$330.00
Hammered Seam Ring - 14k Yellow Gold - 16g - 3/8" - Ring - DUSK Hammered Seam Ring - 14k Yellow Gold - 16g - 3/8" - Ring - DUSK Ear Illustration featuring the Helix, Daith and Lobe piercing placements highlighted in yellow. (Copy) (Copy) (Copy) Nose Illustration featuring the Nostril piercing placements highlighted in yellow. (Copy) (Copy) (Copy)
Hammered Seam Ring - 14k Yellow Gold - 16g - 3/8" - Ring - DUSK
$330.00
Point Seam Ring - Platinum - 16g - 3/8" - Ring - DUSK Point Seam Ring - Platinum - 16g - 3/8" - Ring - DUSK Ear Illustration featuring the Helix, Daith and Lobe piercing placements highlighted in yellow. (Copy) (Copy) Nose Illustration featuring the Nostril piercing placements highlighted in yellow. (Copy) (Copy)
Point Seam Ring - Platinum - 16g - 3/8" - Ring - DUSK
$375.00
Point Seam Ring - 14k Yellow Gold - 16g - 3/8" - Ring - DUSK Point Seam Ring - 14k Yellow Gold - 16g - 3/8" - Ring - DUSK Nose Illustration featuring the Nostril piercing placements highlighted in yellow. (Copy) Ear Illustration featuring the Helix, Daith and Lobe piercing placements highlighted in yellow. (Copy)
Point Seam Ring - 14k Yellow Gold - 16g - 3/8" - Ring - DUSK
$375.00
Point Seam Ring - 14k Rose Gold - 16g - 3/8" - Ring - DUSK Point Seam Ring - 14k Rose Gold - 16g - 3/8" - Ring - DUSK Ear Illustration featuring the Helix, Daith and Lobe piercing placements highlighted in yellow. Nose Illustration featuring the Nostril piercing placements highlighted in yellow.
Point Seam Ring - 14k Rose Gold - 16g - 3/8" - Ring - DUSK
$375.00
Bezel - Orange Carnelian - 14k Yellow Gold - 18g/16g - 3.5mm - End - Threadless - Dusk Bezel - Orange Carnelian - 14k Yellow Gold - 18g/16g - 3.5mm - End - Threadless - Dusk Ear Illustration featuring the Lobe, Conch, Helix, Tragus and Forward Helix piercings highlighted in yellow. (Copy) (Copy) (Copy) (Copy) (Copy) (Copy) Nose Illustration featuring the Nostril piercing highlighted in yellow. (Copy) (Copy) (Copy) (Copy) (Copy) (Copy) Mouth Illustration featuring the Lip, Labret and Philtrum piercing site highlighted in yellow. (Copy) (Copy) (Copy) (Copy) (Copy) (Copy) (Copy) (Copy) (Copy) (Copy) (Copy)
Bezel - Orange Carnelian - 14k Yellow Gold - 18g/16g - 3.5mm - End - Threadless - Dusk
$165.00
4 Prong 1 Bead - Lab White Sapphire - 14k Yellow Gold - 18g/16g - 4x2.75mm - End - Threadless - Dusk 4 Prong 1 Bead - Lab White Sapphire - 14k Yellow Gold - 18g/16g - 4x2.75mm - End - Threadless - Dusk Ear Illustration featuring the Lobe, Conch, Helix, Tragus and Forward Helix piercings highlighted in yellow. (Copy) (Copy) (Copy) (Copy) Nose Illustration featuring the Nostril piercing highlighted in yellow. (Copy) (Copy) (Copy) (Copy) Mouth Illustration featuring the Lip, Labret and Philtrum piercing site highlighted in yellow. (Copy) (Copy) (Copy) (Copy) (Copy) (Copy) (Copy) (Copy) (Copy)
4 Prong 1 Bead - Lab White Sapphire - 14k Yellow Gold - 18g/16g - 4x2.75mm - End - Threadless - Dusk
$145.00
Bezel 6 Bead - Iolite - 14k Rose Gold - 18g/16g14g - 7.5x4.5mm - End - Threadless - Dusk Bezel 6 Bead - Iolite - 14k Rose Gold - 18g/16g14g - 7.5x4.5mm - End - Threadless - Dusk Mouth Illustration featuring the Lip, Labret and Philtrum piercing site highlighted in yellow. (Copy) (Copy) (Copy) (Copy) Ear Illustration featuring the Conch, Helix and Lobe piercing sites highlighted in yellow. (Copy) (Copy) (Copy) (Copy)
Bezel 6 Bead - Iolite - 14k Rose Gold - 18g/16g14g - 7.5x4.5mm - End - Threadless - Dusk
$310.00
Bezel 3 Bead - Emerald - 14k Yellow Gold - 18g/16g14g - 7.5x4.5mm - End - Threadless - Dusk Bezel 3 Bead - Emerald - 14k Yellow Gold - 18g/16g14g - 7.5x4.5mm - End - Threadless - Dusk Ear Illustration featuring the Conch, Helix and Lobe piercing sites highlighted in yellow. (Copy) (Copy) (Copy) (Copy) Mouth Illustration featuring the Lip, Labret and Philtrum piercing site highlighted in yellow. (Copy) (Copy) (Copy) (Copy)
Bezel 3 Bead - Emerald - 14k Yellow Gold - 18g/16g14g - 7.5x4.5mm - End - Threadless - Dusk
$260.00
Halo - Charoite/Diamond - 14k Rose Gold - 18g/16g14g - 6mm - End - Threadless - Dusk Halo - Charoite/Diamond - 14k Rose Gold - 18g/16g14g - 6mm - End - Threadless - Dusk Ear Illustration featuring the Conch, Helix and Lobe piercing sites highlighted in yellow. (Copy) (Copy) Mouth Illustration featuring the Lip, Labret and Philtrum piercing site highlighted in yellow. (Copy) (Copy)
Halo - Charoite/Diamond - 14k Rose Gold - 18g/16g14g - 6mm - End - Threadless - Dusk
$440.00
18 Bead Circle - Blue Chalcedony - 14k Yellow Gold - 18g/16g14g - 8mm - End - Threadless - Dusk 18 Bead Circle - Blue Chalcedony - 14k Yellow Gold - 18g/16g14g - 8mm - End - Threadless - Dusk Ear Illustration featuring the Conch, Helix and Lobe piercing sites highlighted in yellow. (Copy) (Copy) (Copy) Mouth Illustration featuring the Lip, Labret and Philtrum piercing site highlighted in yellow. (Copy) (Copy) (Copy)
18 Bead Circle - Blue Chalcedony - 14k Yellow Gold - 18g/16g14g - 8mm - End - Threadless - Dusk
$485.00
15 Bead Loops - Pyrite - 14k Yellow Gold - 18g/16g14g - 7.5mm - End - Threadless - Dusk 15 Bead Loops - Pyrite - 14k Yellow Gold - 18g/16g14g - 7.5mm - End - Threadless - Dusk Ear Illustration featuring the Conch, Helix and Lobe piercing sites highlighted in yellow. (Copy) (Copy) Mouth Illustration featuring the Lip, Labret and Philtrum piercing site highlighted in yellow. (Copy) (Copy)
15 Bead Loops - Pyrite - 14k Yellow Gold - 18g/16g14g - 7.5mm - End - Threadless - Dusk
$395.00
Bezel 8 Bead - Rainbow Moonstone - 14k Rose Gold - 18g/16g14g - 8x5.5mm - End - Threadless - Dusk Bezel 8 Bead - Rainbow Moonstone - 14k Rose Gold - 18g/16g14g - 8x5.5mm - End - Threadless - Dusk Ear Illustration featuring the Conch, Helix and Lobe piercing sites highlighted in yellow. (Copy) Mouth Illustration featuring the Lip, Labret and Philtrum piercing site highlighted in yellow. (Copy)
Bezel 8 Bead - Rainbow Moonstone - 14k Rose Gold - 18g/16g14g - 8x5.5mm - End - Threadless - Dusk
$325.00
Scythe - 14k Rose Gold - 18g/16g - 5.5x4.5mm - End - Threadless - Dusk Scythe - 14k Rose Gold - 18g/16g - 5.5x4.5mm - End - Threadless - Dusk Ear Illustration featuring the Lobe, Helix, Conch and Tragus piercing sites highlighted in yellow. (Copy) (Copy) Nose Illustration featuring the Nostril piercing site highlighted in yellow. (Copy) (Copy) (Copy) (Copy)
Scythe - 14k Rose Gold - 18g/16g - 5.5x4.5mm - End - Threadless - Dusk
$95.00
Scythe - 14k Yellow Gold - 18g/16g - 5.5x4.5mm - End - Threadless - Dusk Scythe - 14k Yellow Gold - 18g/16g - 5.5x4.5mm - End - Threadless - Dusk Nose Illustration featuring the Nostril piercing site highlighted in yellow. (Copy) (Copy) Ear Illustration featuring the Lobe, Helix, Conch and Tragus piercing sites highlighted in yellow.
Scythe - 14k Yellow Gold - 18g/16g - 5.5x4.5mm - End - Threadless - Dusk
$95.00
Trash Can - 14k Rose Gold - 18g/16g/14g - 5x4mm - End - Threadless - Dusk Trash Can - 14k Rose Gold - 18g/16g/14g - 5x4mm - End - Threadless - Dusk Ear Illustration featuring the Lobe, Helix, Conch and Tragus piercing sites highlighted in yellow. (Copy) (Copy) Nose Illustration featuring the Nostril piercing site highlighted in yellow. (Copy) (Copy)
Trash Can - 14k Rose Gold - 18g/16g/14g - 5x4mm - End - Threadless - Dusk
$145.00
7 Bead Cluster - 14k Rose Gold - 18g/16g/14g - End - Threadless - Dusk 7 Bead Cluster - 14k Rose Gold - 18g/16g/14g - End - Threadless - Dusk Ear Illustration featuring the Lobe, Conch, Tragus, Forward Helix, Helix, and Rook piercing sites highlighted in yellow. (Copy) Lip Illustration featuring the Philtrum, Lip, and Labret piercing sites highlighted in yellow. (Copy) Nose Illustration featuring the Nostril piercing site highlighted in yellow. (Copy)
7 Bead Cluster - 14k Rose Gold - 18g/16g/14g - End - Threadless - Dusk
$160.00
7 Bead Cluster - 14k Yellow Gold - 18g/16g/14g - End - Threadless - Dusk 7 Bead Cluster - 14k Yellow Gold - 18g/16g/14g - End - Threadless - Dusk Ear Illustration featuring the Lobe, Conch, Tragus, Forward Helix, Helix, and Rook piercing sites highlighted in yellow. (Copy) Lip Illustration featuring the Philtrum, Lip, and Labret piercing sites highlighted in yellow. (Copy) Nose Illustration featuring the Nostril piercing site highlighted in yellow. (Copy)
7 Bead Cluster - 14k Yellow Gold - 18g/16g/14g - End - Threadless - Dusk
$160.00
Feather Seam Ring - 14k White Gold - 16g - 3/8" -  Ring - BVLA Feather Seam Ring - 14k White Gold - 16g - 3/8" -  Ring - BVLA
Feather Seam Ring - 14k White Gold - 16g - 3/8" - Ring - BVLA
$415.00
Antiqued Feather Seam Ring - 14k Yellow Gold - 16g - 3/8" -  Ring - BVLA Antiqued Feather Seam Ring - 14k Yellow Gold - 16g - 3/8" -  Ring - BVLA
Antiqued Feather Seam Ring - 14k Yellow Gold - 16g - 3/8" - Ring - BVLA
$430.00
Princess Chain - Peridot - 14k Yellow Gold  - 35mm - 18g/16g - Diablo Princess Chain - Peridot - 14k Yellow Gold  - 35mm - 18g/16g - Diablo Ear Illustration featuring the Lobe, Conch, Helix, Rook, Forward Helix, Tragus, and Daith piercing areas highlighted in yellow. (Copy) (Copy) (Copy)
Princess Chain - Peridot - 14k Yellow Gold - 35mm - 18g/16g - Diablo
$185.00
Princess Chain - Rainbow Moonstone - 14k Yellow Gold  - 18g/16g - Diablo Princess Chain - Rainbow Moonstone - 14k Yellow Gold  - 18g/16g - Diablo Ear Illustration featuring the Lobe, Conch, Helix, Rook, Forward Helix, Tragus, and Daith piercing areas highlighted in yellow. (Copy) (Copy) (Copy)
Princess Chain - Rainbow Moonstone - 14k Yellow Gold - 18g/16g - Diablo
$170.00
Grounded Gemmed Clicker - White CZ - Titanium - 18g - 3/8" - Clicker - Diablo Grounded Gemmed Clicker - White CZ - Titanium - 18g - 3/8" - Clicker - Diablo (Copy) (Copy) (Copy) Ear Illustration featuring the Helix and Lobe piercing areas in yellow. (Copy) (Copy) (Copy)
Grounded Gemmed Clicker - White CZ - Titanium - 18g - 3/8" - Clicker - Diablo
$80.00
Grounded Gemmed Clicker - White CZ - Titanium - 18g - 5/16" - Clicker - Diablo Grounded Gemmed Clicker - White CZ - Titanium - 18g - 5/16" - Clicker - Diablo (Copy) (Copy) Ear Illustration featuring the Helix and Lobe piercing areas in yellow. (Copy) (Copy)
Grounded Gemmed Clicker - White CZ - Titanium - 18g - 5/16" - Clicker - Diablo
$80.00
Grounded Gemmed Clicker - White CZ - Titanium - 16g - 5/16" - Clicker - Diablo Grounded Gemmed Clicker - White CZ - Titanium - 16g - 5/16" - Clicker - Diablo (Copy) Ear Illustration featuring the Helix and Lobe piercing areas in yellow. (Copy)
Grounded Gemmed Clicker - White CZ - Titanium - 16g - 5/16" - Clicker - Diablo
$80.00
Grounded Gemmed Clicker - White CZ - Titanium - 16g - 3/8" - Clicker - Diablo Grounded Gemmed Clicker - White CZ - Titanium - 16g - 3/8" - Clicker - Diablo Ear Illustration featuring the Helix and Lobe piercing areas in yellow.
Grounded Gemmed Clicker - White CZ - Titanium - 16g - 3/8" - Clicker - Diablo
$80.00
Horizon Gemmed Clicker - White CZ - Titanium - 16g - 3/8" - Clicker - Diablo Horizon Gemmed Clicker - White CZ - Titanium - 16g - 3/8" - Clicker - Diablo Ear Illustration featuring the Helix and Daith piercing areas in yellow. (Copy) (Copy)
Horizon Gemmed Clicker - White CZ - Titanium - 16g - 3/8" - Clicker - Diablo
$80.00
Horizon Gemmed Clicker - White CZ - Titanium - 16g - 5/16" - Clicker - Diablo Horizon Gemmed Clicker - White CZ - Titanium - 16g - 5/16" - Clicker - Diablo Ear Illustration featuring the Helix and Daith piercing areas in yellow. (Copy)
Horizon Gemmed Clicker - White CZ - Titanium - 16g - 5/16" - Clicker - Diablo
$80.00
Double Stack Beaded Clicker - Titanium - 16g - 5/16" - Clicker - Diablo Double Stack Beaded Clicker - Titanium - 16g - 5/16" - Clicker - Diablo Ear Illustration featuring the Helix and Daith piercing areas in yellow.
Double Stack Beaded Clicker - Titanium - 16g - 5/16" - Clicker - Diablo
$60.00
Triple Stack Clicker - Titanium - 16g - 5/16" - Clicker - Diablo Triple Stack Clicker - Titanium - 16g - 5/16" - Clicker - Diablo Ear Illustration featuring the Rook, Daith and Helix placements highlighted in yellow.
Triple Stack Clicker - Titanium - 16g - 5/16" - Clicker - Diablo
$50.00
Dragon Egg - Synthetic White Opal - Titanium - 18g/16g - 5.5x4mm - Threaded - End - Industrial Strength Dragon Egg - Synthetic White Opal - Titanium - 18g/16g - 5.5x4mm - Threaded - End - Industrial Strength
Dragon Egg - Synthetic White Opal - Titanium - 18g/16g - 5.5x4mm - Threaded - End - Industrial Strength
$60.00
Dragon Egg - Synthetic Blue Opal - Titanium - 18g/16g - 5.5x4mm - Threaded - End - Industrial Strength Dragon Egg - Synthetic Blue Opal - Titanium - 18g/16g - 5.5x4mm - Threaded - End - Industrial Strength
Dragon Egg - Synthetic Blue Opal - Titanium - 18g/16g - 5.5x4mm - Threaded - End - Industrial Strength
$60.00
Dragon Egg - Synthetic Black Opal - Titanium - 18g/16g - 5.5x4mm - Threaded - End - Industrial Strength Dragon Egg - Synthetic Black Opal - Titanium - 18g/16g - 5.5x4mm - Threaded - End - Industrial Strength
Dragon Egg - Synthetic Black Opal - Titanium - 18g/16g - 5.5x4mm - Threaded - End - Industrial Strength
$60.00
Nipple Clicker - 12g - Arctic Blue CZ - Titanium - Industrial Strength Nipple Clicker - 12g - Arctic Blue CZ - Titanium - Industrial Strength
Nipple Clicker - 12g - Arctic Blue CZ - Titanium - Industrial Strength
$540.00
Miro  - Black Onyx/London Blue CZ - 18k Rose Gold - 18g/16g/14g - Threadless - End - Anatometal Miro  - Black Onyx/London Blue CZ - 18k Rose Gold - 18g/16g/14g - Threadless - End - Anatometal
Miro - Black Onyx/London Blue CZ - 18k Rose Gold - 18g/16g/14g - Threadless - End - Anatometal
$300.00
Marquise 5 Gem Fan - Black/White CZ - 18k Rose Gold - 18g/16g/14g - 9x5.5mm - Threadless - End - Anatometal Marquise 5 Gem Fan - Black/White CZ - 18k Rose Gold - 18g/16g/14g - 9x5.5mm - Threadless - End - Anatometal Ear Illustration featuring the Lobe, Helix, Conch, and Tragus piercings in yellow. (Copy) (Copy) (Copy) (Copy) (Copy) Mouth Illustration featuring the Labret piercing in yellow. (Copy) (Copy) (Copy) (Copy) (Copy) (Copy)
Marquise 5 Gem Fan - Black/White CZ - 18k Rose Gold - 18g/16g/14g - 9x5.5mm - Threadless - End - Anatometal
$235.00
Marquise 5 Gem Fan - Primrose/Pistachio CZ - 18k Rose Gold - 18g/16g/14g - 9x5.5mm - Threadless - End - Anatometal Marquise 5 Gem Fan - Primrose/Pistachio CZ - 18k Rose Gold - 18g/16g/14g - 9x5.5mm - Threadless - End - Anatometal Ear Illustration featuring the Lobe, Helix, Conch, and Tragus piercings in yellow. (Copy) (Copy) (Copy) (Copy) Mouth Illustration featuring the Labret piercing in yellow. (Copy) (Copy) (Copy) (Copy) (Copy)
Marquise 5 Gem Fan - Primrose/Pistachio CZ - 18k Rose Gold - 18g/16g/14g - 9x5.5mm - Threadless - End - Anatometal
$235.00
Marquise 5 Gem Fan - London Blue/White CZ - 18k Rose Gold - 18g/16g/14g - 12x7.5mm - Threadless - End - Anatometal Marquise 5 Gem Fan - London Blue/White CZ - 18k Rose Gold - 18g/16g/14g - 12x7.5mm - Threadless - End - Anatometal Ear Illustration featuring the Lobe, Helix and Conch piercings in yellow. (Copy) (Copy) Mouth Illustration featuring the Labret piercing in yellow. (Copy) (Copy)
Marquise 5 Gem Fan - London Blue/White CZ - 18k Rose Gold - 18g/16g/14g - 12x7.5mm - Threadless - End - Anatometal
$475.00
Marquise 5 Gem Fan - Mint Green/Lilac CZ - 18k White Gold - 18g/16g/14g - 9x5.5mm - Threadless - End - Anatometal Marquise 5 Gem Fan - Mint Green/Lilac CZ - 18k White Gold - 18g/16g/14g - 9x5.5mm - Threadless - End - Anatometal Ear Illustration featuring the Lobe, Helix, Conch, and Tragus piercings in yellow. (Copy) (Copy) (Copy) Mouth Illustration featuring the Labret piercing in yellow. (Copy) (Copy) (Copy) (Copy)
Marquise 5 Gem Fan - Mint Green/Lilac CZ - 18k White Gold - 18g/16g/14g - 9x5.5mm - Threadless - End - Anatometal
$235.00
Marquise 5 Gem Fan - Pink/White CZ - 18k White Gold - 18g/16g/14g - 9x5.5mm - Threadless - End - Anatometal Marquise 5 Gem Fan - Pink/White CZ - 18k White Gold - 18g/16g/14g - 9x5.5mm - Threadless - End - Anatometal Ear Illustration featuring the Lobe, Helix, Conch, and Tragus piercings in yellow. (Copy) (Copy) Mouth Illustration featuring the Labret piercing in yellow. (Copy) (Copy) (Copy)
Marquise 5 Gem Fan - Pink/White CZ - 18k White Gold - 18g/16g/14g - 9x5.5mm - Threadless - End - Anatometal
$235.00
Marquise 5 Gem Fan - Amethyst/White CZ - 18k White Gold - 18g/16g/14g - 12x7.5mm - Threadless - End - Anatometal Marquise 5 Gem Fan - Amethyst/White CZ - 18k White Gold - 18g/16g/14g - 12x7.5mm - Threadless - End - Anatometal Ear Illustration featuring the Lobe, Helix and Conch piercings in yellow. (Copy) Mouth Illustration featuring the Labret piercing in yellow. (Copy)
Marquise 5 Gem Fan - Amethyst/White CZ - 18k White Gold - 18g/16g/14g - 12x7.5mm - Threadless - End - Anatometal
$475.00
Marquise 5 Gem Fan - Ruby/White CZ - 18k Yellow Gold - 18g/16g/14g - 9x5.5mm - Threadless - End - Anatometal Marquise 5 Gem Fan - Ruby/White CZ - 18k Yellow Gold - 18g/16g/14g - 9x5.5mm - Threadless - End - Anatometal Ear Illustration featuring the Lobe, Helix, Conch, and Tragus piercings in yellow. (Copy) Mouth Illustration featuring the Labret piercing in yellow. (Copy) (Copy)
Marquise 5 Gem Fan - Ruby/White CZ - 18k Yellow Gold - 18g/16g/14g - 9x5.5mm - Threadless - End - Anatometal
$235.00
Marquise 5 Gem Fan - Aurora Borealis/Artic Blue CZ - 18k Yellow Gold - 18g/16g/14g - 9x5.5mm - Threadless - End - Anatometal Marquise 5 Gem Fan - Aurora Borealis/Artic Blue CZ - 18k Yellow Gold - 18g/16g/14g - 9x5.5mm - Threadless - End - Anatometal Ear Illustration featuring the Lobe, Helix, Conch, and Tragus piercings in yellow. Mouth Illustration featuring the Labret piercing in yellow. (Copy)
Marquise 5 Gem Fan - Aurora Borealis/Artic Blue CZ - 18k Yellow Gold - 18g/16g/14g - 9x5.5mm - Threadless - End - Anatometal
$235.00
Marquise 5 Gem Fan - Sapphire/White CZ - 18k Yellow Gold - 18g/16g/14g - 12x7.5mm - Threadless - End - Anatometal Marquise 5 Gem Fan - Sapphire/White CZ - 18k Yellow Gold - 18g/16g/14g - 12x7.5mm - Threadless - End - Anatometal Ear Illustration featuring the Lobe, Helix and Conch piercings in yellow. Mouth Illustration featuring the Labret piercing in yellow.
Marquise 5 Gem Fan - Sapphire/White CZ - 18k Yellow Gold - 18g/16g/14g - 12x7.5mm - Threadless - End - Anatometal
$475.00
Beaded Clicker- 14k White Gold - 16g - Clicker - Junipurr Beaded Clicker- 14k White Gold - 16g - Clicker - Junipurr
Beaded Clicker- 14k White Gold - 16g - Clicker - Junipurr
$420.00
Imogen Left - 14k Rose Gold - 18g/16g - 11x5mm - End - Threadless - Junipurr Imogen Left - 14k Rose Gold - 18g/16g - 11x5mm - End - Threadless - Junipurr Ear Illustration featuring Helix and the Lobe in yellow. (Copy) (Copy) (Copy)
Imogen Left - 14k Rose Gold - 18g/16g - 11x5mm - End - Threadless - Junipurr
$190.00
Imogen Left - 14k Yellow Gold - 18g/16g - 11x5mm - End - Threadless - Junipurr Imogen Left - 14k Yellow Gold - 18g/16g - 11x5mm - End - Threadless - Junipurr Ear Illustration featuring Helix and the Lobe in yellow. (Copy)
Imogen Left - 14k Yellow Gold - 18g/16g - 11x5mm - End - Threadless - Junipurr
$190.00
Half Triumph - 14k Rose Gold - 18g/16g/14g - 7x2.5mm - End - Threadless - Junipurr Half Triumph - 14k Rose Gold - 18g/16g/14g - 7x2.5mm - End - Threadless - Junipurr Illustration of a ear featuring the Conch, Helix, Forward Helix, Lobe and Tragus piercing in yellow. (Copy)
Half Triumph - 14k Rose Gold - 18g/16g/14g - 7x2.5mm - End - Threadless - Junipurr
$155.00
Daphne - White CZ - 14k Rose Gold - 18g/16g - 12x3mm - End - Threadless - Junipurr Daphne - White CZ - 14k Rose Gold - 18g/16g - 12x3mm - End - Threadless - Junipurr Illustration of an ear featuring the Helix, Forward Helix, Tragus and Lobe piercing sites.
Daphne - White CZ - 14k Rose Gold - 18g/16g - 12x3mm - End - Threadless - Junipurr
$210.00
Ferndale - 18k Rose Gold - 18g/16g/14g - 5.5x4mm - End - Threadless - Anatometal Ferndale - 18k Rose Gold - 18g/16g/14g - 5.5x4mm - End - Threadless - Anatometal Ear Illustration featuring the Lobe, Helix, Conch, Tragus, Forward Helix Piercing sites (Copy) (Copy) (Copy) (Copy) (Copy) Mouth Illustration featuring the Lip, Labret, and Philtrum piercing sites (Copy) (Copy) (Copy) (Copy) (Copy)
Ferndale - 18k Rose Gold - 18g/16g/14g - 5.5x4mm - End - Threadless - Anatometal
$125.00
Ferndale - 18k White Gold - 18g/16g/14g - 5.5x4mm - End - Threadless - Anatometal Ferndale - 18k White Gold - 18g/16g/14g - 5.5x4mm - End - Threadless - Anatometal Ear Illustration featuring the Lobe, Helix, Conch, Tragus, Forward Helix Piercing sites (Copy) (Copy) (Copy) (Copy) Mouth Illustration featuring the Lip, Labret, and Philtrum piercing sites (Copy) (Copy) (Copy) (Copy)
Ferndale - 18k White Gold - 18g/16g/14g - 5.5x4mm - End - Threadless - Anatometal
$125.00
Ferndale - 18k Yellow Gold - 18g/16g/14g - 5.5x4mm - End - Threadless - Anatometal Ferndale - 18k Yellow Gold - 18g/16g/14g - 5.5x4mm - End - Threadless - Anatometal Ear Illustration featuring the Lobe, Helix, Conch, Tragus, Forward Helix Piercing sites (Copy) (Copy) (Copy) Mouth Illustration featuring the Lip, Labret, and Philtrum piercing sites (Copy) (Copy) (Copy)
Ferndale - 18k Yellow Gold - 18g/16g/14g - 5.5x4mm - End - Threadless - Anatometal
$125.00
Sonoma - White CZ - 18k Rose Gold - 18g/16g/14g - 4.75x4mm - End - Threadless - Anatometal Sonoma - White CZ - 18k Rose Gold - 18g/16g/14g - 4.75x4mm - End - Threadless - Anatometal Ear Illustration featuring the Lobe, Helix, Conch, Tragus, Forward Helix Piercing sites (Copy) (Copy) (Copy) (Copy) Mouth Illustration featuring the Lip, Labret, and Philtrum piercing sites (Copy) (Copy) (Copy) (Copy)
Sonoma - White CZ - 18k Rose Gold - 18g/16g/14g - 4.75x4mm - End - Threadless - Anatometal
$175.00
Sonoma - White CZ - 18k White Gold - 18g/16g/14g - 4.75x4mm - End - Threadless - Anatometal Sonoma - White CZ - 18k White Gold - 18g/16g/14g - 4.75x4mm - End - Threadless - Anatometal Ear Illustration featuring the Lobe, Helix, Conch, Tragus, Forward Helix Piercing sites (Copy) (Copy) (Copy) Mouth Illustration featuring the Lip, Labret, and Philtrum piercing sites (Copy) (Copy) (Copy)
Sonoma - White CZ - 18k White Gold - 18g/16g/14g - 4.75x4mm - End - Threadless - Anatometal
$150.00
Sonoma - White CZ - 18k Yellow Gold - 18g/16g/14g - 4.75x4mm - End - Threadless - Anatometal Sonoma - White CZ - 18k Yellow Gold - 18g/16g/14g - 4.75x4mm - End - Threadless - Anatometal Ear Illustration featuring the Lobe, Helix, Conch, Tragus, Forward Helix Piercing sites (Copy) (Copy) Mouth Illustration featuring the Lip, Labret, and Philtrum piercing sites (Copy) (Copy)
Sonoma - White CZ - 18k Yellow Gold - 18g/16g/14g - 4.75x4mm - End - Threadless - Anatometal
$175.00
Zia - Synthetic Bubble Gum Pink Opal- 18k Rose Gold - 18g/16g - 3mm - End - Threadless - Anatometal Zia - Synthetic Bubble Gum Pink Opal- 18k Rose Gold - 18g/16g - 3mm - End - Threadless - Anatometal Ear Illustration featuring the Lobe, Helix, Conch, Tragus, Forward Helix Piercing sites (Copy) (Copy) Mouth Illustration featuring the Lip, Labret, and Philtrum piercing sites (Copy) (Copy)
Zia - Synthetic Bubble Gum Pink Opal- 18k Rose Gold - 18g/16g - 3mm - End - Threadless - Anatometal
$95.00
Sold out
Zia - Synthetic Light Purple Opal - 18k White Gold - 18g/16g - 3mm - End - Threadless - Anatometal Zia - Synthetic Light Purple Opal - 18k White Gold - 18g/16g - 3mm - End - Threadless - Anatometal Ear Illustration featuring the Lobe, Helix, Conch, Tragus, Forward Helix Piercing sites (Copy) (Copy) Mouth Illustration featuring the Lip, Labret, and Philtrum piercing sites (Copy) (Copy)
Zia - Synthetic Light Purple Opal - 18k White Gold - 18g/16g - 3mm - End - Threadless - Anatometal
$95.00
Zia - Synthetic Bold Red Opal - 18k Yellow Gold - 18g/16g - 3mm - End - Threadless - Anatometal Zia - Synthetic Bold Red Opal - 18k Yellow Gold - 18g/16g - 3mm - End - Threadless - Anatometal Ear Illustration featuring the Lobe, Helix, Conch, Tragus, Forward Helix Piercing sites (Copy) Mouth Illustration featuring the Lip, Labret, and Philtrum piercing sites (Copy)
Zia - Synthetic Bold Red Opal - 18k Yellow Gold - 18g/16g - 3mm - End - Threadless - Anatometal
$95.00
Sold out
Haute Couture 5 - White CZ - Titanium - 16g - 4.75x5mm - Captive - End - Leroi Haute Couture 5 - White CZ - Titanium - 16g - 4.75x5mm - Captive - End - Leroi Ear Illustration featuring the Helix, Conch and Daith piercing sites. (Copy) Nose Illustration featuring the septum piercing site
Haute Couture 5 - White CZ - Titanium - 16g - 4.75x5mm - Captive - End - Leroi
$65.00
Haute Couture 4 - White CZ - Titanium - 16g - 4.5x10.5mm - Captive - End - Leroi Haute Couture 4 - White CZ - Titanium - 16g - 4.5x10.5mm - Captive - End - Leroi Ear Illustration featuring the Helix, Conch and Daith piercing sites.
Haute Couture 4 - White CZ - Titanium - 16g - 4.5x10.5mm - Captive - End - Leroi
$130.00
Marquise with Accents - Orange Sapphire/White CZ - 18k Yellow Gold - 18g/16g - 5x4.75mm - Threadless - End - Anatometal Large Orange Sapphire surrounded by White CZ, set in Yellow Gold. Marquise with Accents - Orange Sapphire/White CZ - 18k Yellow Gold - 18g/16g - 5x4.75mm - Threadless - End - Anatometal Mouth Diagram featuring the Philtrum, Labret and Lip piercings (Copy) (Copy) (Copy)
Marquise with Accents - Orange Sapphire/White CZ - 18k Yellow Gold - 18g/16g - 5x4.75mm - Threadless - End - Anatometal
$250.00
FaraTa - Sandblasted Black Onyx - 18k Yellow Gold - 14g/12g - 12.75x6.5mm - Threaded - End - Anatometal Black Onyx Oval set in Yellow Gold. FaraTa - Sandblasted Black Onyx - 18k Yellow Gold - 14g/12g - 12.75x6.5mm - Threaded - End - Anatometal Ear Diagram featuring the Conch, Helix and Lobe piercings (Copy) (Copy) Mouth Diagram featuring the Philtrum, Labret and Lip piercings (Copy) (Copy)
FaraTa - Sandblasted Black Onyx - 18k Yellow Gold - 14g/12g - 12.75x6.5mm - Threaded - End - Anatometal
$255.00
FaraTa - Sandblasted Amethyst - 18k White Gold - 14g/12g - 12.75x6.5mm - Threaded - End - Anatometal Bold purple sandblasted Amethyst gemstone oval set in White Gold. FaraTa - Sandblasted Amethyst - 18k White Gold - 14g/12g - 12.75x6.5mm - Threaded - End - Anatometal Ear Diagram featuring the Conch, Helix and Lobe piercings (Copy) Mouth Diagram featuring the Philtrum, Labret and Lip piercings (Copy)
FaraTa - Sandblasted Amethyst - 18k White Gold - 14g/12g - 12.75x6.5mm - Threaded - End - Anatometal
$345.00
FaraTa - Rainbow Moonstone - 18k Rose Gold - 14g/12g - 12.75x6.5mm - Threaded - End - Anatometal Large oval Rainbow Moonstone set in Rose Gold finishes. FaraTa - Rainbow Moonstone - 18k Rose Gold - 14g/12g - 12.75x6.5mm - Threaded - End - Anatometal Ear Diagram featuring the Conch, Helix and Lobe piercings Mouth Diagram featuring the Philtrum, Labret and Lip piercings
FaraTa - Rainbow Moonstone - 18k Rose Gold - 14g/12g - 12.75x6.5mm - Threaded - End - Anatometal
$355.00
Tiny Feather Curved Left - 14k Yellow Gold - 18g/16g - 6x2mm - Threaded - End - BVLA Yellow Gold Feather Curved to the Left. Tiny Feather Curved Left - 14k Yellow Gold - 18g/16g - 6x2mm - Threaded - End - BVLA Ear Diagram featuring the Rook, Conch, Tragus, Helix, Forward Helix, and Lobe (Copy) (Copy) (Copy) (Copy) (Copy) (Copy) (Copy) Nose diagram featuring Nostril piercing. (Copy)
Tiny Feather Curved Left - 14k Yellow Gold - 18g/16g - 6x2mm - Threaded - End - BVLA
$165.00
Tiny Feather Curved Right - 14k Yellow Gold - 18g/16g - 6x2mm - Threaded - End - BVLA Yellow Gold Feather, curved to the right. Tiny Feather Curved Right - 14k Yellow Gold - 18g/16g - 6x2mm - Threaded - End - BVLA Ear Diagram featuring the Rook, Conch, Tragus, Helix, Forward Helix, and Lobe (Copy) (Copy) (Copy) (Copy) (Copy) (Copy) Nose diagram featuring Nostril piercing.
Tiny Feather Curved Right - 14k Yellow Gold - 18g/16g - 6x2mm - Threaded - End - BVLA
$165.00
Spider Web - 14k Yellow Gold - 16g - 10mm - Threaded - End - BVLA Yellow Gold Spider Web. Spider Web - 14k Yellow Gold - 16g - 10mm - Threaded - End - BVLA Ear Diagram featuring the Helix, Conch and Lobe. (Copy)
Spider Web - 14k Yellow Gold - 16g - 10mm - Threaded - End - BVLA
$245.00
Spider Web - 14k White Gold - 16g - 10mm - Threaded - End - BVLA Spider Web in White Gold. Spider Web - 14k White Gold - 16g - 10mm - Threaded - End - BVLA Ear Diagram featuring the Helix, Conch and Lobe.
Spider Web - 14k White Gold - 16g - 10mm - Threaded - End - BVLA
$245.00
Pear V - Rainbow Moonstone - 14k White Gold - 18g/16g - 4x2.5mm - Threaded - End - BVLA Pear shaped Rainbow Moonstone set in White gold. Pear V - Rainbow Moonstone - 14k White Gold - 18g/16g - 4x2.5mm - Threaded - End - BVLA Ear Diagram featuring the Rook, Conch, Tragus, Helix, Forward Helix, and Lobe (Copy) (Copy) Mouth Diagram featuring the Lip and Labret (Copy) (Copy)
Pear V - Rainbow Moonstone - 14k White Gold - 18g/16g - 4x2.5mm - Threaded - End - BVLA
$250.00
FaraTa - Moonstone - 18k Rose Gold - 14g/12g - End -Threaded - Anatometal FaraTa - Moonstone - 18k Rose Gold - 14g/12g - End -Threaded - Anatometal - Modern Ritual
FaraTa - Moonstone - 18k Rose Gold - 14g/12g - End -Threaded - Anatometal
$255.00
Marquise with Accents  - Aurora Borealis CZ/Mint Green CZ - 18k White Gold - 18g/16g/14g - Threadless - End - Anatometal Marquise with Accents  - Aurora Borea lis CZ/Mint Green CZ - 14k White Gold - 18g/16g/14k - Threadless - End - Anatometal - Modern Ritual
Marquise with Accents - Aurora Borealis CZ/Mint Green CZ - 18k White Gold - 18g/16g/14g - Threadless - End - Anatometal
$125.00
Sold out
Lindsey  - Swiss Blue Topaz - 18k Rose Gold - 18g/16g/14k - Threadless - End - Anatometal Lindsey  - Swiss Blue Topaz - 14k Rose Gold - 18g/16g/14k - Threadless - End - Anatometal - Modern Ritual
Lindsey - Swiss Blue Topaz - 18k Rose Gold - 18g/16g/14k - Threadless - End - Anatometal
$175.00
Sold out
Lindsey  - Violet Topaz - 18k White Gold - 18g/16g/14k - Threadless - End - Anatometal Lindsey  - Violet Topaz - 14k White Gold - 18g/16g/14k - Threadless - End - Anatometal - Modern Ritual
Lindsey - Violet Topaz - 18k White Gold - 18g/16g/14k - Threadless - End - Anatometal
$175.00
Lindsey  - Brandywine - 18k Yellow Gold - 18g/16g/14k - Threadless - End - Anatometal Lindsey  - Brandywine - 14k Yellow Gold - 18g/16g/14k - Threadless - End - Anatometal - Modern Ritual
Lindsey - Brandywine - 18k Yellow Gold - 18g/16g/14k - Threadless - End - Anatometal
$175.00
King  - Blue Zircon CZ - 18k White Gold - 18g/16g/14k - Threadless - End - Anatometal King  - Blue Zircon CZ - 14k White Gold - 18g/16g/14k - Threadless - End - Anatometal - Modern Ritual
King - Blue Zircon CZ - 18k White Gold - 18g/16g/14k - Threadless - End - Anatometal
$125.00
Slasher Dagger  - 14k White Gold - 18g/16g/14g - Threadless - End - BVLA Slasher Dagger  - 14k White Gold - 18g/16g/14g - Threadless - End - BVLA - Modern Ritual
Slasher Dagger - 14k White Gold - 18g/16g/14g - Threadless - End - BVLA
$210.00
Slasher Dagger  - 14k Yellow Gold - 18g/16g/14g - Threadless - End - BVLA Slasher Dagger  - 14k Yellow Gold - 18g/16g/14g - Threadless - End - BVLA - Modern Ritual
Slasher Dagger - 14k Yellow Gold - 18g/16g/14g - Threadless - End - BVLA
$175.00
6 Bead Triangle  - 14k Yellow Gold - 18g/16g/14k - Threadless - End - BVLA 6 Bead Triangle  - 14k Yellow Gold - 18g/16g/14k - Threadless - End - BVLA - Modern Ritual
6 Bead Triangle - 14k Yellow Gold - 18g/16g/14k - Threadless - End - BVLA
$130.00
Tri Bead Arc  - 14k Rose Gold - 18g/16g - Threadless - End - BVLA Tri Bead Arc  - 14k Rose Gold - 18g/16g - Threadless - End - BVLA - Modern Ritual
Tri Bead Arc - 14k Rose Gold - 18g/16g - Threadless - End - BVLA
$155.00
Tri Bead Arc  - 14k White Gold - 18g/16g - Threadless - End - BVLA Tri Bead Arc  - 14k White Gold - 18g/16g - Threadless - End - BVLA - Modern Ritual
Tri Bead Arc - 14k White Gold - 18g/16g - Threadless - End - BVLA
$155.00
Sold out
Tri Bead Arc  - 14k Yellow Gold - 18g/16g - Threadless - End - BVLA Tri Bead Arc  - 14k Yellow Gold - 18g/16g - Threadless - End - BVLA  - Modern Ritual
Tri Bead Arc - 14k Yellow Gold - 18g/16g - Threadless - End - BVLA
$155.00
Beaded Kolo - 14k Yellow Gold - 16g - 7/16 Diameter - Seam - BVLA Beaded Kolo - 14k Yellow Gold - 16g - 7/16 Diameter - Seam - BVLA  - Modern Ritual
Beaded Kolo - 14k Yellow Gold - 16g - 7/16 Diameter - Seam - BVLA
$440.00
Beaded Kolo - 14k Rose Gold - 16g - 7/16 Diameter - Seam - BVLA Beaded Kolo - 14k Rose Gold - 16g - 7/16 Diameter - Seam - BVLA - Modern Ritual
Beaded Kolo - 14k Rose Gold - 16g - 7/16 Diameter - Seam - BVLA
$440.00
Beaded Kolo - 14k White Gold - 16g - 5/16 Diameter - Seam - BVLA Beaded Kolo - 14k White Gold - 16g - 5/16 Diameter - Seam - BVLA  - Modern Ritual
Beaded Kolo - 14k White Gold - 16g - 5/16 Diameter - Seam - BVLA
$350.00
Previous
Next

Modern Ritual Piercing

326 Cleveland Ave NW
Canton, OH 44702
Call or Text: (330) 413-2942

Terms & Conditions Privacy Policy

Open Daily 12pm-7pm